To drawGon Freecss, you will need a pencil, eraser, and a ruler. The important thing to remember when drawing Gon Freecss from Hunter X Hunter is to use both a light and dark pencil.
And of course, you’ll need a paper to work on.
Always remember to erase any mistakes that you have made when drawing with a pencil and ruler.
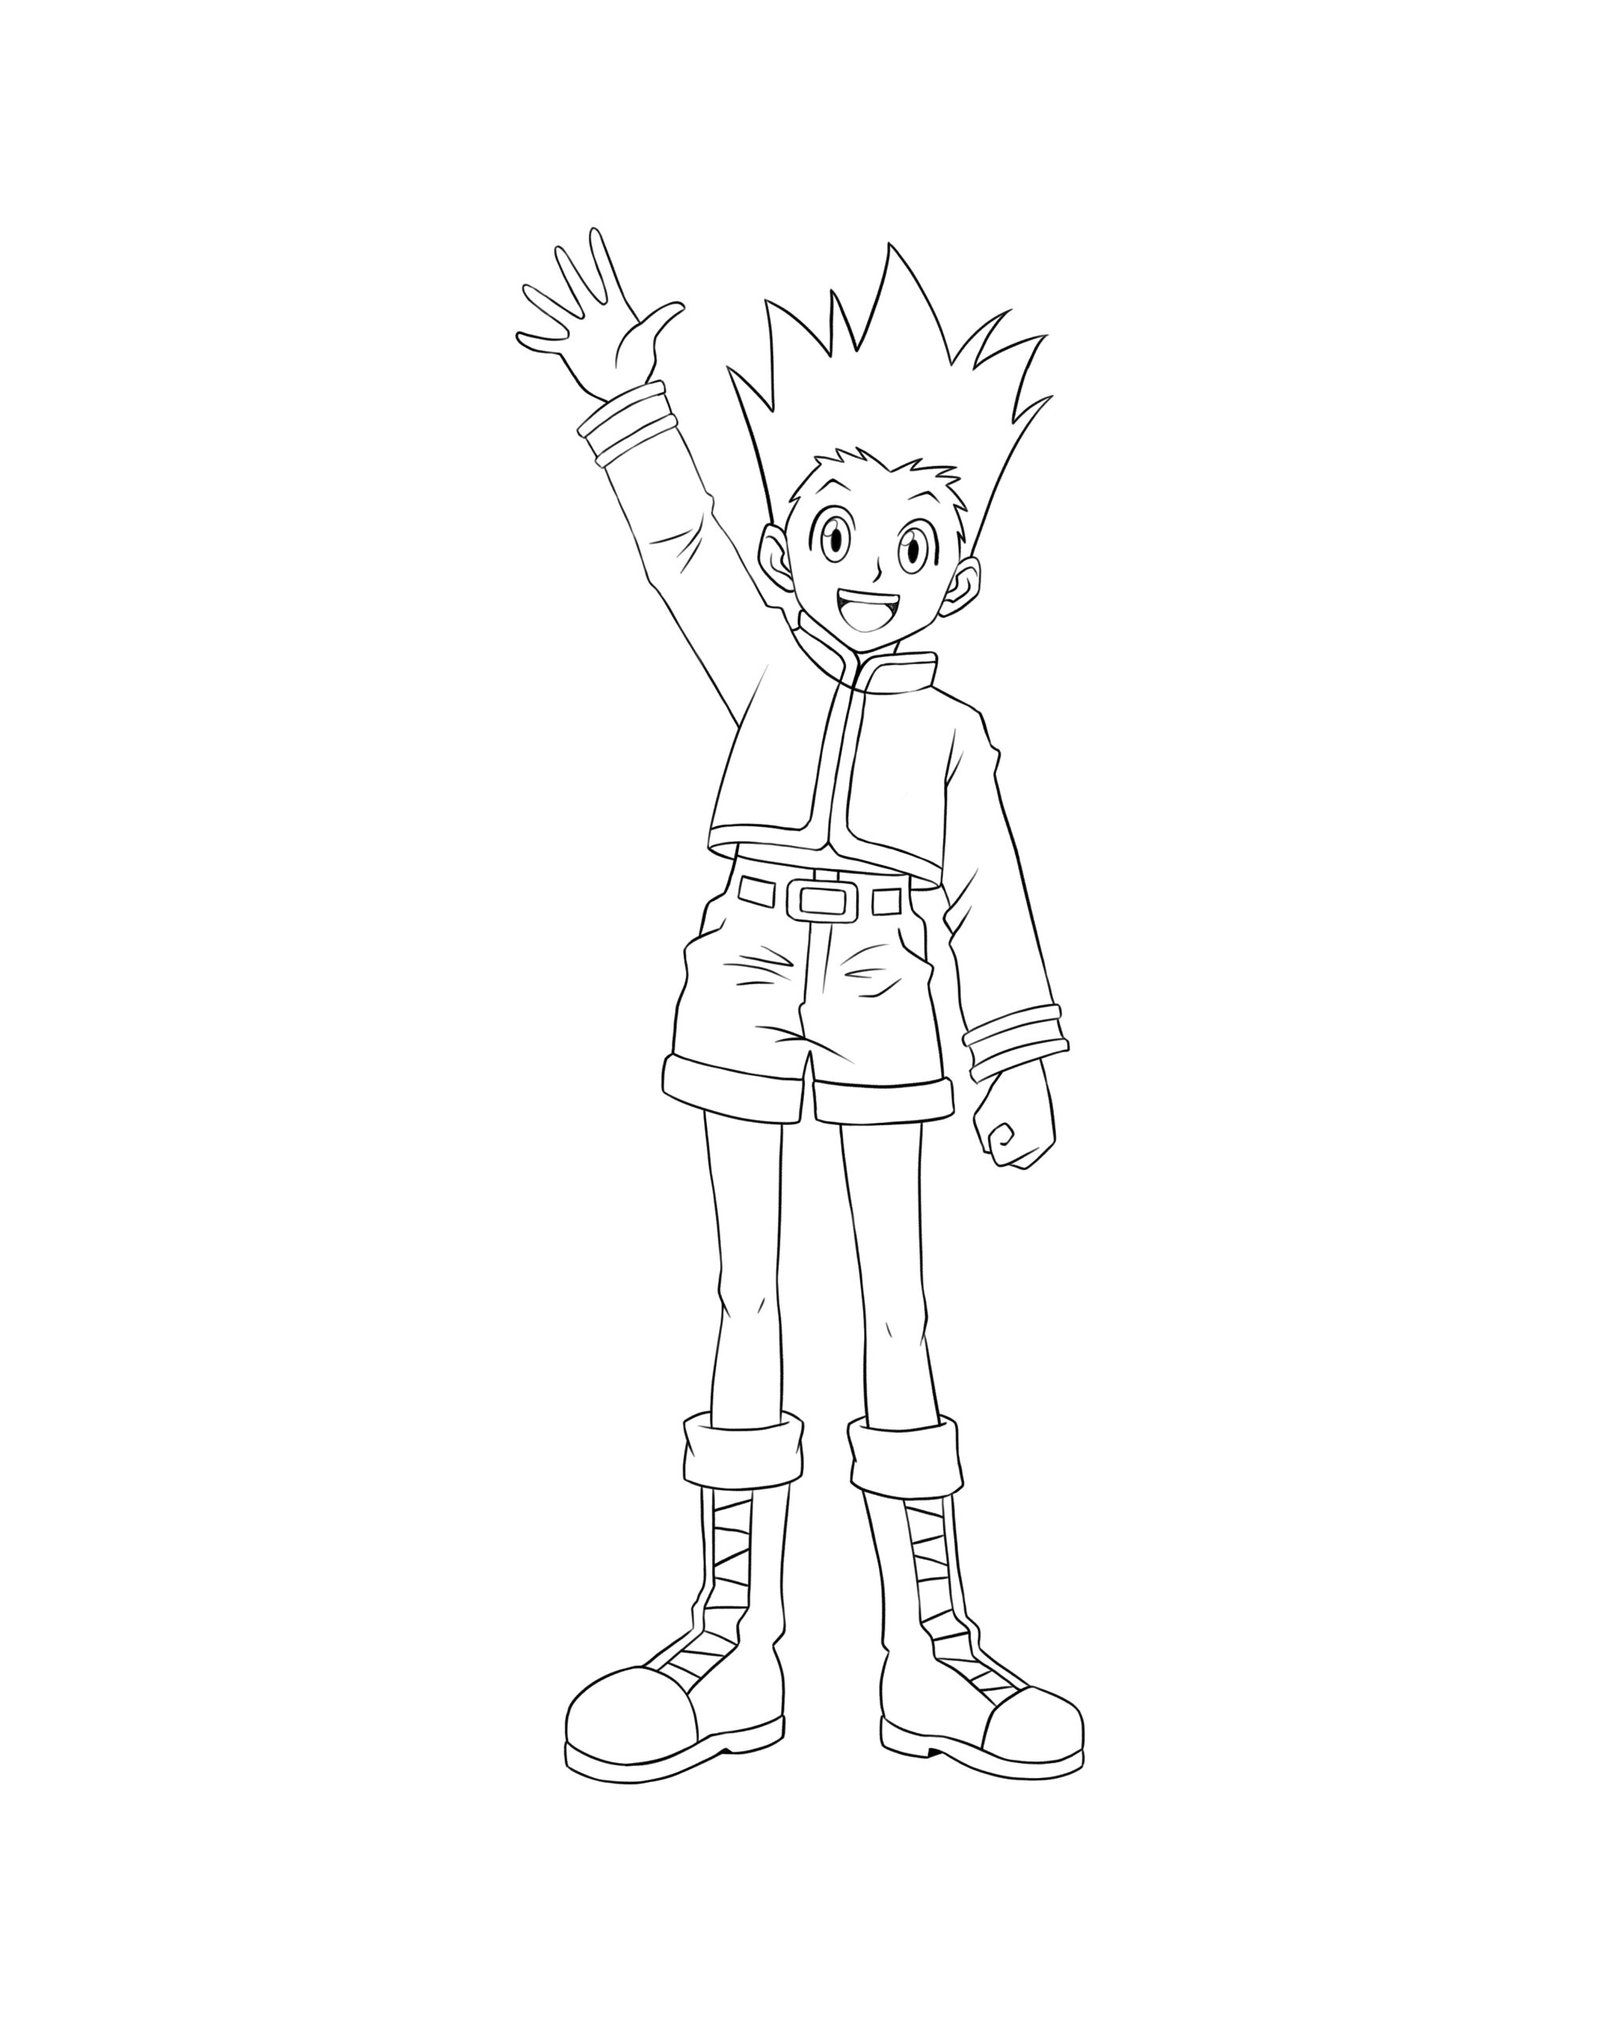
By following the step-by-step drawing guide, you will be able to draw this character with ease.
No matter what skill level you are at, you should have no problem drawing this character.
These are just a few steps on how to draw Gon step by step.
How to Draw Gon Freecss from Hunter X Hunter
Contents
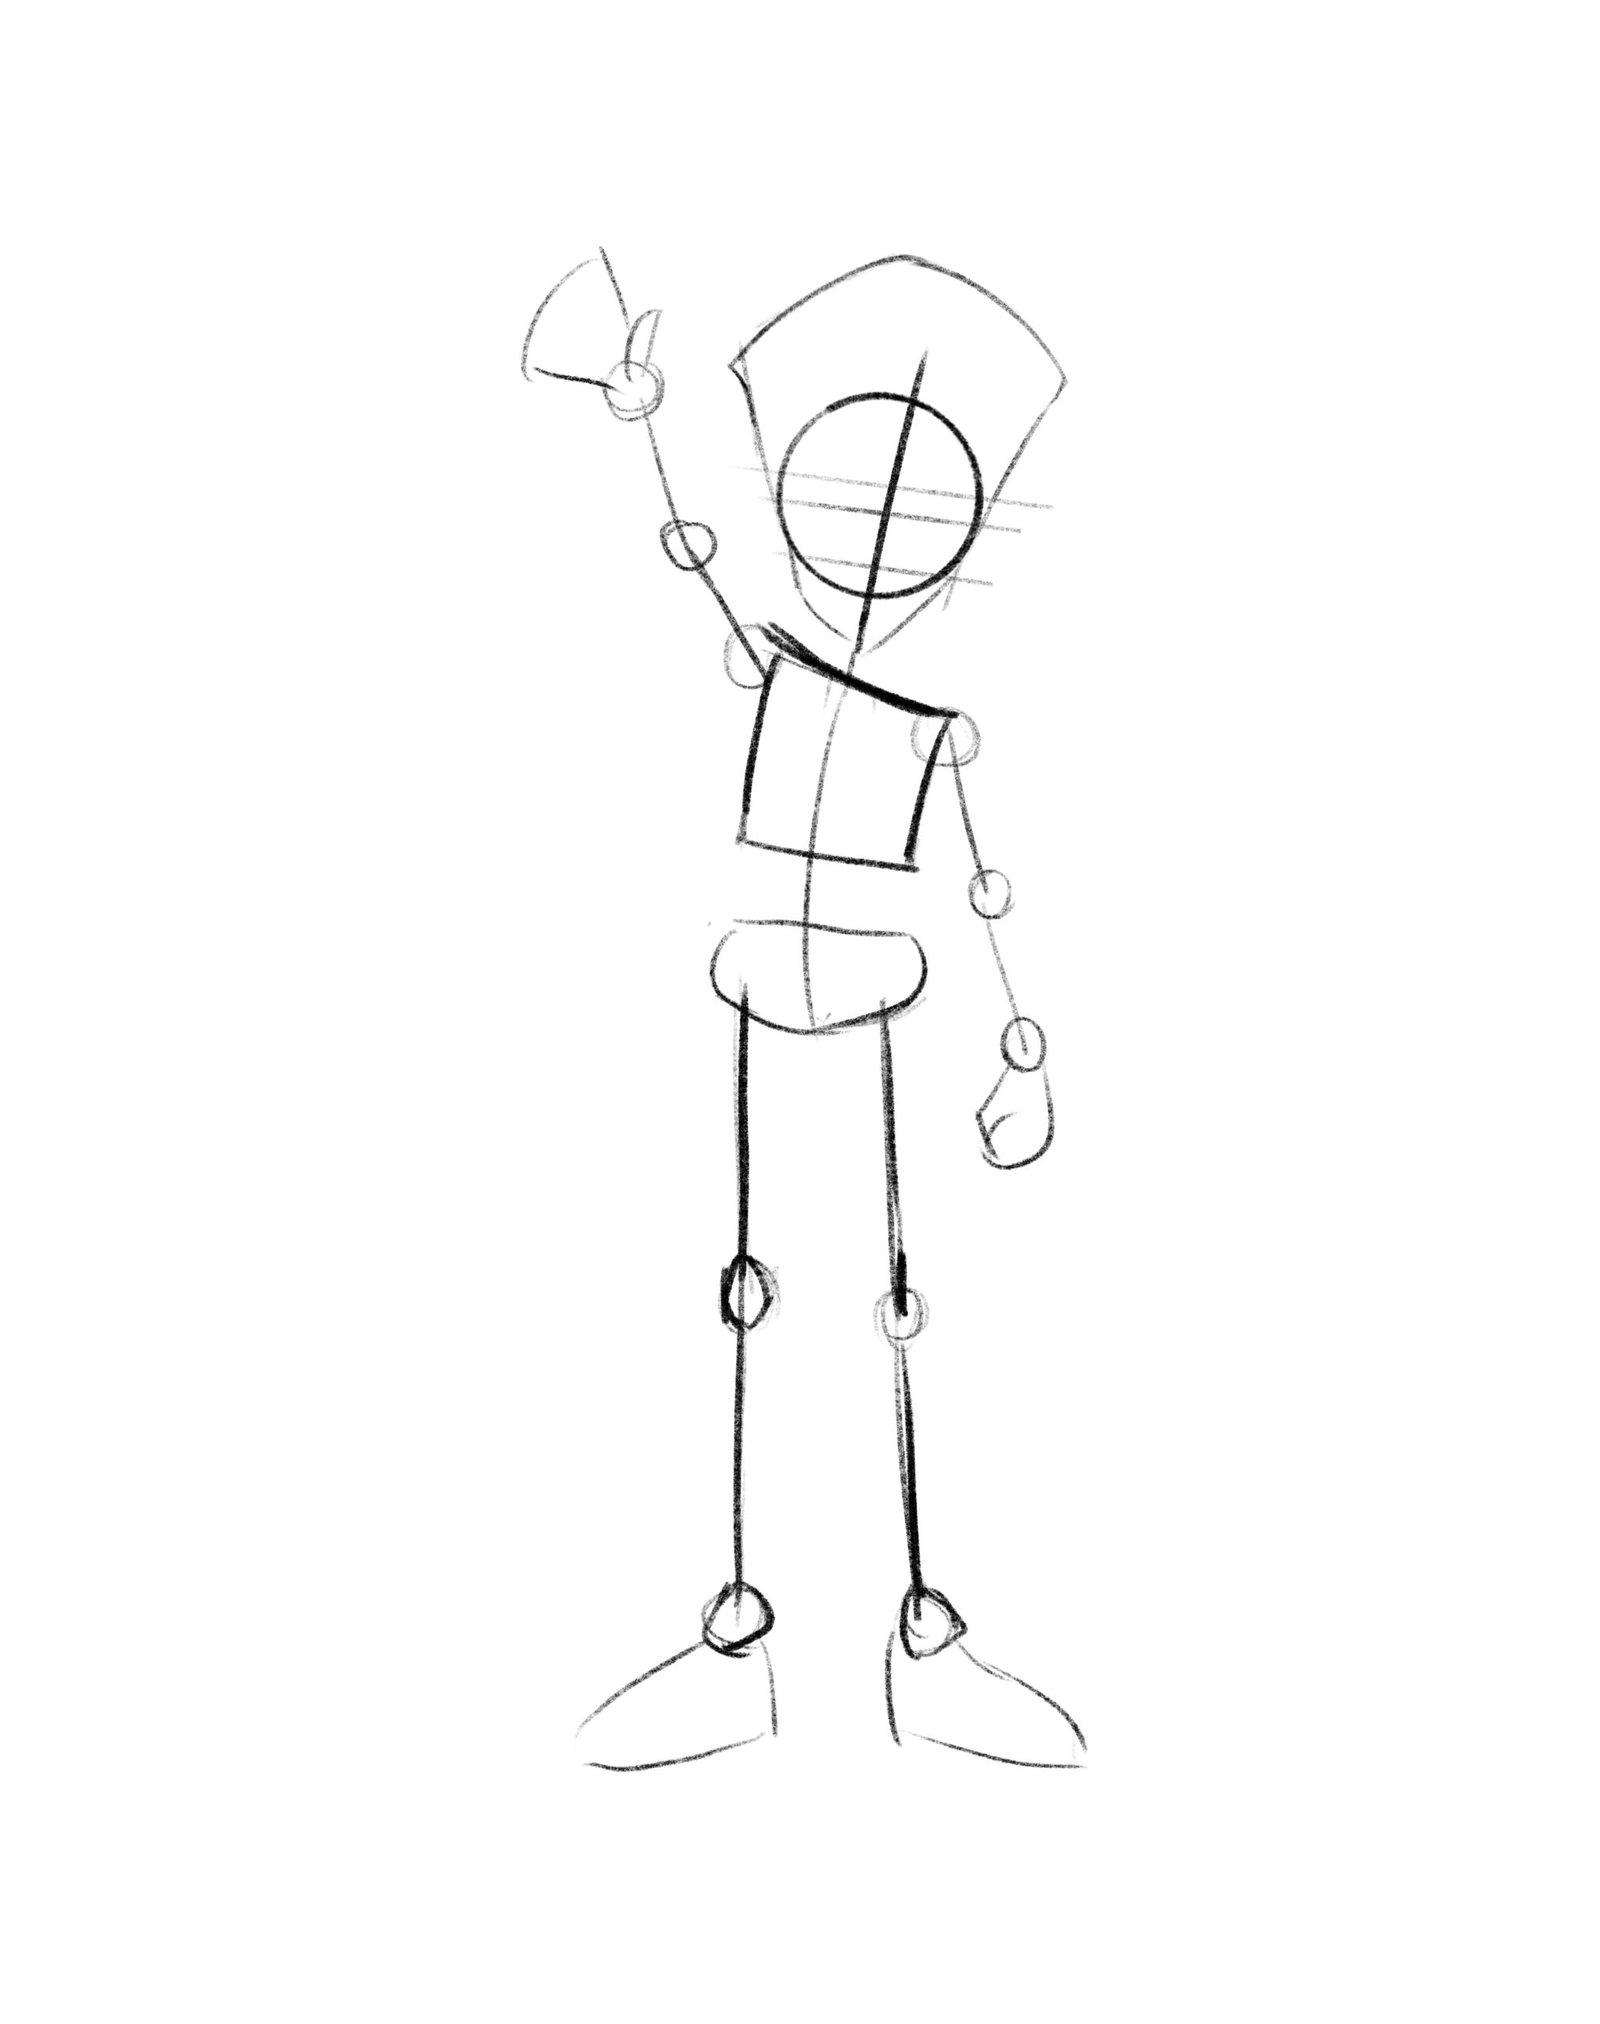
Draw Gon’s Pose
To draw his pose, you need to start with a big circle.
The circle serves as the head.
Then you draw a slightly bent vertical line at the circle’s center.
Make sure the right portion of the head is a bit smaller than the left.
Draw a horizontal line dividing the circle into two equal parts, make sure the vertical line extends a bit down the circle so it can serve as the neck.
Draw Gon’s Head
Start with a circle and line
The circle will serve as the head of the Gon.
Make sure the circle is big enough to accommodate other features that would be fixed to its head.
The circle should be slightly bent towards the right-hand side of Gon.
A vertical line should be drawn inside the circle, and make sure the line extends outside the circle.
The vertical line should be slightly bent to suit the slightly bend circle.
The vertical line is not directly at the center of the circle.
The percentage of the left side of the circle is more than the right side of the circle.
Draw your slightly bent horizontal line at the main center of the circle, and it should be extended.
Draw the Outline for Gon’s body
Draw a free-hand square bending towards the direction of the head.
This square would serve as the chest and main body of the Gon.
Let the right-hand side of the square bend inwardly and the left-hand side of the square slightly outward, making it blend with the head.
Gon’s posture shows that his right hand is up and his left hand is down.
Draw outline for the arms and hand
For the left arm, draw a slightly bent vertical line starting from the top of the square body, then draw a bulb-like to serve as a hand of Gon.
The right arm, the right arm, is facing up.
Therefore, you draw a vertical line starting from the square shape that serves as the shoulder to the top closer to the ear.
This is the right arm, then add a circle to it like you did the left arm so it can serve as the right-hand
Draw outlines for the legs
To draw the left leg, draw a vertical line starting from the bottom of the horizontal lines of the pant.
This first line should end in a circle, which serves as the knee bending down to the shin.
For the right leg, do the same for the right leg.
Draw outline for the eyes and nose
It would be best to draw a circle for the eyes.
Make sure the pupil of the eyes is not too big so that the white part of the eyes can be seen.
To draw the eyes, the iris draws a small circle inside the eyes, the eyes are not too close together, and the eyes have eyelids and eyebrows.
The nose can easily be drawn by making a curve on the vertical line that runs through the head. The nose is above the mouth and below the eyes.
Just draw a vertical line beside the jaw, close to the collar, the neck is covered by the collar of a Gon’s cloth, and the neck is connected to the head, and to the chest.
Trace the first circle you drew for the head into a chin form to draw the jaw.
The jaw can be traced from the ear down to the chin.
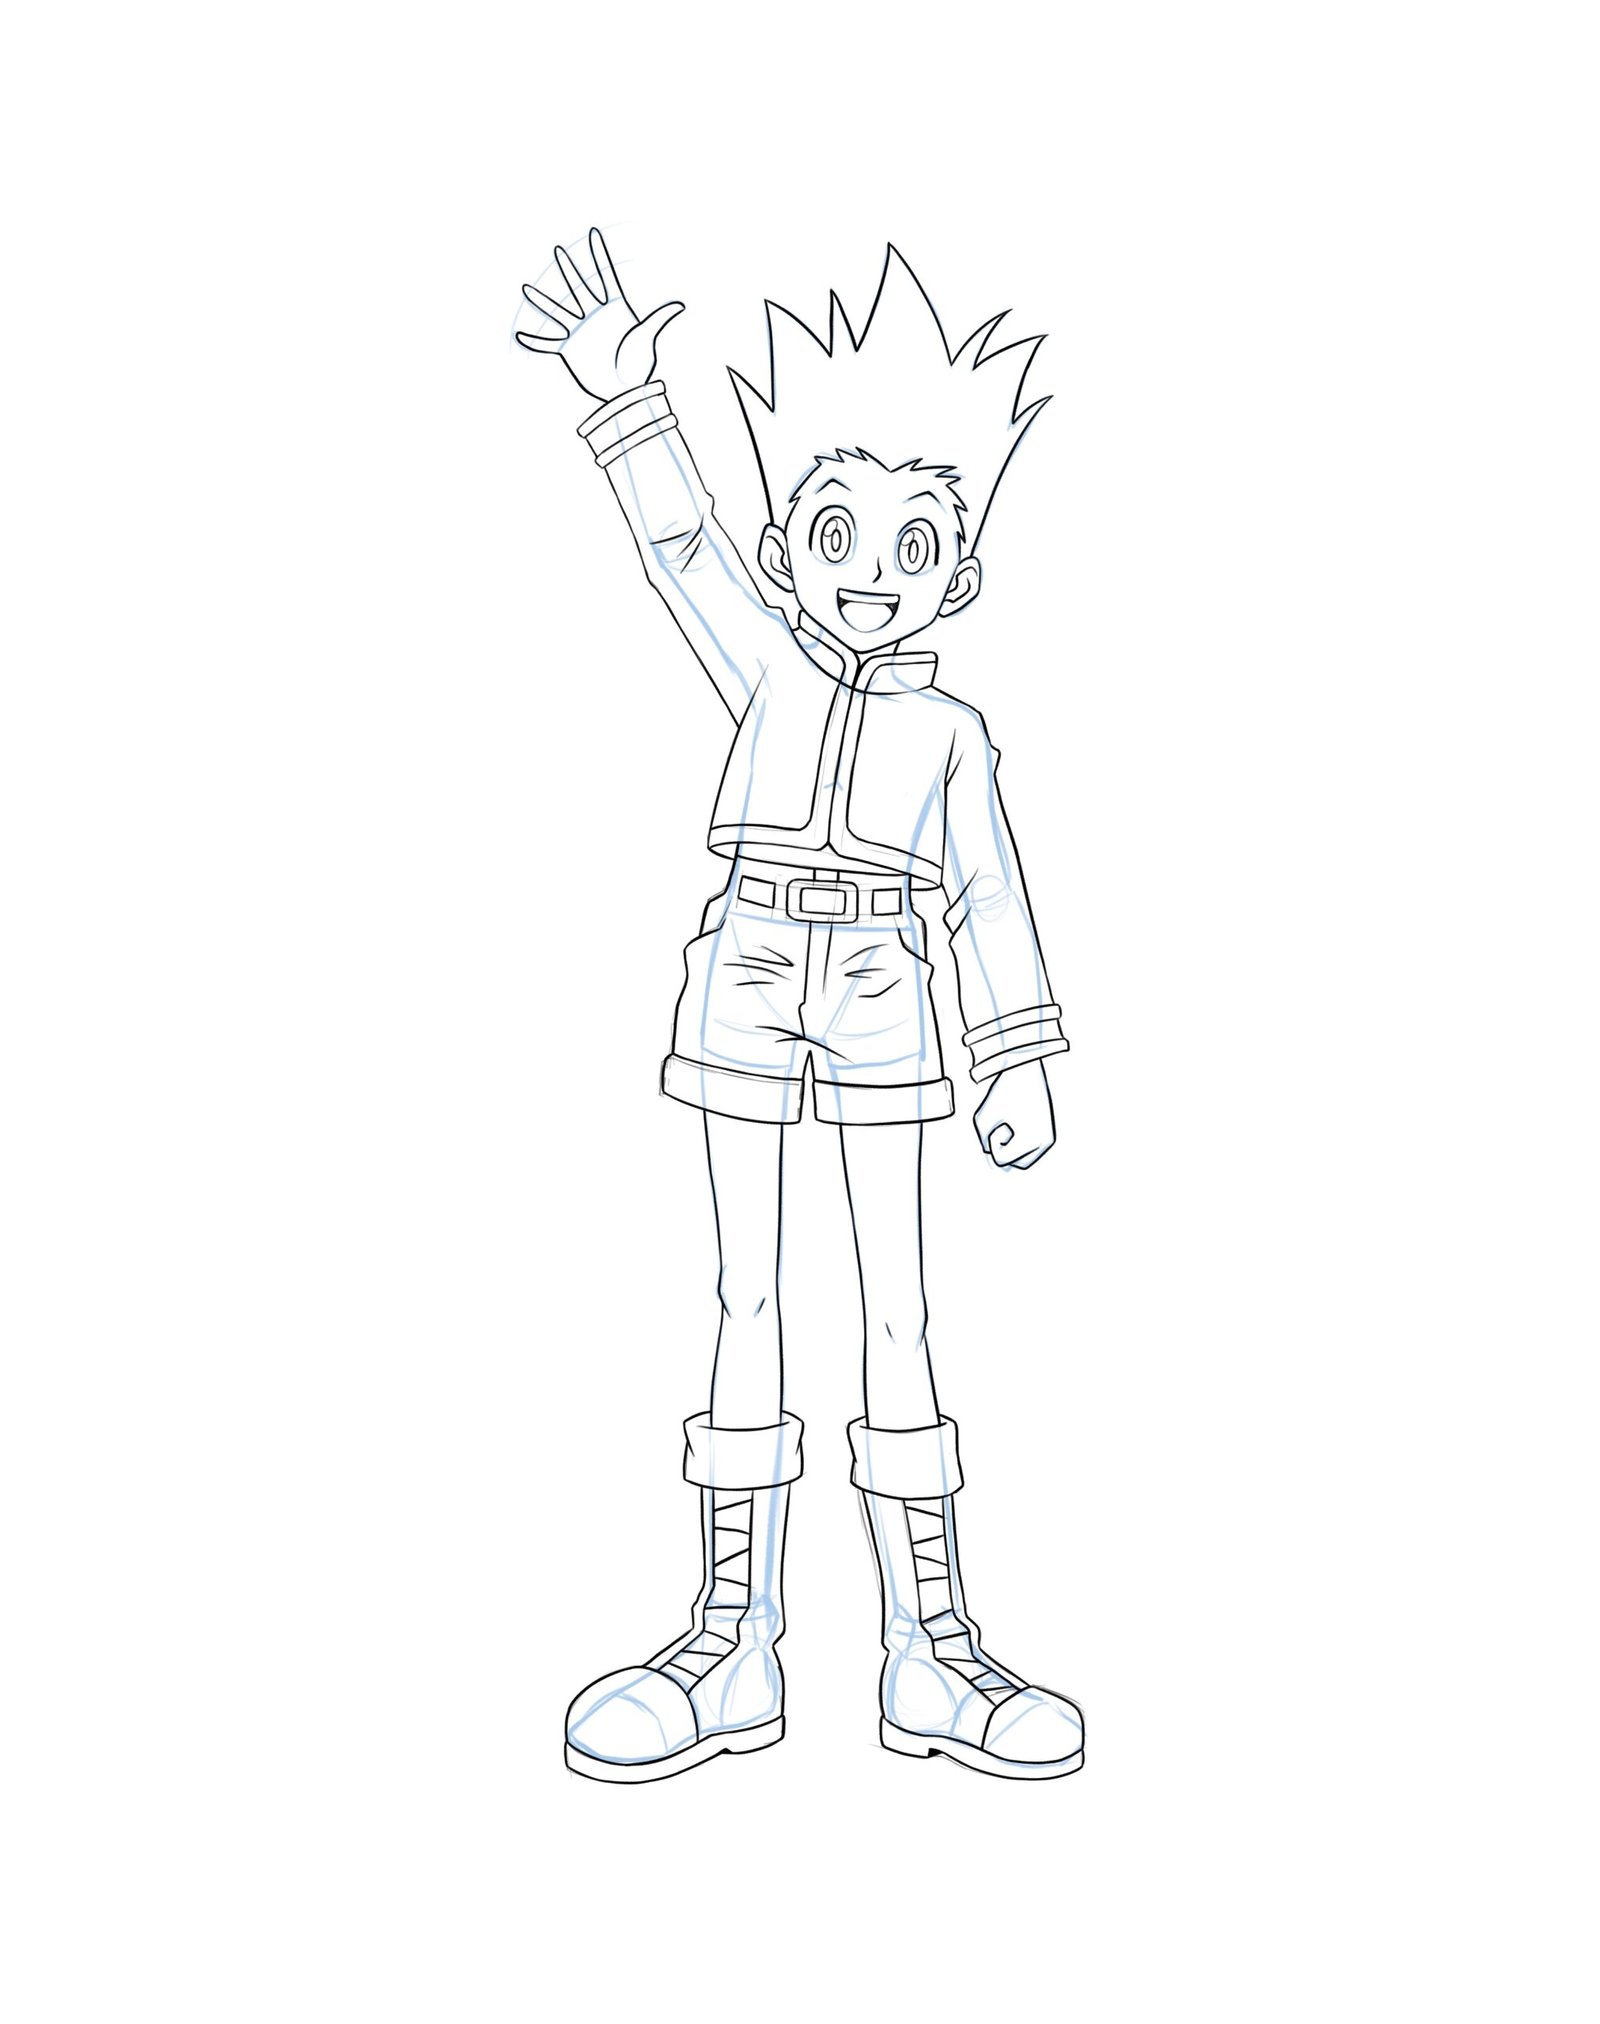
Draw Outline for Gon’s Hair
Hair is easy to draw, trace the top circle of the head with a star-like shape, draw another star-like shape from the right ear to the left ear, make the shape very big that it makes it look as if Gon is wearing a crown, now double the top star, so it looks more realistic, the hair is of two colors, the top star color is different from the color for the other star
Draw Outlines for the Facial Features
Draw the eyes and eyebrows
After drawing the eyes with several circles, draw the eyebrow by connecting to lines together to look like the edge of a triangle.
Draw the nose, ear, and mouth
The nose is another easy part of the body that can easily be drawn, making a curve on the vertical line that runs through the head.
The nose is above the mouth and below the eyes. The nose should be drawn with a thick line
For the ear, make an overlapping curve facing the face. The ear is drawn using several semi-circles.
The mouth, the mouth is below the nose.
Draw two horizontal lines that make it look like the teeth are out.
Below the horizontal line, then make a concave curve inside the convex (mouth), this concave serves as the tongue, so it looks like Gon is calling the attention of someone.
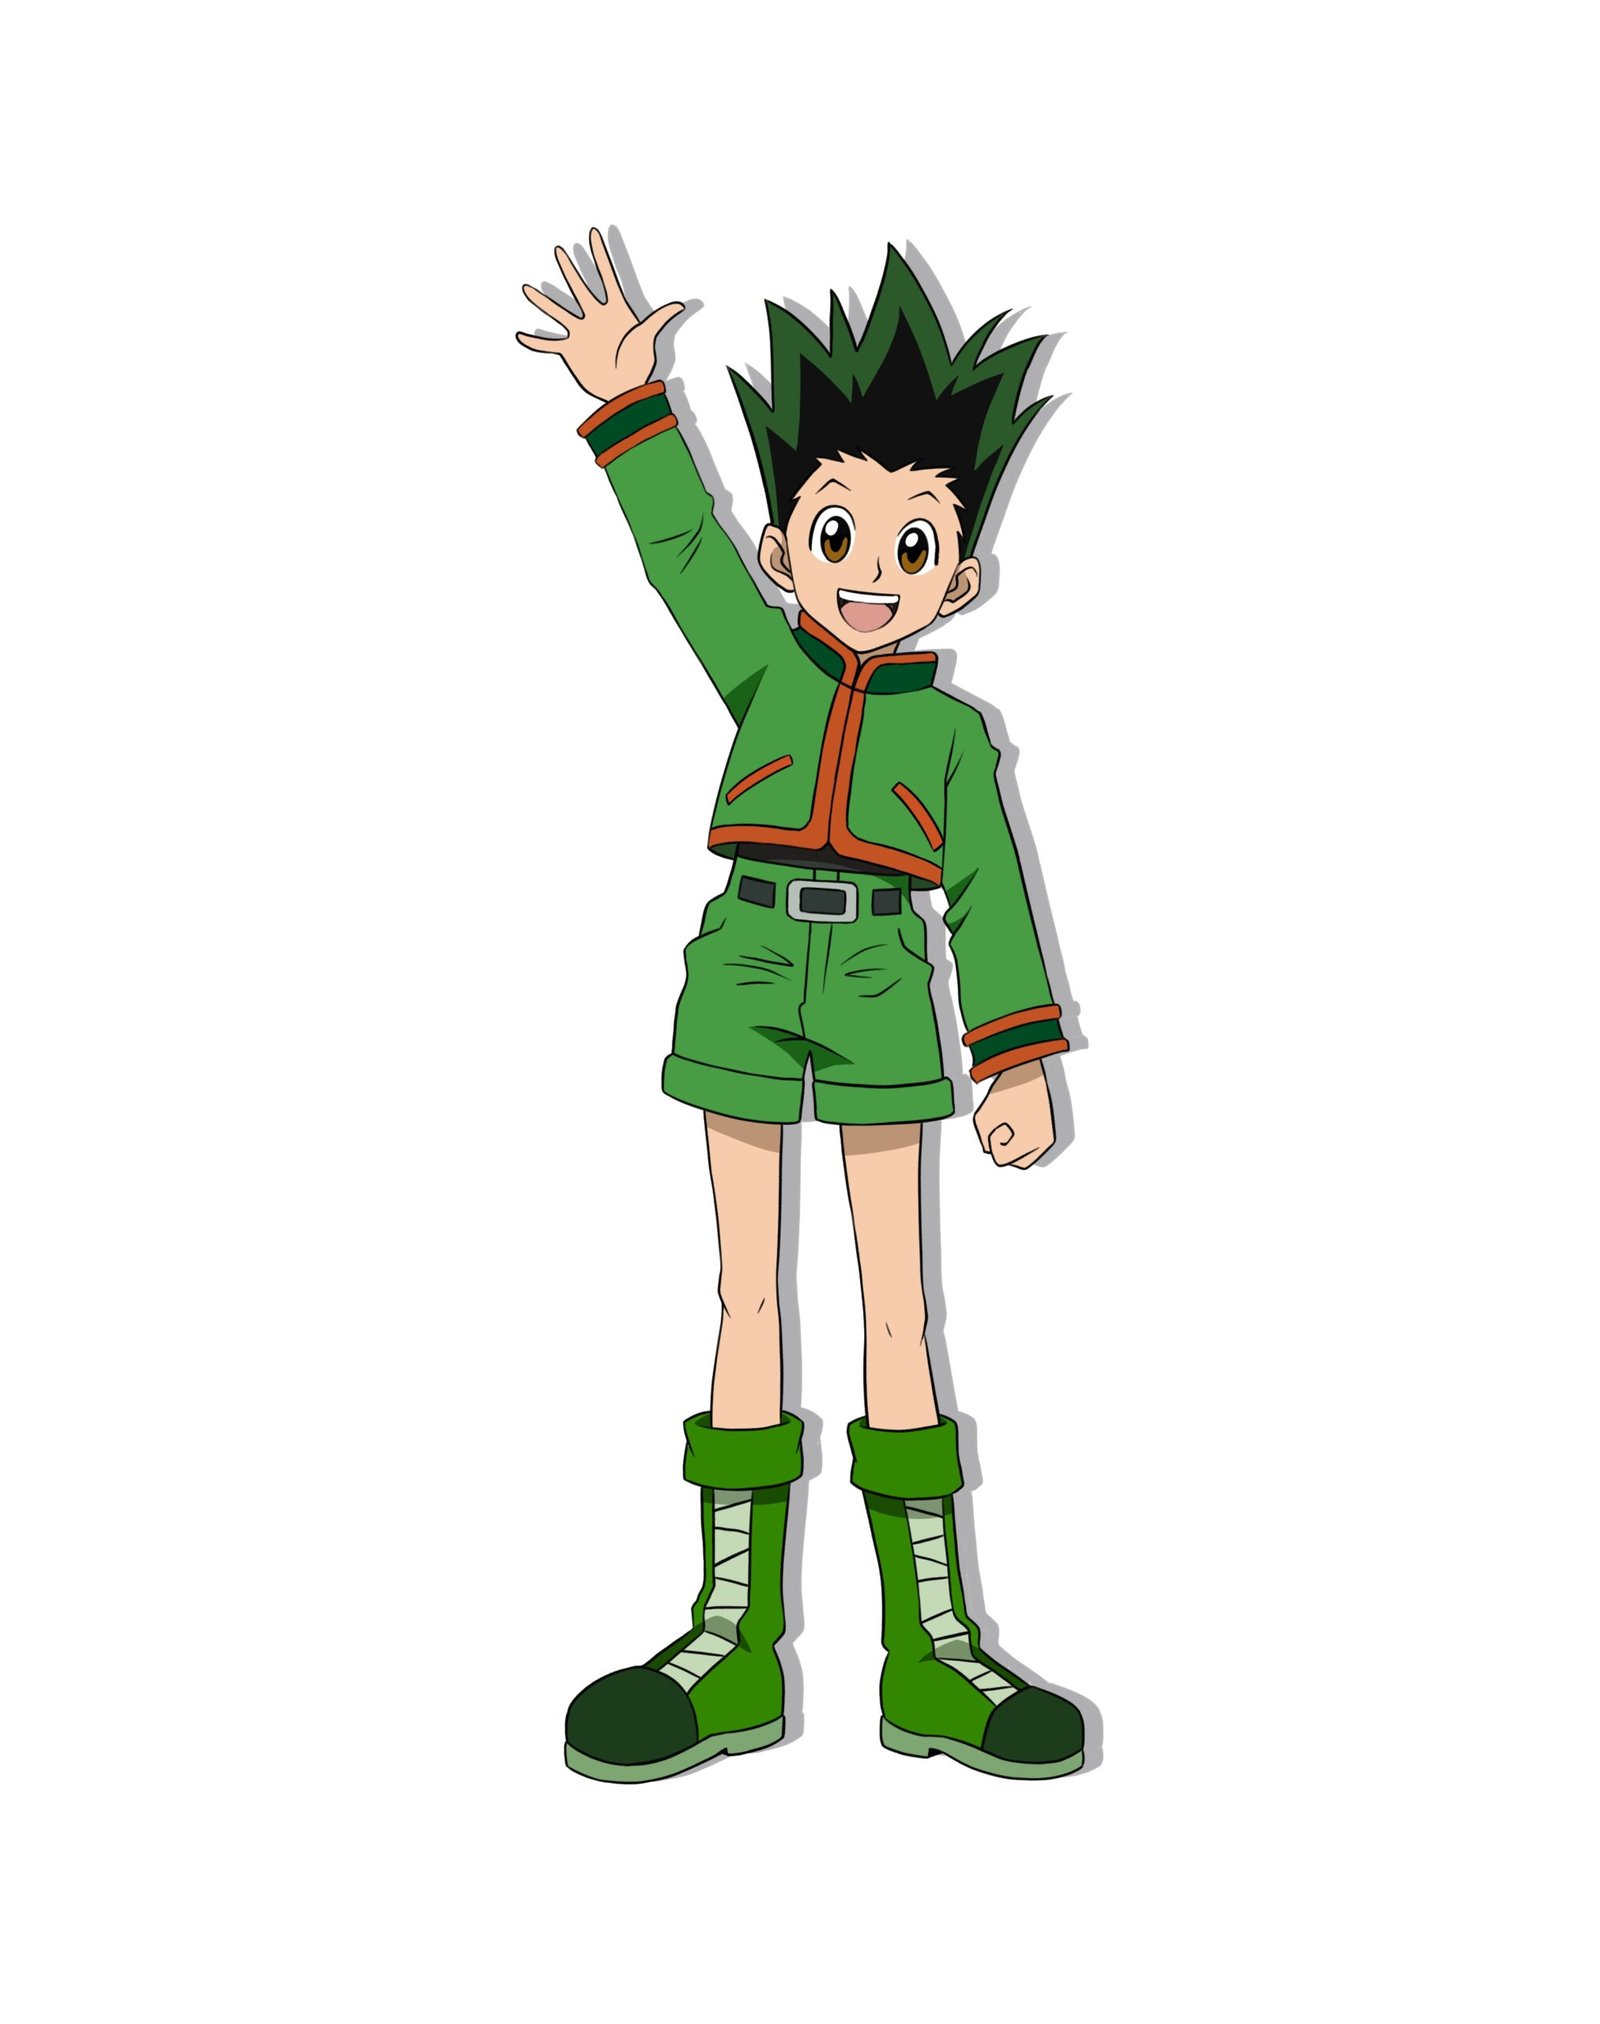
Gon Freecss Hair drawing
His hairs are spiky so draw them big so that it makes it look as if he’s wearing a crown, the hair has two colors, and the top color is green.
It is different from the lower color, which is black.
Gon Freecss Outfit drawing
Gon is putting on a jacket, and short pants with a long boot, the jacket, the short pant, and the boot have the same color which is green and the shirt has some touches of orange color at the tips of the cloth, and the tips of his pockets.
Gon Freecss jacket drawing
Drawing the jacket, you start with a curve from the neck to the end corner of the square you drew for the chest.
Do not let the jacket cover his whole body, leave a little space on the body to show that he is wearing a black shirt under the jacket.
Now double the curve, but the curve should not meet.
The curve for the right and left of the shirt should be close, so it looks like the cloth is buttoned or hooked, the cloth reaches his wrist, and it has a pocket on each side.
To draw the pocket, draw a rectangle on each side of the cloth. Don’t forget to draw the edge of the shirt accordingly.
Gon Freecss pant drawing
For the pant, know that Gon is putting on a short pant which is above his knee, the pant is held by a belt, and the pant also has two pockets, to draw the pant, draw the belt first,
For the belt draw a rectangle at the center of the pant, double the rectangle to make it look more realistic,
Draw another rectangle at the sides of the first rectangle but you don’t have to double the sides’ rectangle.
For the pocket, just draw a little curve at the side of the pant, draw a horizontal line crossing the vertical line coming from the belt,
Draw another small vertical line at the edge of the horizontal line and close the horizontal line with another vertical line so that the pant would look like it was folded at the bottom.
Gon Freecss belt drawing
Another easy part of the outfit is the belt.
For the belt, draw a rectangle at the center of the pant, double the rectangle to make it look more realistic, and draw another rectangle at the sides of the first rectangle, but you don’t have to double the sides rectangle.
The bigger rectangle is colored black and white at the double, while the smaller rectangles are black
Draw Gon’s Hand
To draw the left hand, draw a bulb-like circle in the middle of the horizontal line of the arm, draw a small horizontal line at the bottom of the circle (inside the circle), and now draw a spiral shape inside the circle which serves as the collective fingers because he was folding his left hand.
For the right hand, draw a circle in the middle of the horizontal lines of the right arm; on this circle, you can now draw his fingers.
Gon has five fingers on the right hand.
Draw the fingers on the top of the circle, so it looks like he’s waving his hands.
You can start with the thumb so it would be easier to draw other fingers
Draw the Legs and Boot
Draw a vertical line on the lateral side of the knee, starting from the pant’s horizontal line and down to the shin, but this other vertical line should not touch the circle so the legs can look more realistic.
For the right leg, do the same for the left leg and the right leg.
The boot is very big.
To draw the boot, you first need to draw a curve at the end of the shin.
Besides this, you should draw another curve above the horizontal curve so it would look like it is from the back, close the curves with another horizontally curved line, this forms the top of the boot, draw a vertical line downward, curve the line so it forms the front of his boot, double the vertical lines so that you can easily fix his shoelace, for the front of his shoe, draw a circle and on the circle draw another vertical curved line to the middle of the horizontal line to make the shoelace.
Draw the last vertical line to form the back of the boot.
This last line must also be curved to show the shoe sole, then draw a vertical line that closes the edges of the sole and the circle in front of the shoe.
The color of the boot matches the clothes. The boot has three different colors: light green, deep green for the front of the boot, and ash color for the bootlace.
Enhance Gon’s Outfit
Be reminded that Gon is putting on a matching outfit.
This means that the jacket, pants, and the boots are of the same color, the jacket has touches of orange, and the boot touches ash color.
The color of the belt is black with touches of white.
Enhance the Outlines
Enhance outline here means that you add details to the parts of Gon’s body.
For the eyes, the iris is white and the pupils are black, the nose is black, the hair is green and black, and many more.