In Japanese folklore, Kasuga Sama is the spirit that wears strange masks, and Sokutai is in the movie Spirited Away.
Now we will use the step-by-step guide provided below to correctly draw Kasuga Sama from the movie Spirited Away.
First, start with a pencil and sketch out the basic outline of the mask them the outfit. Next, begin to fill in the features. With a bit of practice, you too can draw Kasuga Sama perfectly!
With a bit of practice, you too can draw Kasuga Sama perfectly!
Just follow me and let me show you the tricks to draw Kasuga with your primary drawing material; Prepare yourself for a shock!
Outline the Mask of Kasuga Sama
Contents
We will begin this drawing by sketching out Kasuga’s face mask, which covers the whole head.
The mask is essential to him because it completes Kasuga’s outfit.
For the mask, you don’t need to be a professional artist before you replicate that; you only need primary knowledge about the basic shapes used in drawing, including your lines and dots.
So, are you ready for this?
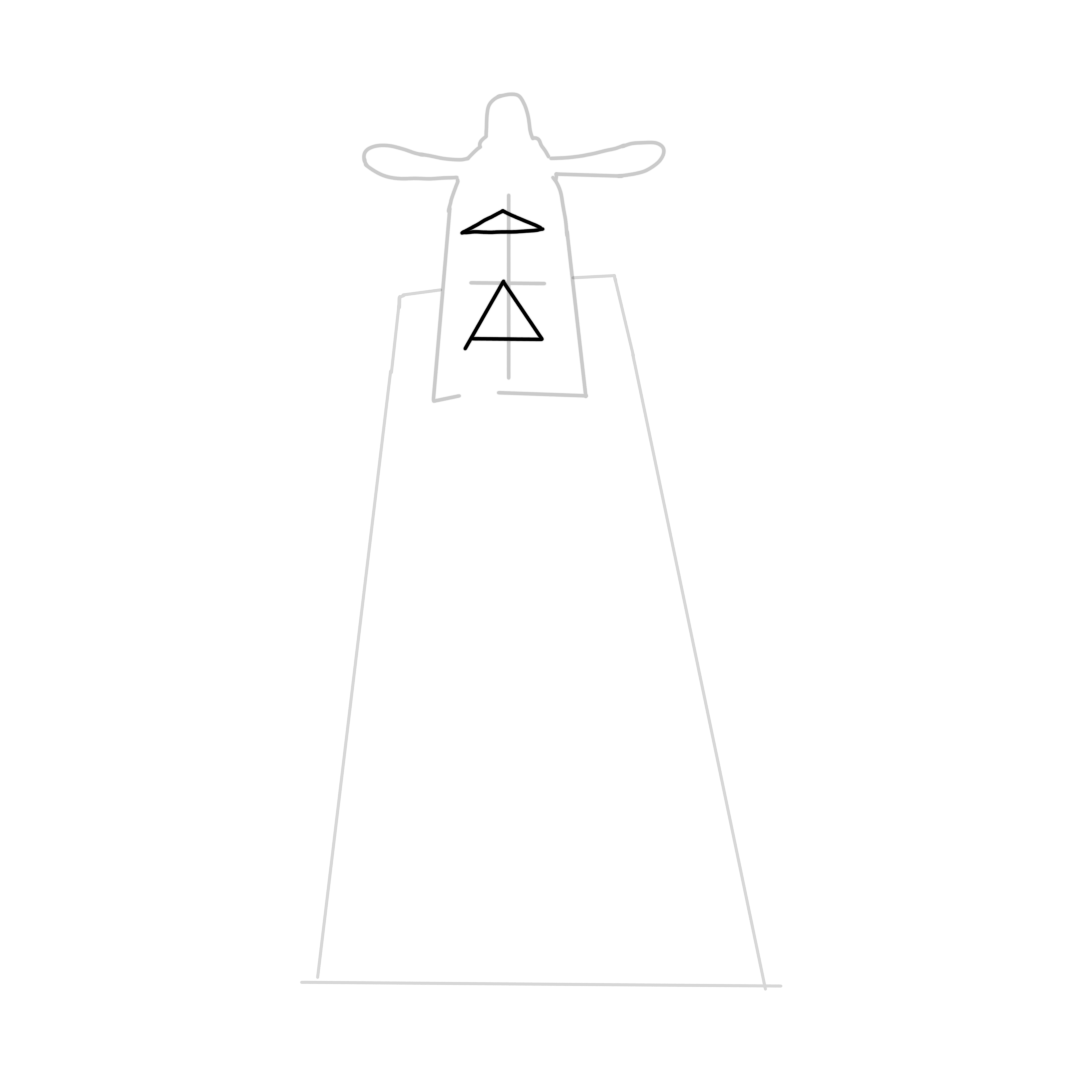
Draw the trapezoid shape of the mask, now draw the upper part of the mask by adding the rectangular-like shape at the sides of the mask, this makes the upper part looks like that of a hat.
Make a cross inside this shape (a vertical line at the center of the trapezoid shape and a horizontal line at the center of the vertical line.
These are the primary approaches to the mask which will help you when you want to draw the mask.
Outline the Sokutai
Kasuga wears a Sokutai which is the outfit; this covers all the body parts.
The Sokutai is so long that it starts from the mask and covers the remaining body parts.
Make a slant line at the sides of the mask and extend it downward; ensure the slant line of the Sokutai is very long, equating to the length of the body.
Add a line from the end of the slant lines so that these lines come together and make an edge pointing downward; this is the helm of the Sokutai.
Draw the Mask
The next step is to draw the mask; draw the mask by manipulating the basic shapes you drew for the mask into the natural shape so you won’t spend much time on this step.
Firstly, draw the face of the mask by making slightly slant lines in alignment with the sides of the trapezoid shape of the mask, making a horizontally curved line joining the top of the slant line and the bottom end of the slant lines together.
Check this out; Make a concave curve at the top of the mask in alignment with the shape you drew for the top of the mask, and add a concave curve to the top of the face of the mask so that it’s aligned with the horizontally curved line of the mask.
Draw a letter “V” shape above the concave curve so that its ends are joined to the top of the mask, and add additional “V” lines to the first one to make the top more realistic. You can now join the top of the “V” shape to the ends of the lower concave curve, but that’s not all; there is more.
To finish up the mask, we need to add the basic shapes used to fill in the face of the mask; begin by making doubled bent lines at the top of the face so that it looks like the upper part of a triangular shape with sharp edges facing upward.
Add a flat triangle under these bent lines in alignment with the direction of the top of the triangle. Add little doubled horizontal lines that look like an equal to the (=) sign under the triangle.
Draw the nose-like shape of the mask at the center of the equals to signs so that the vertical line you drew for the basis of the face mask is at the center of the circle of the nose-like shape.
Still, on the shape of the mask, draw a triangular shape under the horizontal line you drew for the basis of the face mask. Extend the sidelines of the triangular shape, so it forms slant lines under the triangle.
Fill in the space created by these slant lines with more lines so that it’s aligned to the direction of the existing slant lines, making Kasuga’s mask look like it has a mouth.
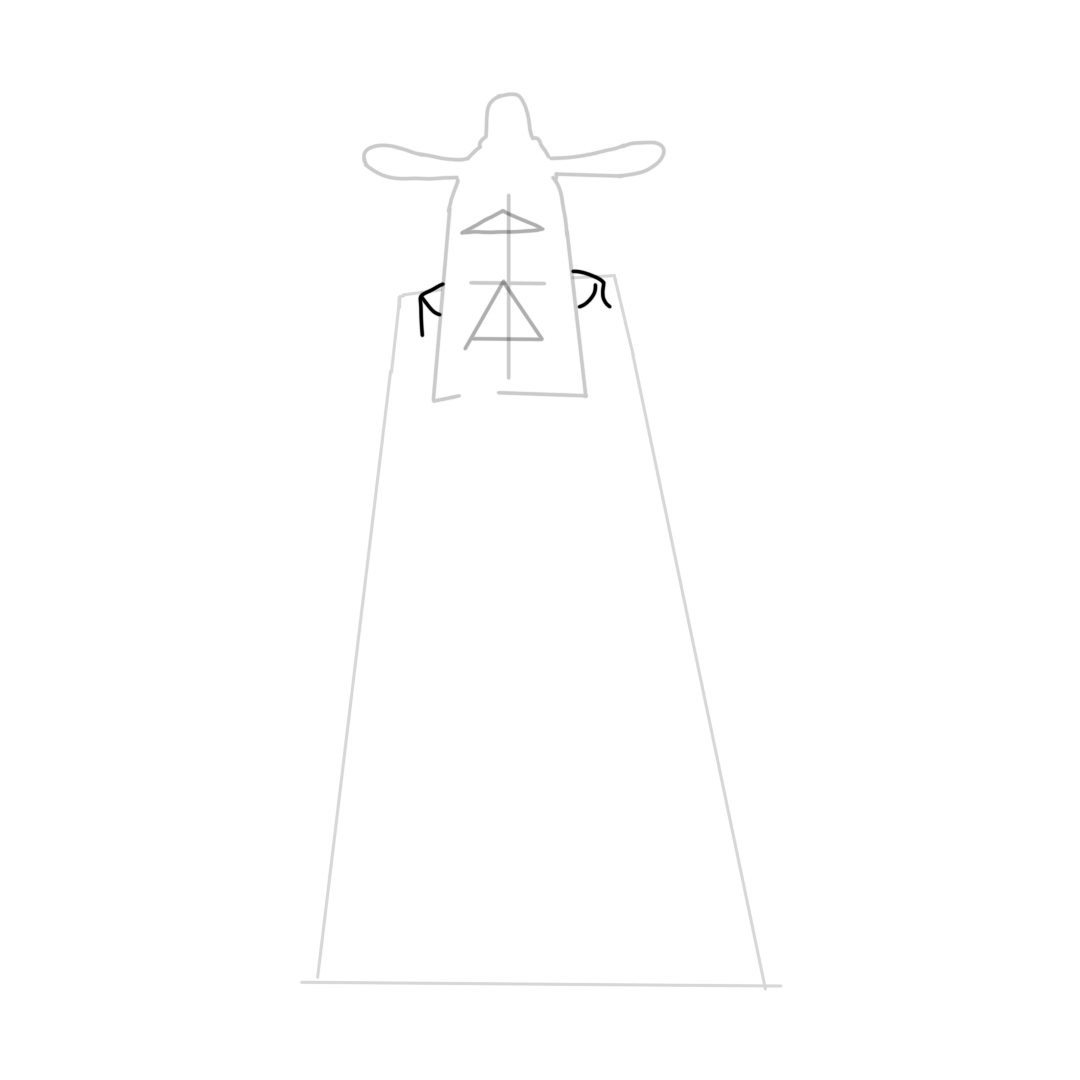
Draw the Collar of the Outfit
This is another technical part of the drawing but requires only your attention, you have to follow the instructions well, and within a few minutes, you are done with the collar of the outfit.
Make a curve at the sides of the mask, add a line (a perfectly straight line on the right side and a little vertically curved line on the left) at the side of the curve and join the end of these lines to the side of the mask with a horizontally curved line.
Now finish the collar of the outfit by drawing a wavy curved line from the shape of the collar you drew to the sides of the slant line of the outfit so that it’s aligned to the lines that made up the outfit, and here you are! You just completed the collar of the outfit.
Draw the Sokutai
You are almost there!
For this step, you need to be very careful because this is what will determine the whole body of Kasuga’s drawing.
The sides of the outfit are slightly curved, while the lower part that forms the helm of the outfit is curved inwardly in the form of a convex curve in alignment with the primary lines of the outfit.
Add Details to the Kasuga Sama Drawing
Now, draw the shape of the fan’s blades on the horizontal line you drew for the basis of the face mask so that these fan’s blade looks like the shape of the mask’s eyes. Ensure the blade’s three sides are curved, making it more realistic.
Another unique thing you need to add to the mask is the rectangular shape-like pattern on the right side of the part of the mask that looks like the mouth; do this, and you will be shocked by what you get.
You wouldn’t want to leave the outfit just plain like that, so make some curved lines to add details to the outfit. Trace the border of the outfit and mask with a thick line and erase all excess lines and dots on the drawing.
Add Color to the Kasuga Sama Drawing
Now it’s time to add beauty to Kasuga’s drawing using your coloring pencils or color box.
Details give your drawing depth, while color makes the drawing more attractive.
Use the best color that suits Kasuga’s nature, and you can combine two or more colors to have a fantastic look. Shade the nose-like mask and the fan-like shape of the mask’s eye.
Conclusion
Today, you’ve learned about Kasuga Sama drawing from the famous anime series “Spirited Away”.
This character is a bit challenging to draw, but I think you’ll be able to follow my guide and produce a great result.
Kasuga Sama is a spirit that wears a mask and Sokutai in the movie.
Thank you for reading this article, and I hope it was helpful if you followed through carefully. Have fun!


")
")
")
")
 From Spirited Away | Let's draw Haku")

 Breif & Easy Guide")