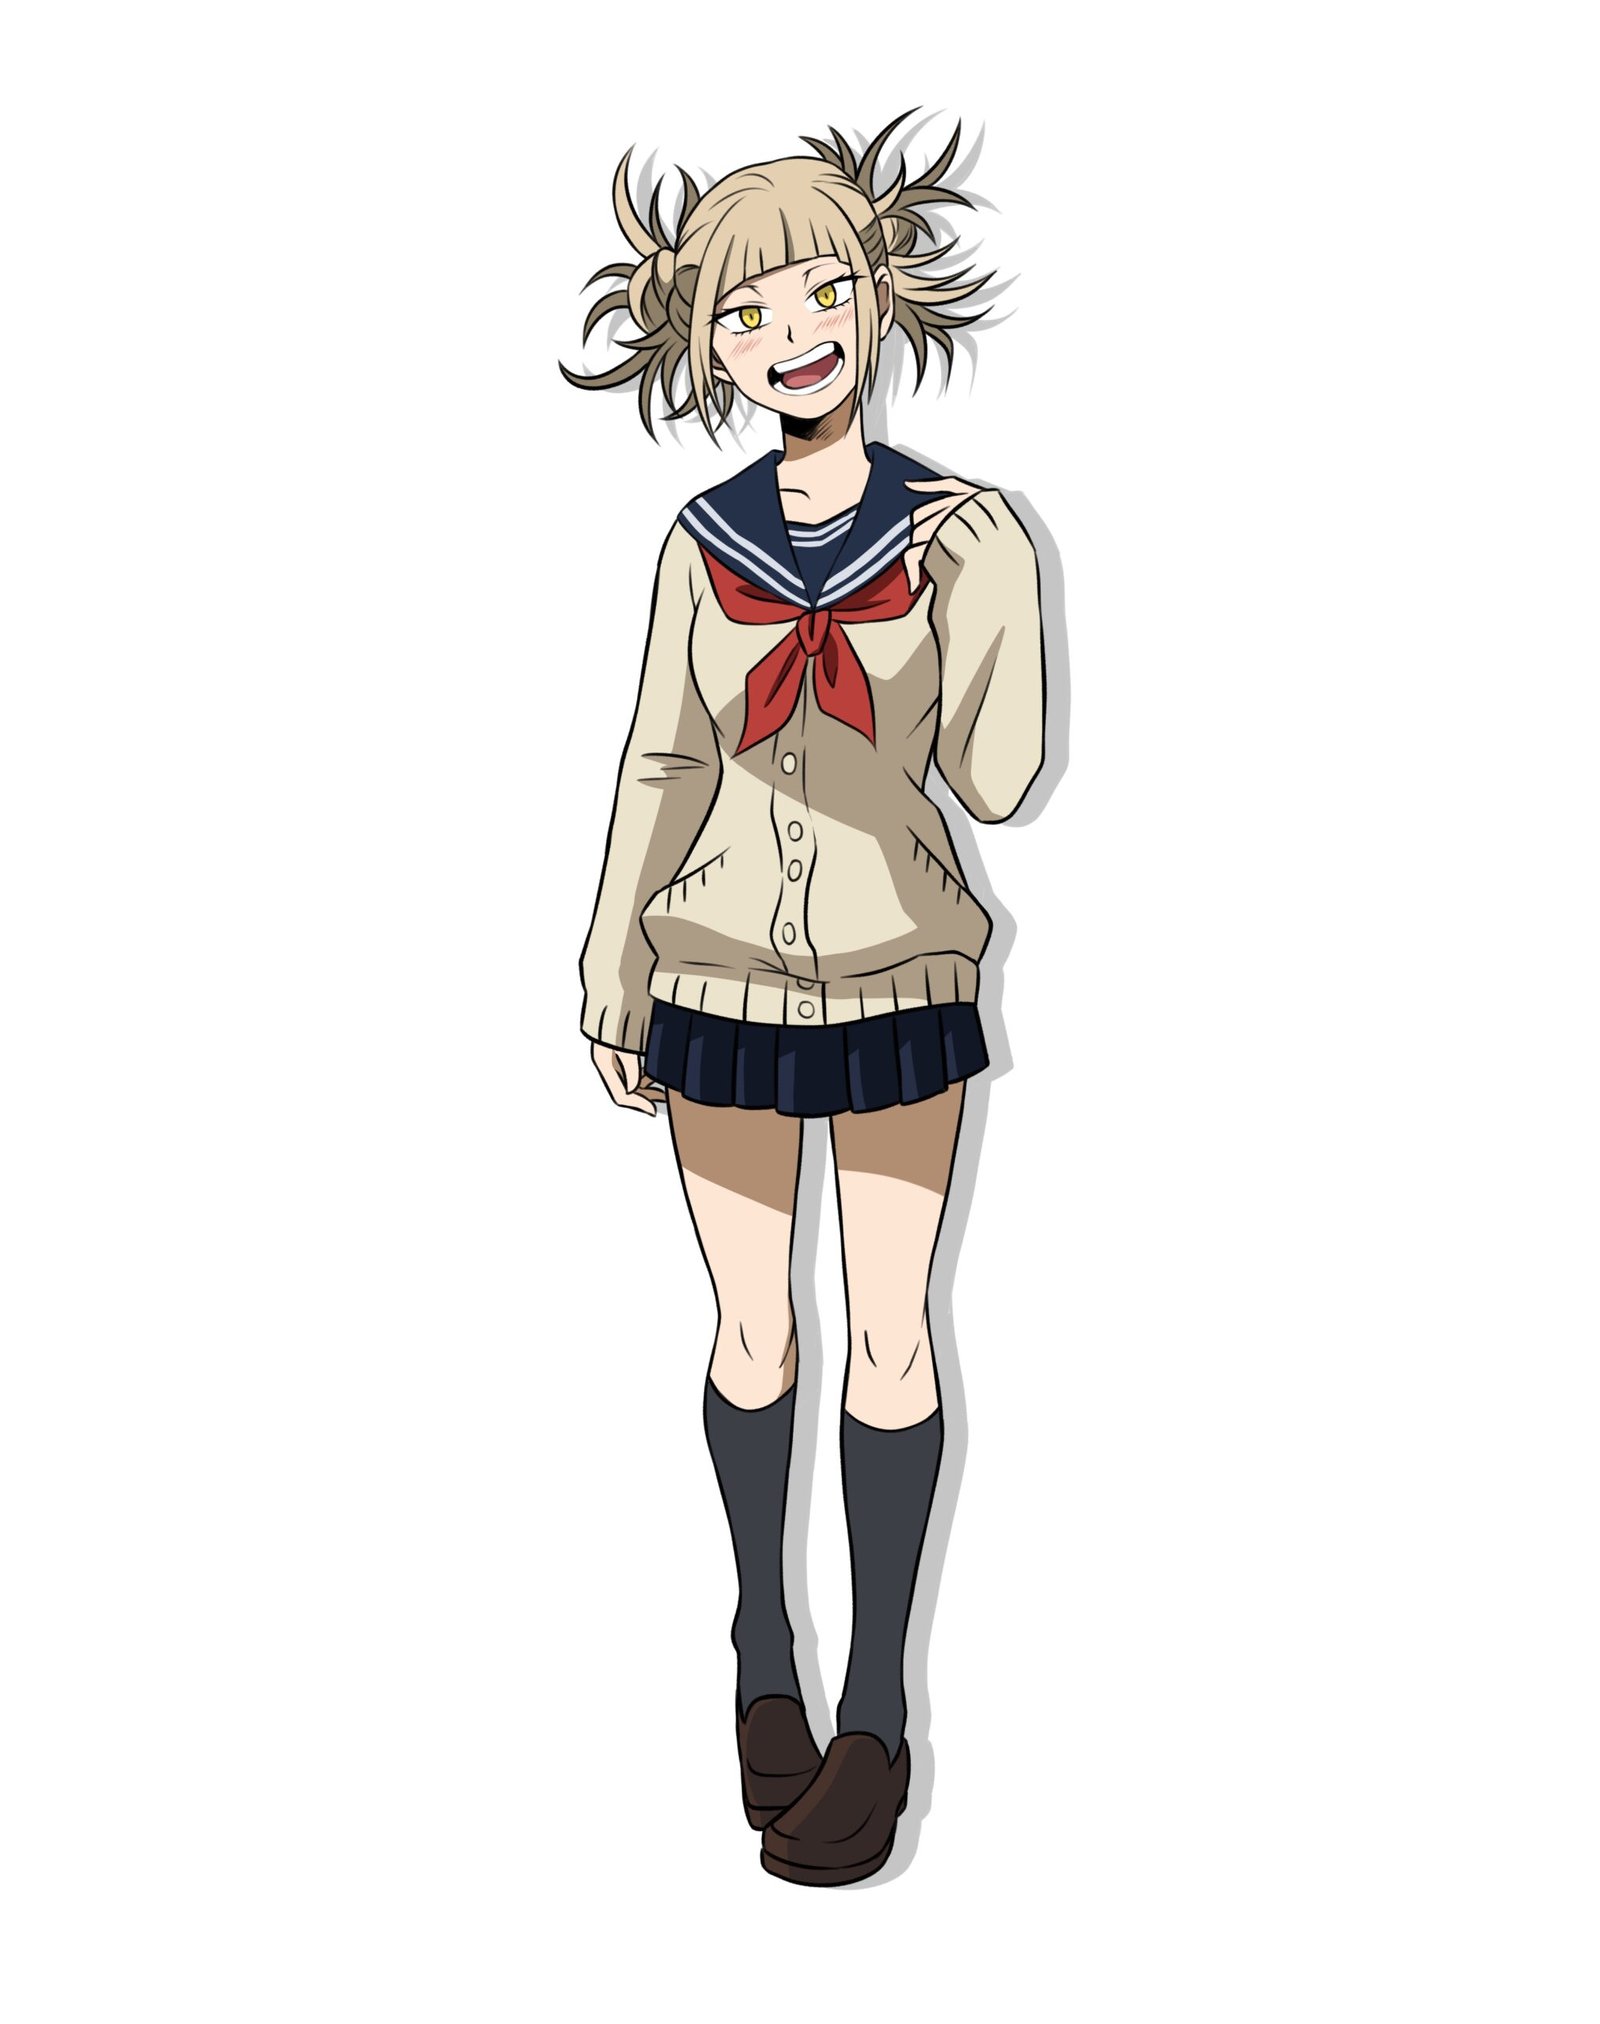
Himiko Toga is a tall young woman with long, straight black hair and red eyes that are slanted at the edges. Let’s get started with the Himiko Toga Drawing without further ado.
Her mouth is set in a constant smirk, showing off her teeth.
The three distinctive markings around her left eye include a curved line connecting the corner of her brow to above and beyond the eye, a triangular marking that spans from the top of her cheekbone to below her eye, and three dots beneath the first marking to form an incomplete triangle.
How to Draw Himiko Toga (Step-By-Step Guide)
Contents
Draw Toga’s Pose
To draw her pose, start with the circle of the head.
The circle should not be too big.
Still, the size of a head, the head is slightly bedding towards the right hand, draw two vertical lines under the circle, this is the neck, draw slanted horizontal lines at the edge of the vertical line, this is the shoulder.
From the horizontal line, draw a straight line, this straight line should be long enough so that other features can be attached to it, this is the chest.
At the end of the straight line(vertical line) draw another circle between the lines, this circle should be bigger than the head.
This is the basic shape for the waistline and the waist, draw straight lines down from the circle (waist), this vertical line is the legs, on the straight line, and draw a small circle under the big circle, the small circle represents the knee.
At the end of the straight line, draw a square that looks like a shoe.
At the bottom of the square, make sure it is a bit cure to look more rational. The left shoe is in front of the right shoe.
Himiko Toga’s Head Drawing
Inside the circle representing the head, draw a vertical line at the circle’s center.
This vertical line will help us position features found on the head at the right place, draw a slightly curved horizontal line facing downward, and touch the head’s right side.
This horizontal line is for the positioning of the hair because it shows the limit of the hair towards the eyes.
Draw another slightly curved horizontal line at the circle’s center and the vertical line.
This horizontal line will help us position her eyes.
Draw a slightly curved horizontal line to get the shape of the mouth
Draw Outline for the Arms
For the left arm, draw a curve at the side of the straight line that serves as the chest.
The curve should start from the top of the vertical line(shoulder) and end close to the bottom of the vertical line.
At the top of the vertical line(shoulder), draw a freehand triangle inside the top of the chest.
This triangle is connected to the top of the curve.
This is where her left fingers will be fixed.
For the right arm, draw a vertical line starting from the top of the shoulder down the body; at the bottom of the line, make sure it is curved towards the big circle that serves as the waist on the curved part of the vertical line, draw another small curve pointing towards the big circle, this is the right arm.
Draw Outline for the Jaw
The jaw is connected to the hair and also connected to the ear.
Trace the circle you drew for the head into a jaw shape.
The bottom of the jaw (chin) should be curvedly joined together.
Draw Outline for the Hair
Toga’s hair is connected to the jaw and also the ear.
To draw the hair, trace the upper part of the circle of the head to the ear, and make the top of the hair look more like a wig.
Besides the ears, draw a curve that starts from the top of the vertical line inside the head, the curve crosses the ear and points outside, making the right hair curve point towards the shoulder.
The left hair curve beside the jaw, and trace the horizontal line that was first drawn on the circle with a thick line, this is the border of the hair, on the border of the hair make a thorn-like vertical line on it.
Draw vertical lines from the edges of the border down to the side of the curve you drew that was pointing downward, connect the two edges of the curves and vertical lines sharply.
On the sides of the hair, draw different branches at the side of the hair, so it looks like leafy hair.
Make the edges of the leafy hair very sharp to make the facial expression of the toga more practical.
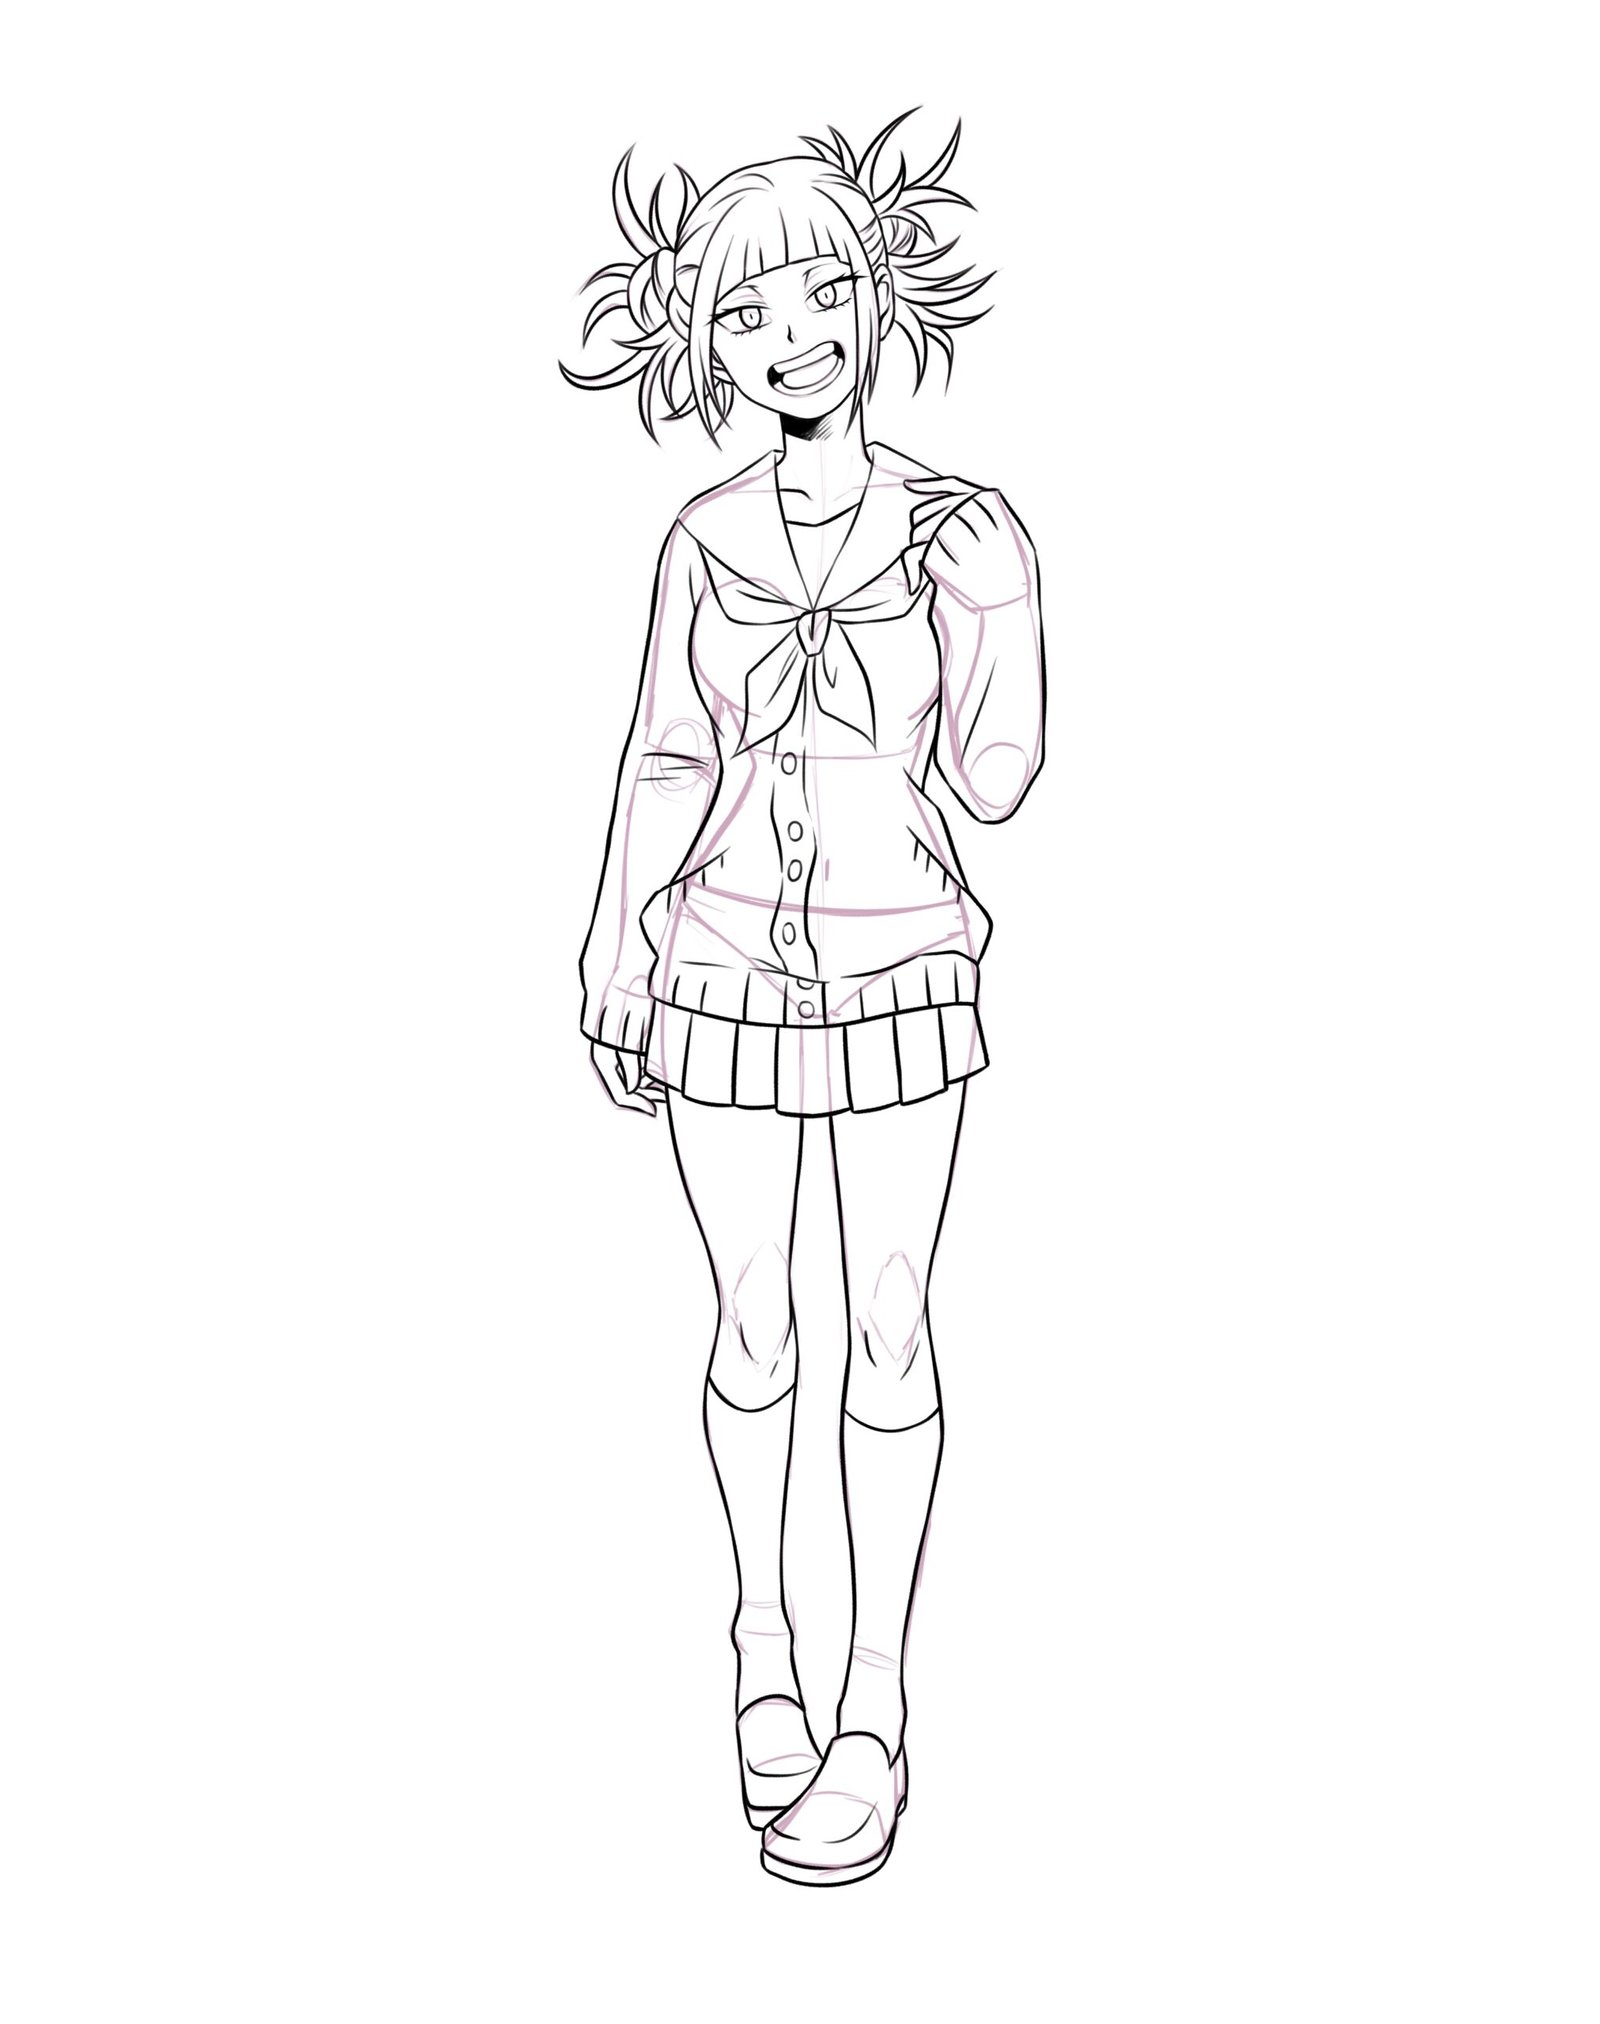
Outline Himiko’s toga body, arm, hair, face, etc
Draw Toga’s Facial Features
Draw the eyebrow, eyes, nose, and mouth
For the eyebrow, the right eyebrow is connected to the border of the hair, and the left eyebrow is just below the border.
The two eyebrows are not close together.
Her eyebrow is directly above the eyes.
To draw the eyebrow, draw a small horizontal line at the sides of the vertical lines that divided the circle of the head.
Draw the eyebrows with a thick line.
For the eyes, the eyes are directly under the eyebrow.
To draw the eyes, draw a small circle under the eyebrow.
Let the second horizontal line you drew inside the head circle be at the center of the small circle(eyes).
On the horizontal line, you will draw the pupils of her eyes
Her nose is the simplest draw of the features on the face; the nose is drawn on the vertical line that runs from the center of the circle (head).
To draw the nose, just put a dot on the line. The nose is above the mouth.
To draw the mouth, draw a love-like curve at the bottom of the head’s curve (inside the curve).
The vertical line in the head should be at the center of the mouth. Double the love-like circle to make it look more realistic.
Himiko Toga Neck Drawing
The neck is connected to the circle of the head.
It is connected to the jaw or chin.
It’s connected to the shoulder.
To draw the neck, draw small vertical lines at the bottom of the head, joining it to the shoulder.
Draw the Right Side of the Kansai Collar
The Kansai collar is connected to her sleeve and connected to her cloth.
To draw the Kansai collar, draw a V shape from her neck to her chest, and draw a vertical line from the edges of the shoulder to the sharp edge of the V shape on the chest.
Himiko Toga Left Arm Drawing
For the left arm, draw a curve at the side of the straight line that serves as the chest.
The curve should start from the top of the vertical line(shoulder) and end close to the bottom of the vertical line.
At the top of the vertical line(shoulder), draw a freehand triangle inside the top of the chest; this triangle is connected to the top of the curve. This is where her left fingers will be fixed.
Draw the Rest of Her Kansai Collar
Finish the Kansai collar with the shape of a leaf at the bottom of the small convex, and the shape should be far apart.
The left hand of the toga is resting on her left side of the collar.
By drawing these, you are done with her Kansai collar.
Draw Toga’s Outfit
Toga is wearing a long sleeve sweater, and she’s wearing a round neck, also putting on a Kansai collar.
For the right-hand sleeve, draw a vertical line starting from the top of the shoulder down the body.
At the bottom of the line, make sure it is curved towards the big circle that serves as the waist; this is the right-hand sleeve; at the edge of the draw vertical lines inside the curved part, which makes the helm of the sweater more realistic, also do the same for the left-hand sleeve.
For the seifuku to be completed, draw a small curve beside the top of the circle, the curve should be connected to the waistline; add another curve beside the right arm; this shows the wideness of her chest.
Draw small vertical lines in front of the sweater, and draw a small circle inside the vertical lines, this is the button lines.
The round neck is also a very simple part of the outfit that can be drawn since the sweater covers all the parts of the cloth except the top part of the round neck.
To draw the round neck, draw a slightly curved horizontal line crossing the V shape of the neck.
For the short skirt, the skirt is connected to the bottom of the sweater.
To draw the skirt, you need to add the designs for the skirt; the skirt is far above the knee, draw vertical lines under the sweater but shouldn’t touch the sweater, and draw an irrational horizontal line at the bottom of the skirt.
Draw Toga’s Hands
The left hand is resting on the left collar, the only visible part of the hand is the fingers, the thumb is not visible, only the last four fingers, her fingertips are bent downwards, the fingers are joined together with each other, the back of the hand is facing upwards, the palm faces downwards.
Himiko Toga Leg and Shoe drawing
For the left leg, draw a straight line from the bottom of the skirt down, make sure the vertical line passes beside the small circle you drew for the knee, and curve the straight line inwardly before it gets to the shoe.
Draw another vertical line from the edge of the skirt downward, curve the vertical line outwardly when it touches the small circle, and curve it inwardly after it touches the small circle so the back of the leg can be pragmatic.
Make sure the down part of the leg is smaller than the shin and upper part of the leg.
At the center of the shin, draw a curve facing upward below the small curve.
For the shoe, draw a concave curve at the bottom of the leg, trace the square-like shape that was drawn into the shape of the shoe, and draw a vertical line at the front of the shape so the shoe can look more real.
And draw another vertical line under the vertical line, this shows the sole of the shoe.
For the right leg, draw a straight line from the bottom of the skirt down.
Make sure the vertical line passes beside the small circle you drew for the knee, and curve the straight line inwardly before it gets to the shoe.
Draw another vertical line from the edge of the skirt downward, curve the vertical line outwardly when it touches the small circle, and curve it inwardly after it touches the small circle so the back of the leg can be better.
Curve the vertical line outwardly after the calf, and draw small curves at the bottom of the lines, this is the ankle.
For the Himiko toga shoe drawing, draw a concave curve at the bottom of the leg and trace the square-like shape that was drawn into the shape of the shoe.
On the left side of the shoe, make it vertical, so it looks like the left leg is covering the part of the right leg, draw a slight curve vertical line inside the square, this is the upper part of the right shoe.
Draw Toga’s Right Arm & Hand
Draw a vertical line starting from the top of the shoulder down the body.
At the bottom of the line, make sure it’s curved towards the big circle that serves as the waist.
On the curved part of the vertical line, draw another small curve pointing towards the thigh, draw a small convex curve from the bottom of the first curve to the middle of the second curve, this is the thumb, draw small vertical lines from the convex to the skirt, these are her fingers.
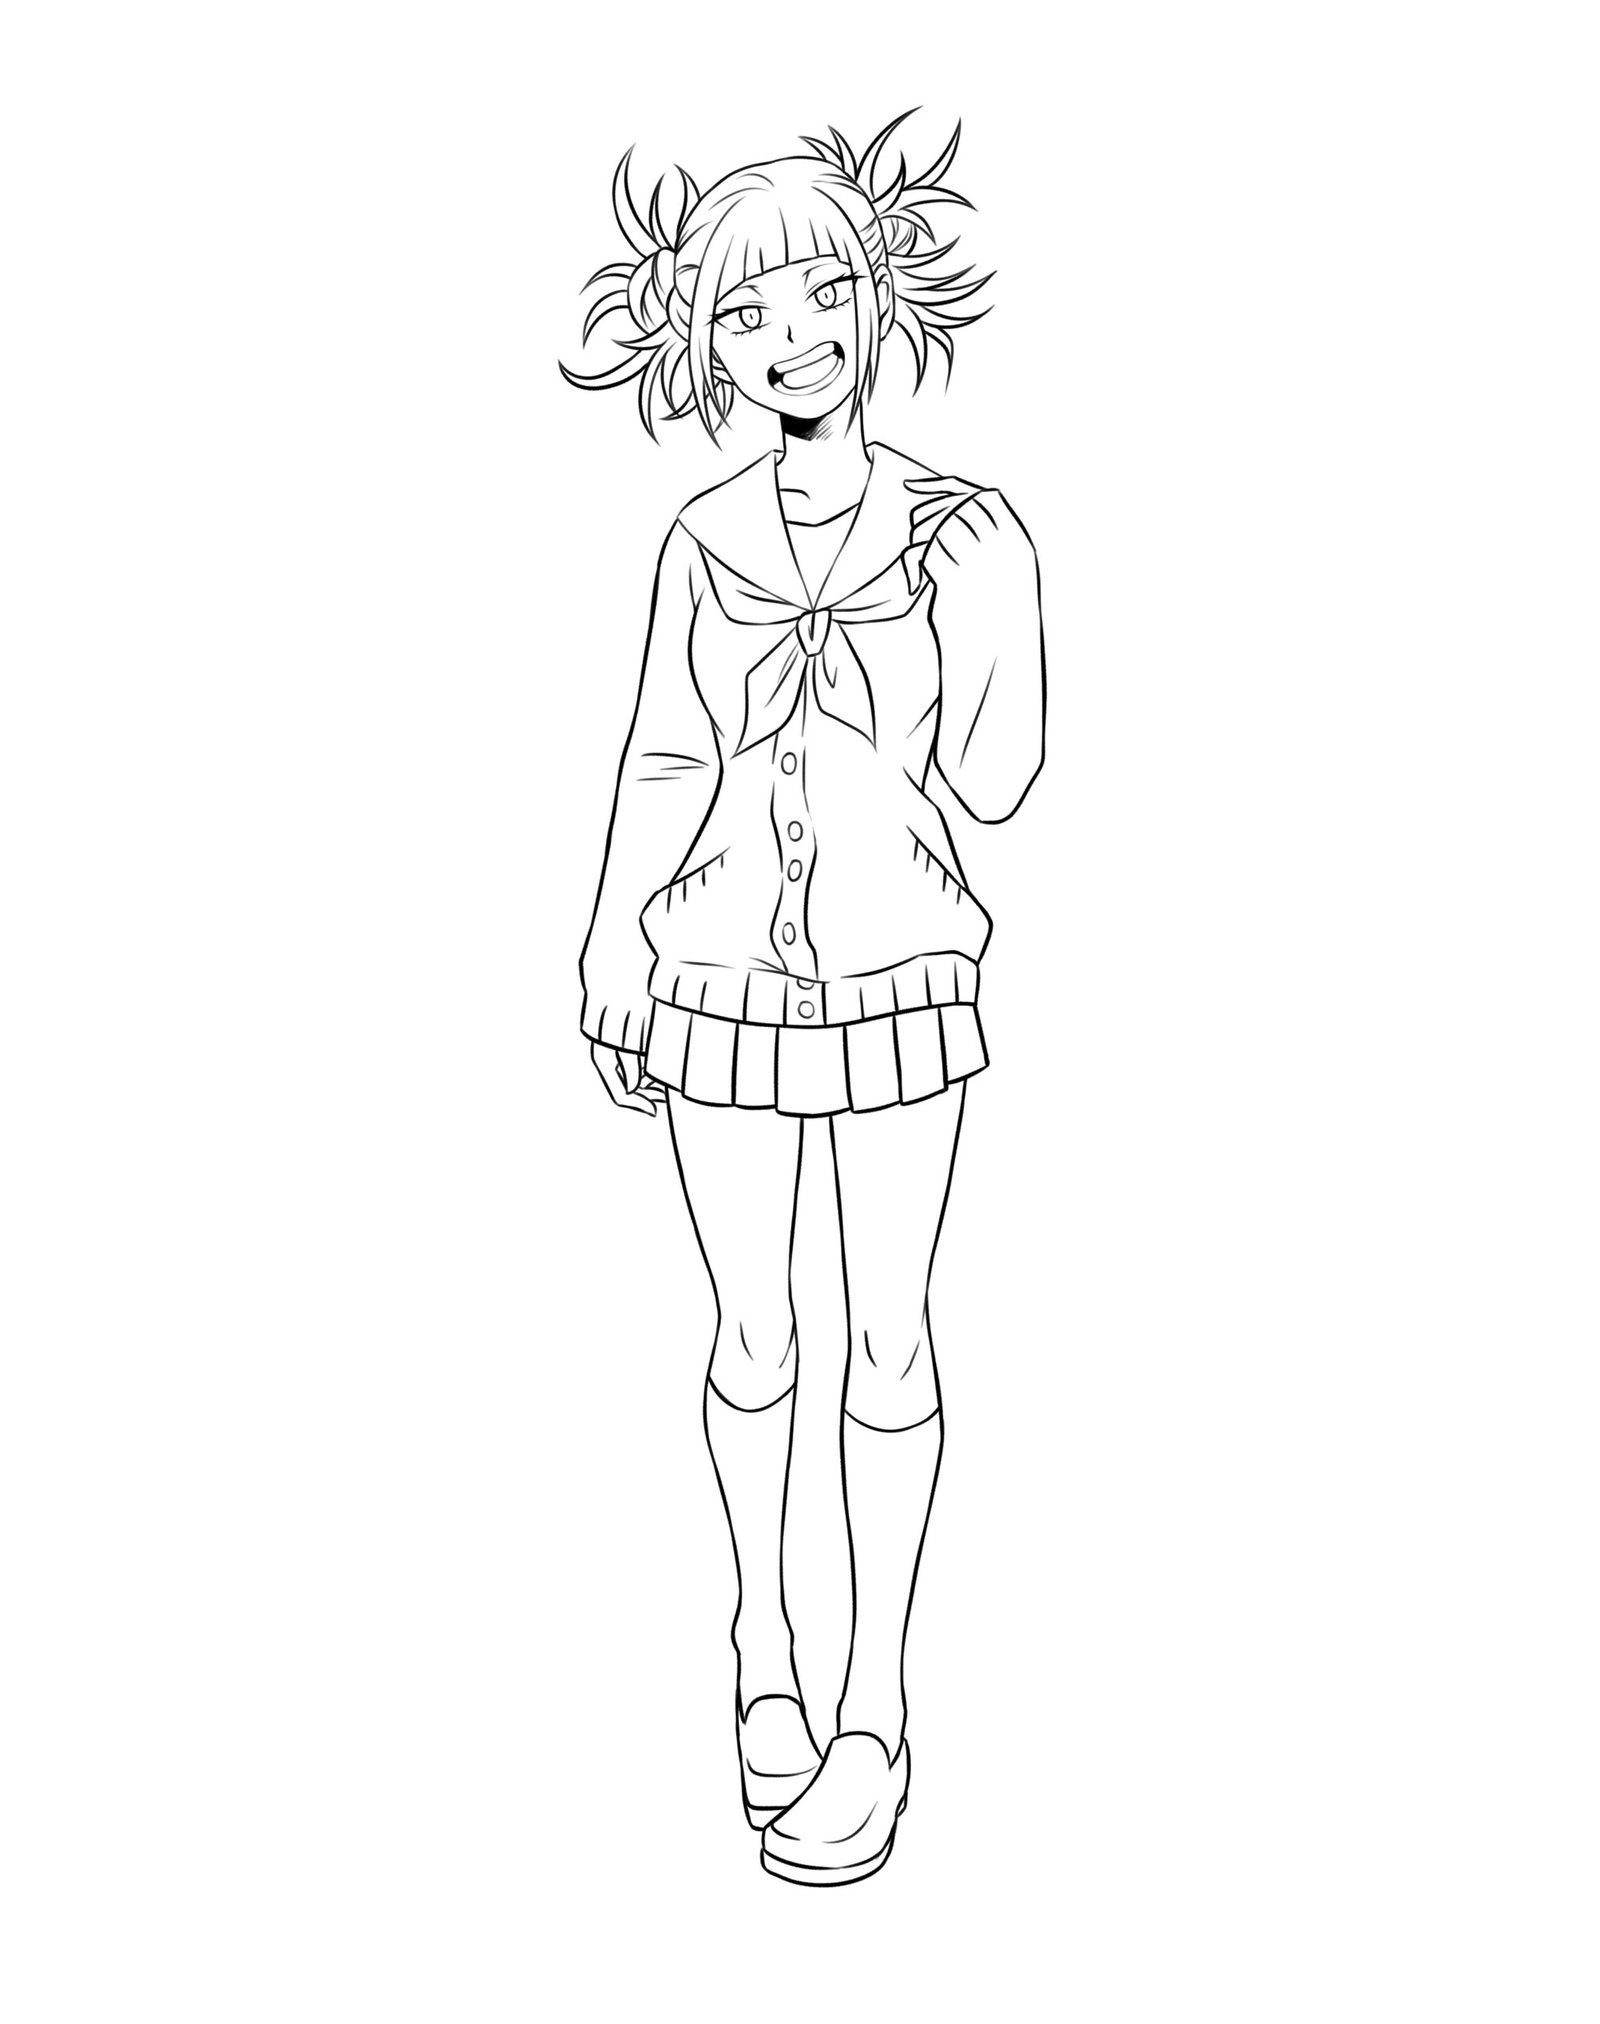
Enhance Outfit
Enhancement here means making the clothes look more realistic by adding details such as wrinkles or folds in the clothing.
Details can also be by adding appropriate colors to the outfit.
The cloth and the hair have the same color of ash, the sweater and the round neck have the same color of deep blue or navy blue, the socks match the skirt, the shoe is brown
Conclusion to Himiko Toga Drawing
Here we go, by now you should be able to draw the Himiko toga without any error, the main thing you need to do is get a clearer image of the Himiko toga and also all the necessary equipment needed such as pencils, eraser, your colors, and very importantly drawing paper.
Drawing is a way of expressing yourself and with constant drawing, it will be made easier for you.


")
")
")
