He’s not talkative but calmer than other members of his team.
Draw Dabi’s pose
Contents
To draw his pose, you need to start with the head, make a circle, and make a vertical line inside the head getting to the jaw, this is for the alignment of the facial features.
Draw a horizontal line for the eyes, a smaller horizontal line for the nose, and the last horizontal line for the mouth.
Make a curve to represent the shoulder.
Then draw a line running from the shoulder, and mark the shoulder with a similar curve that you had drawn for the shoulder.
The left hand is like it is running over the right shoulder.
For the left hand, make a bent vertical line with a small circle at the end of the line.
For the right shoulder draw a vertical line running from the neck region and draw a circle at the end of the short vertical line.
Draw a big circle that meets the ends of this vertically curved line that forms the body, this is the first step to Dabi drawing.
Draw a vertical line from the big circle to form the right thigh, and draw another a bend vertical line to form the left tight.
Make a dot at the ends of these vertical lines and draw small circles surrounding the dots you made, this is the knee joint.
Draw a vertical line from the dots of the knee downward; this is for the right leg.
Make a slightly bent vertical line from the other dots inside the left knee joint, this is for the right leg.
Draw the shape of his shoe attached to the legs, the left shoe is facing downward while the right shoe is facing the right side.
With this, you can conclude that he’s in a standing posture or position.
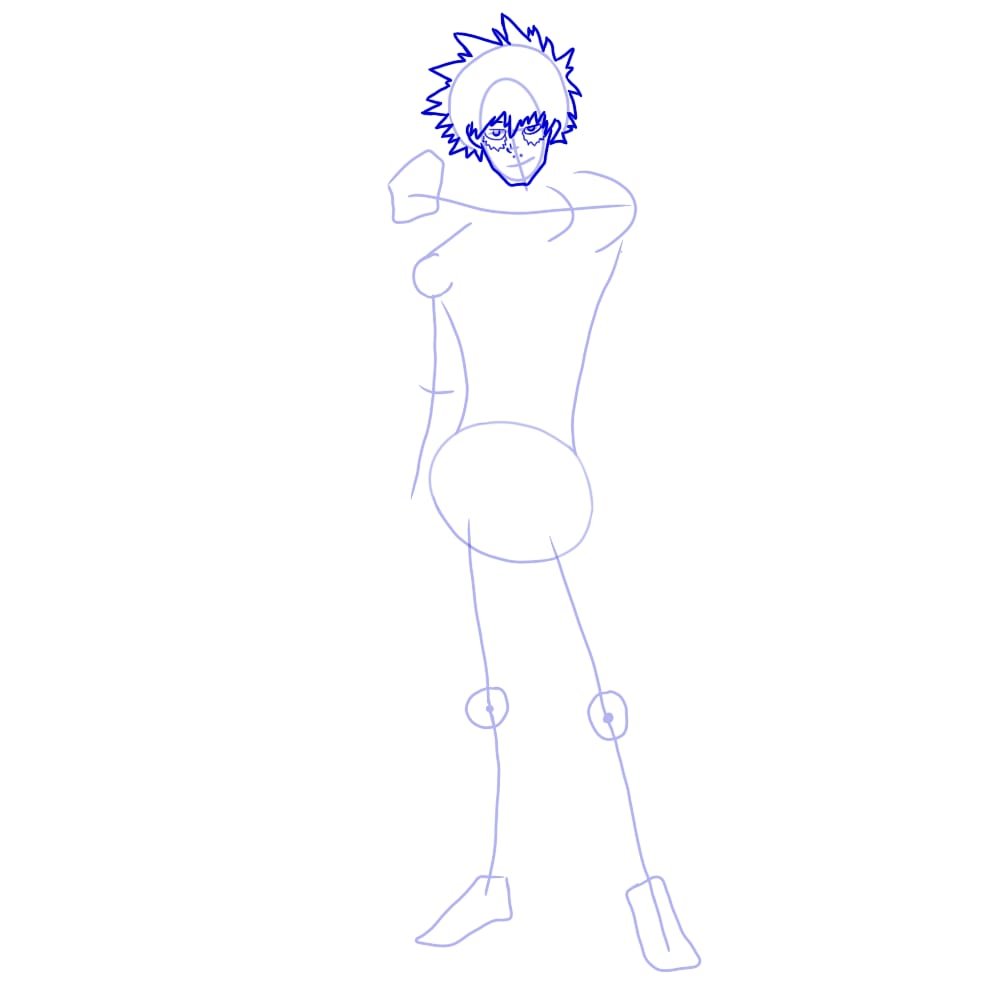
Trace out the jaw from the circle you drew for the head.
With this, you are done with the jaw and can now move to the next interesting part of the Dabi drawing, which is the hair.
Draw Dabi’s Hair
The hair is a very funny and live-making part of the Dabi drawing because it shows one of the uniqueness Dabi possesses on his body.
To draw the hair might be very simple but more or less technical, make a zigzag pattern forming several edges on the curve of the head, you can start your zigzag pattern from the left or the right side of the jaw all you need to do is be sure the hair is attached to the sides of the jaw.
With this, you are done with this step.
Draw Dabi’s Face
Draw the eyes and nose
Draw your oval circle for the shape of the eyes at the horizontal line you drew for the eyes.
Make a small circle inside this oval shape of the eyes, this is the iris of the eyes.
Make a slightly zigzag pattern in the form of a convex curve over the lower part oval shape of the eyes, this is the shape of a kind of scar around his eyes, and with this, you are done with the eyes.
To draw the nose, make a small dot on the right side of the face, which is on the horizontal line you drew for the basics of the nose; under it, make two dots at the sides of the vertical line of the head, so it forms the nostril, and with this, you are done with Dabi’s eyes and nose.
Draw the mouth
The mouth is one of the weird parts of Dabi you cannot wait to draw; the mouth is under the two dots you made for the nostrils.
Make a horizontal line under the nostril, and draw a convex curve that is not too wide nor too narrow so that the shape of the mouth can be more realistic.
Make lines joining the sides of the mouth to the ends of the jaw, so it forms the shape of his scar.
Make a small horizontal line under the convex curve, so it makes up the hair under his mouth. By drawing this, you are done with the mouth.
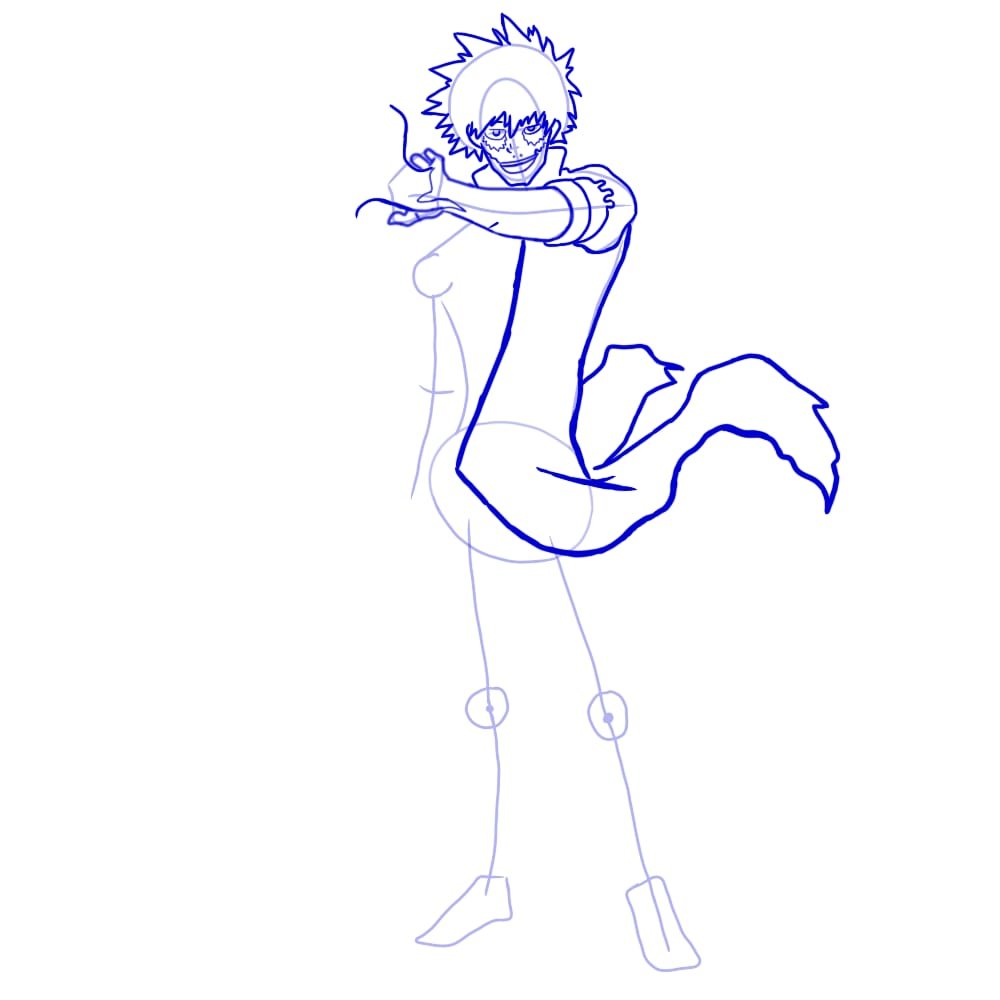
Draw Dabi’s Left Arm, Hand, And Sleeve
Dabi’s left sleeve covers the left arm; therefore, if you draw the left arm, you can easily replicate the sleeve.
Draw a horizontal line from the two edges of the small curve you drew for the left elbow so that it passes through under the jaw to the vertical line you drew for the wrist, and this is the left arm.
So let’s make the hand, and draw the thumb then draw the other two fingers on the upper part of the hand.
Make a curve that extends upward from the last finger, and do the same for the thumb side, so it curves downward, so it forms the basis of the flames coming from his hands.
To draw the sleeve, make another two curves inside the curves you made for the basic of the left shoulder, and make a horizontal line to join these two curves to the first curve so that the last small curve has a hill shape pattern at the back of it to show the design attached to the sleeve.
You can now join the lower part of the biggest curve you drew for the arm to these curves so that the sleeve can look more pragmatic.
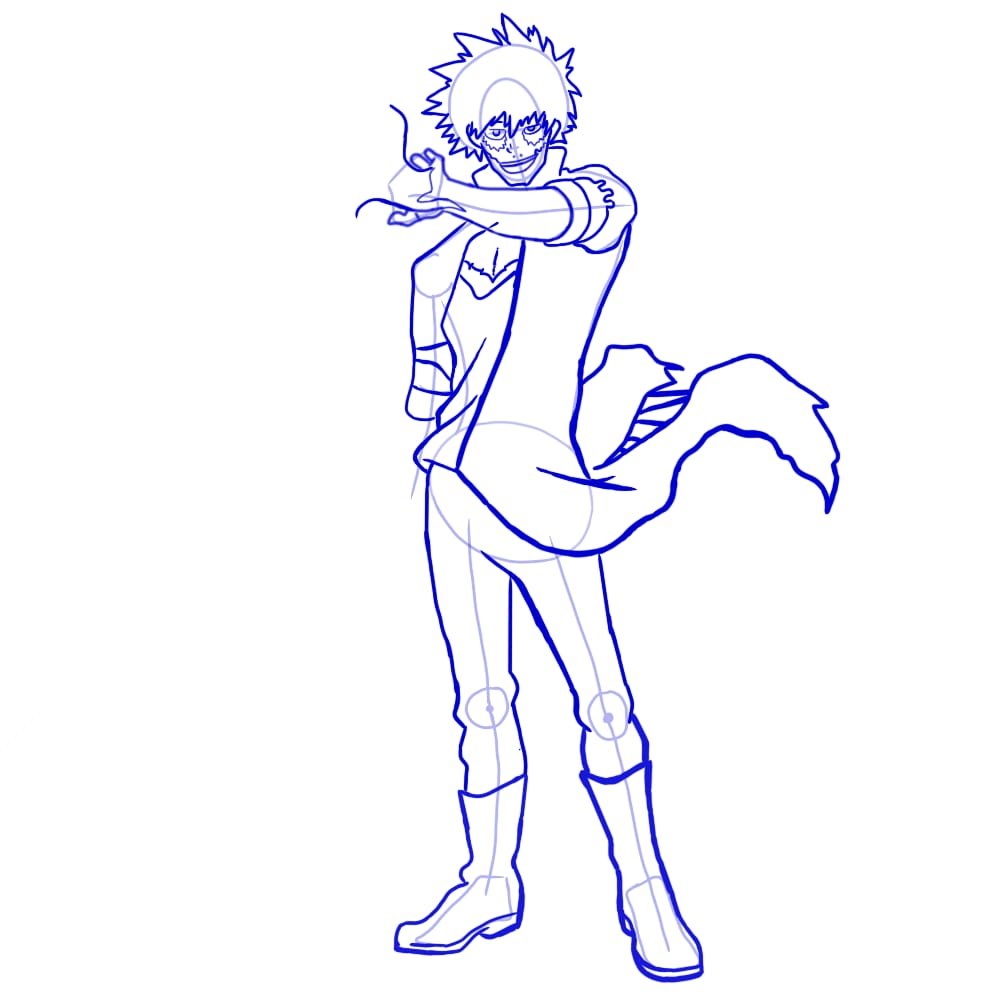
Draw Dabi’s Crimson coat
Draw the collar of Dabi’s crimson coat
The collar is also another very interesting part of the outfit that can easily be drawn with a few strokes.
Draw a small horizontal line at the sides of the jaw and make another vertical line from the end of this horizontal line around the neck.
Draw the body of his coat
To draw the coat, draw a vertically bent line from the horizontal line of the left arm to the center of the circle you drew for the waist, then draw another vertical line from his left shoulder to his waist on the left side.
Draw a free-hand horizontal line from the first vertical line to make it look like the coat is flowing. This is the basic or first step to drawing the jacket.
Draw Dabi’s Shirt
The shirt is also a very easy step. You can easily draw without any error.
To draw the shirt, draw the neck of the shirt using two lines that form the two V-shaped necklines, and draw a vertical line from the right side of the shirt.
Draw Dabi’s Right Arm and Right Shoulder
To draw the right arm, we must first draw the right shoulder because the arm is attached to the shoulder; the shoulder can easily be drawn with just a line.
Trace down the vertical that runs from the neck region to the small circle of the right shoulder’s joint, this is the right shoulder.
To draw the right arm, draw a vertical line from the side of the circle joining to the end of the line of the shoulder till it gets to the horizontal line you drew on the basic line of the right arm.
Trace the horizontal line joining to his outfit, making another two additional curves forming the right sleeve of the coat.
Draw the Upper Part of His Pant
To make the upper part of his pant is also a very simple step that can easily be replicated with just a few lines;
Draw a vertical line from the right side of the big circle which you drew for the waist to the side of the small circle you drew for the knee joint and make sure the line is curved at the end in alignment with the small circle.
Draw another vertical line from the bottom (center) of the big circle and also align the curved part of the vertical line to the small circle of the knee, this is the upper pant for the right leg.
Draw a vertical line from the left side of the coat to the side of the small circle of the left knee.
You can now finish the upper part of the left pant with a vertical line that runs from the top of the vertical line you drew from the center of the circle representing the waist to also align with the small circle of the left knee.
Draw the lower part of his Crimson coat
At this point, you don’t have to rush yourself because you are almost done with your Dabi drawings; the lower part of the coat is also the last step for the coat.
Draw the lower end of the coat from the first horizontal lines, and draw another curved line joining these lines together so that it forms an edge on the right side beside the left end at the back.
On the right side of his body draw the lower part of his coat, with this you are already done with the lower part of the jacket.
Draw Dabi’s Boots
The boot is attached to the pant.
For the right boot, draw a curved vertical line to show the shin while it looks like the continuation of the vertical line of the pant, for the calf of the right leg.
Make a small rough vertical line from the vertical line of the pant.
Draw a horizontal line at the end of the vertical line joining to the shin.
Draw a small vertical line from the horizontal line and curve the edge so that it forms the ankle.
Draw a vertically bent line to form the upper part of the right boot, and draw a small vertical line to form the front of the boot.
Draw the back of the boot with a small vertical line attached to the ankle.
Make a line at the end of the end so it forms the sole of the shoe.
Now join the sole of the shoe with the front of the shoe with a curved horizontal line.
For the left boot, draw a curved vertical line from the side of the small circle, and draw a small horizontally curved line joining the two vertical lines together, this is the upper part of the boot.
Draw curved lines from the end of this horizontal line to form the boot and the curved part shows the ankle.
Make sure the vertical line of the left side of the shoe is curved downward to show the front part of the boot, make a curve joining these lines together so that it forms the side of the boot.
The left boot is facing downward while the right boot is facing the right side of the body.
Draw Dabi’s Belt
The belt is attached to the outfit, and it’s only shown on the right side of the waist; make a rectangle attached to the coat and also aligned with the right side of the waist; two dots inside the belt, so it shows the front part of the belt.
Enhance Outfit
Enhancement here means adding details to your Dabi drawing,
Clean all the excess lines and dots.
Use thick lines for the border of the jacket.
Use thick lines for the boot.
Use thick lines for the upper part of the pant.
Enhancement means adding shadow or lighting to your Dabi drawing, it means adding some lines to make the Dabi drawing more realistic for example, add the upper part of the lower jacket which looks like lines joining the two left sides of the coat.
Use a thick line for the “V” shape of the shirt, enhancement can also mean adding colors to the outfits, the jacket is blue-black, the shirt is white, the belt is ash in color, and the boot is black.
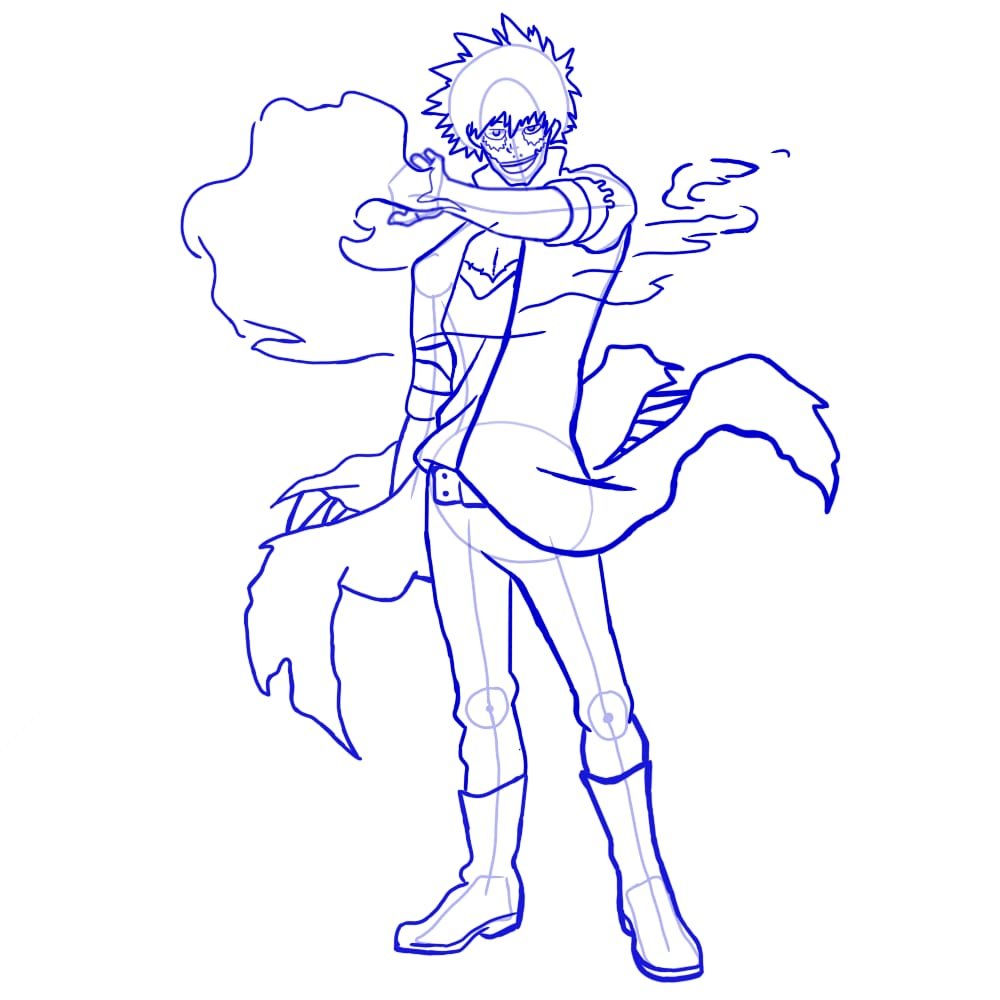
Enhance Outline
For the outlines, you are permitted to erase the excess lines and dots.
Add colors to the outline, can add lines that you feel might make the drawing look more realistic.
For example, adding a vertical line from the right sleeve to the coat which make the right arm look more realistic, this is also another avenue for you to draw the flames.
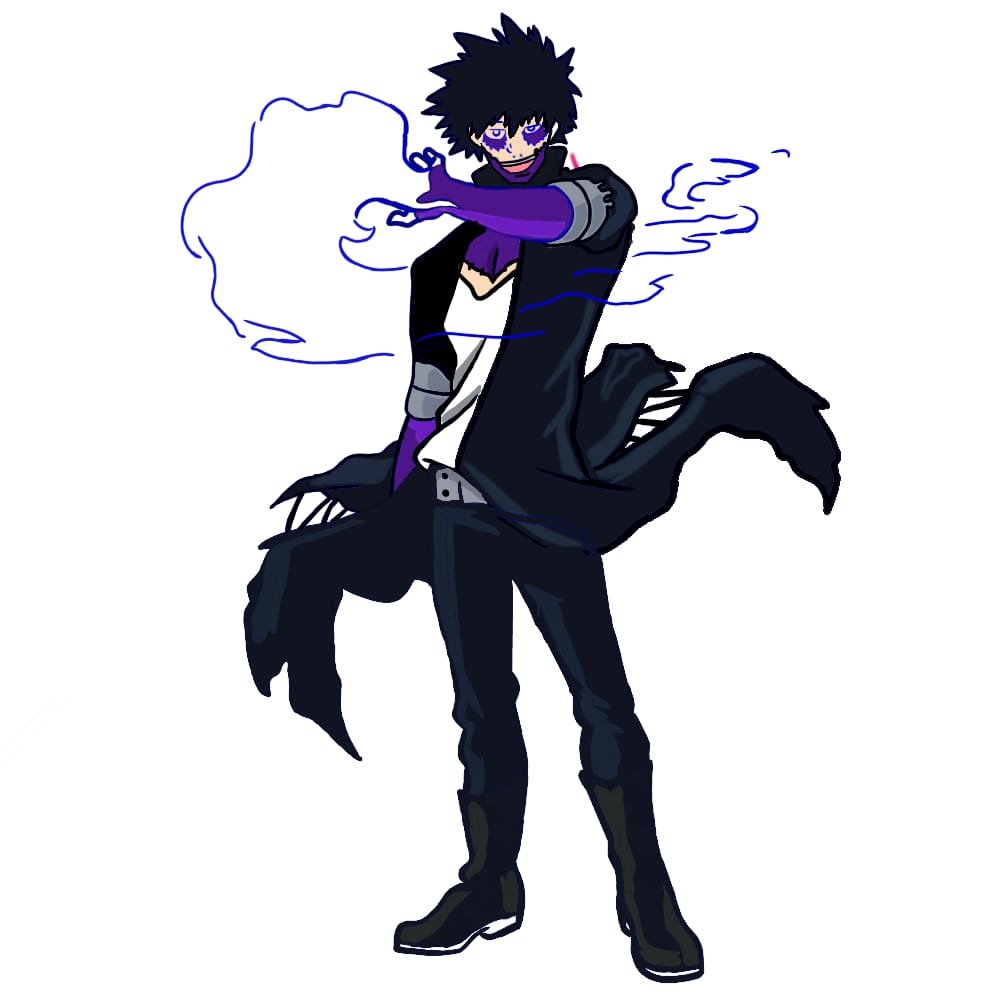
The flame comes out of the left hand while it passes through the chest to the left side of the body, the flames have a sky color (sky blue), and don’t forget to add a pink color to the middle of the mouth, so it forms the tongue, you can add colors to eyes, lower eyelid, the scar of his mouth, the arms, the hair (which is black).
With this, you are done with your drawing.
Conclusion to Dabi Drawing
With these few steps above, you can certainly draw Dabi without stress.
You need to get all the necessary materials ready and find a comfort zone without disturbance, so you can get full concentration while drawing.
Also, makes sure you have your coloring pens with you because this is what will make your drawing looks more attractive and effective.


 Breif & Easy Guide")
")
")