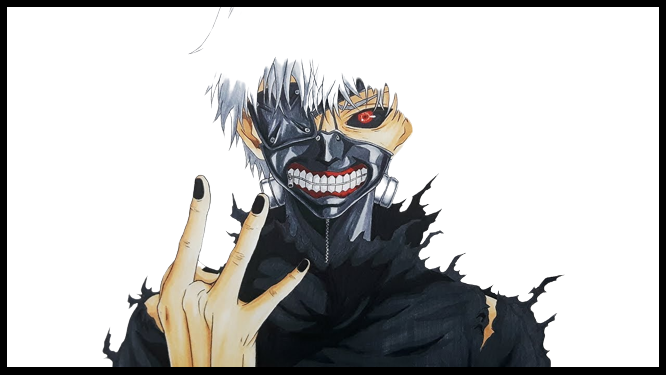
Do you know that drawing is a very useful skill for every artist? This article will tell you how to draw Kaneki Ken from Tokyo Ghoul in 7 easy steps.
How to Draw Kaneki Ken From Tokyo Step-by-Step Guide
Contents
If you’re reading this, you probably already know that Kaneki Ken from Tokyo Ghoul is one of the coolest anime characters out there, and now you want to learn how to draw him.
Drawing Kaneki Ken from Tokyo Ghoul isn’t particularly difficult when you know the right tips and tricks, but it will help if you have some prior drawing experience and can follow specific instructions.
OR
If you’re looking to learn how to draw Kaneki Ken from Tokyo Ghoul, you’ve come to the right place!
This tutorial will provide you with all the steps needed to draw this awesome character, as well as some helpful tips and resources that will help you improve your drawing skills even more!
So let’s get started!
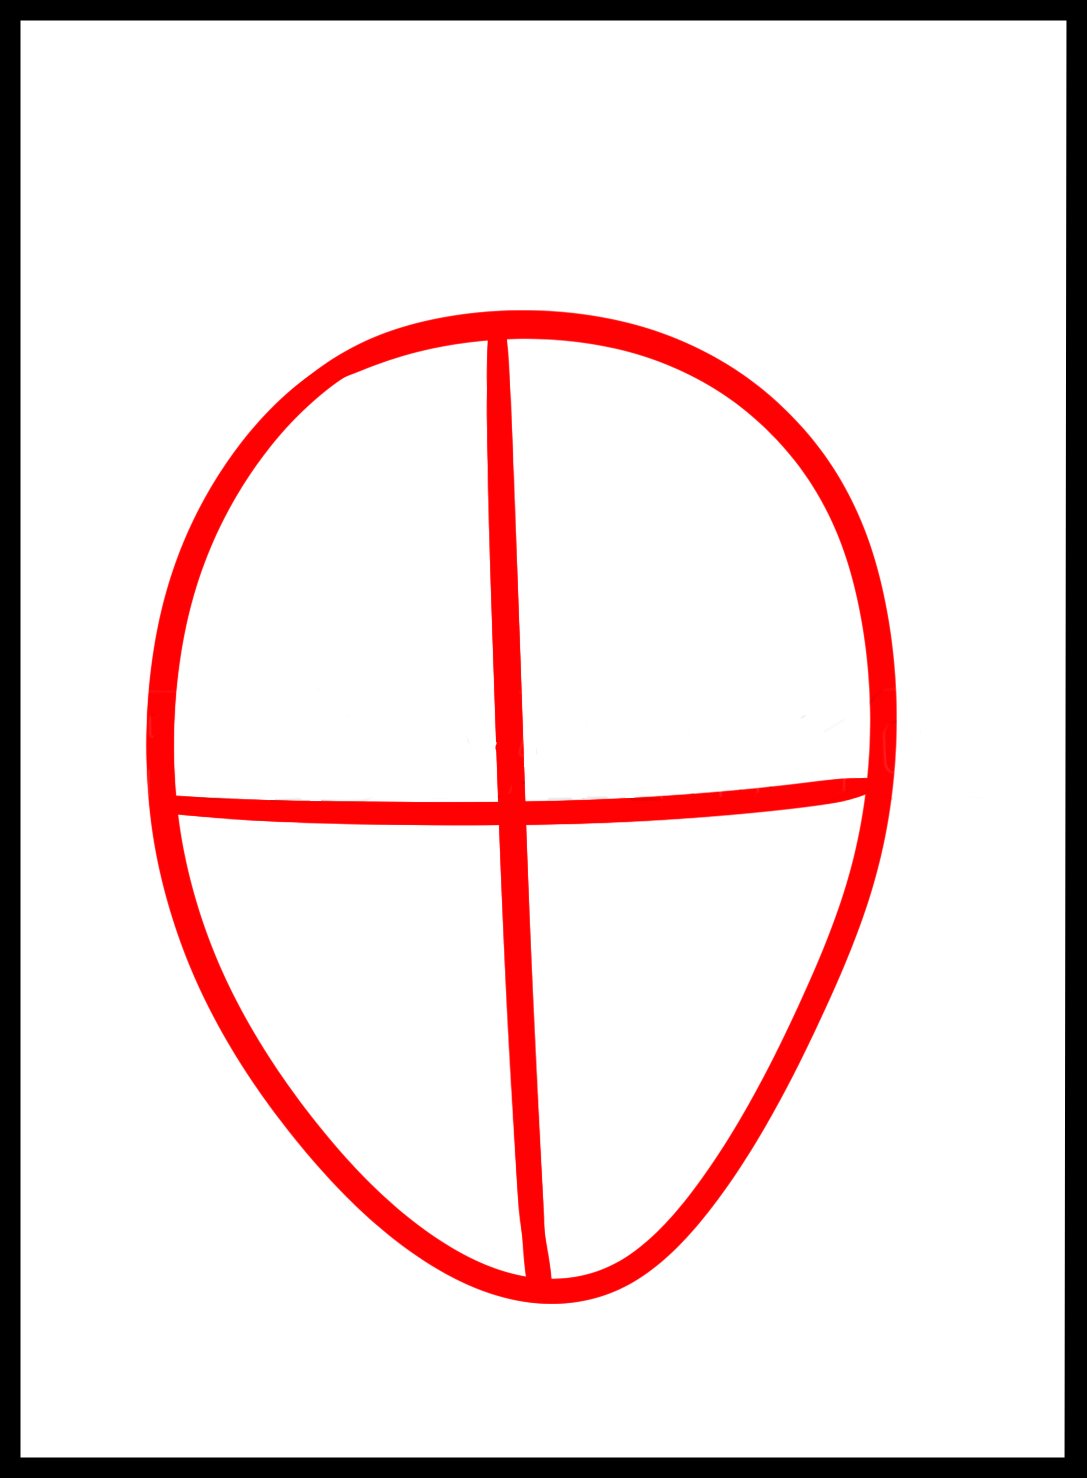
Step 1) Sketch Out His Face guideline
When you are learning how to draw Kaneki Ken, start by sketching out his head shape.
Don’t be afraid of drawing mistakes at first!
It’s better to start with an imperfect sketch than not try at all.
Next, draw two intersecting lines that make up the back of his head, a horizontal line, and a vertical line which will become one of his ears, and then place a circle at that intersection.
OR
The first step in drawing Kaneki Ken is to sketch out his face.
His face has an intricate pattern on it, so make sure you do not sketch too darkly at first.
First, draw a circle; then, draw two lines across it.
This will create guideposts for your eyes and nose.
After that, move down one step towards his hair and draw two little half-circles right under your original eye circle guideline. This is where his eyebrows go and will be important later when we start doing shading of his face.
Now, draw a straight line from each of those little half-circles down until you have drawn both sides of his nose; remember that your lines should never be too dark at first!
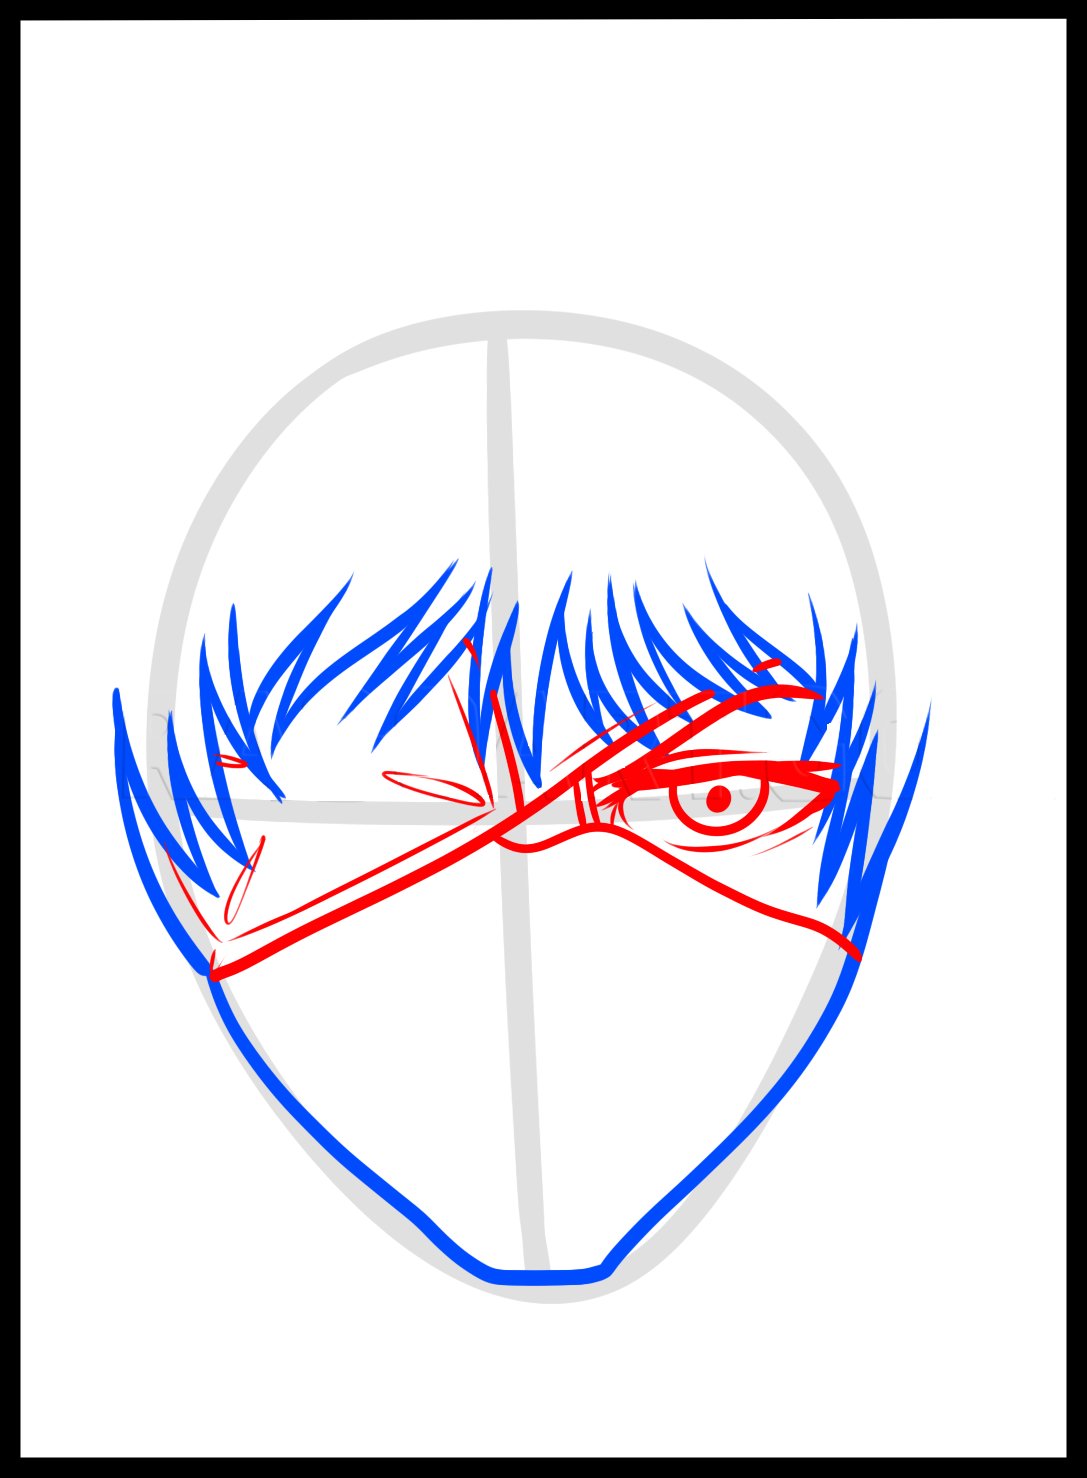
Step 2) Sketch Out His Jaw outline
Draw Jaw of Kanki Ken
To draw a character like Kaneki, you’ll need to have a clear sense of his face proportions.
Start with his jaw, sketching out its basic shape and noting where it juts out about his chin.
Make sure that everything is symmetrical and proportionate—one of Kaneki’s most defining features is his strong jawline, so make sure you get it right!
After that, shade in all of your other lines.
Draw Hairs of Keneki Ken
The outline of his hair is crucial, so start by sketching out a basic oval.
Make sure it’s far enough away from his hairline, as we don’t want to ink in any part of his face.
Also, try not to make your initial outline too big.
Keep it simple and small, as Kaneki’s hair isn’t very tall or voluminous at all.
After you’re happy with your first step, it’s time to move on!
OR
You can start by sketching out his hair’s outline.
Make sure that you draw a smooth line, not too thick or thin.
If you want to make your drawing more realistic, try to add some waves to it as well.
You can do so by using short strokes and long strokes as shown in the figure given below.
Step 3) Sketch out his Eye Outline
Using a 0.5 or any pencil, draw in a basic oval shape that’s about an inch high and about three inches long.
Then, using your eraser, lighten up his right eye by making two small circles directly below it—one close to his eye and one far away from it.
The top circle should be twice as wide as it is tall while the bottom one should be twice as tall as it is wide.
This will give him a half-lidded look. When finished, outline these circles with your sharpened HB pencil and fill them in with color to make his iris (the middle part of his eye) and his left eye must look like little closed.
Step 4) Sketch Out his Nose, Mouth, and Hair Outline
Draw Nose
Once you’ve got his shape down, it’s time to learn how to draw Kaneki’s nose.
This can be a little tricky at first, as he has a long nose that comes out of his face rather abruptly.
Start by drawing two lines across his face parallel with one another and slightly curved.
These will help you get an idea of where you want his nose to be on his face, and then once you have those two lines in place and your eye is used to seeing them there, start sketching out where you think his nostrils will go.
They should appear a bit sunken into either side of that prominent nose, and if they don’t, simply erase them!
Draw Mouth
Kaneki’s mouth and teeth are his most defining features.
That said, they aren’t too difficult to draw if you pay attention.
His top lip is thin while his bottom lip is a bit wider and curved (rather than straight).
His fangs should also be thin but make sure they stick out enough that you can see them when he closes his mouth.
The teeth inside of his mouth are slightly sharper than normal human teeth.
Again, practice is key here—drawing these details can make all of the difference between an okay drawing and a great one!
Step 5) Draw His Hairs
These are like antennae from a human, but they’re much smaller.
In other words, they only cover a small portion of his face, so don’t overdo it when drawing them.
For that matter, don’t even draw them at all since he doesn’t have them in all forms of his ghoul form and sometimes just chooses not to use them.
However, if you do want to draw them then keep in mind that they should be on both sides of his head at roughly ear level and point out at roughly 20 degrees from horizontal.
They also cover half of his forehead, so make sure you place your guidelines accordingly.
Step 6) Draw His Shoulders
The next step in learning how to draw Kaneki Ken is drawing his shoulders.
His upper torso should be elongated, creating a V-shape when viewed from behind.
When you’re drawing him in profile, it’s okay if his right shoulder is a little wider than his left one; however, if you are drawing him from any other angle, make sure that both shoulders are about even width.
You should use long and sweeping lines to draw Kaneki’s collarbones; however, try not to make them too sharp—his shoulders aren’t as prominent as most superhero characters and don’t need that sort of detail.
As far as details go, leave out everything but his eyes.
Step 7) Add the Finishing Touches in your drawing
Once you’ve drawn your final line in your drawing, add some finishing touches.
You should now be able to see a pretty clear version of what it should look like.
If there are any parts that you feel still need some more work, then go ahead and add more details.
However, if you’re completely satisfied with what you have so far, then take out your eraser and start getting rid of all those pencil marks until they’re completely gone.
Then voila! You’ve finished drawing yourself an awesome-looking anime character!
Conclusion to Kaneki Ken Drawing
In this tutorial, we showed you Kaneki Ken Drawing from Tokyo Ghoul.
This tutorial is easy to follow, and with a little bit of practice, you’ll be able to draw Kaneki with ease!
If you have any questions or feedback, please feel free to leave a comment below.
We hope you enjoy this tutorial!
OR
If you’re a fan of Tokyo Ghoul, you’re going to love this easy-to-follow tutorial on how to draw Kaneki Ken.
This seven-step guide is perfect for beginners, and by the end, you’ll be able to create a masterpiece that you can be proud of.
So what are you waiting for?
Start drawing today! If you have any questions, be sure to leave a comment in the section below. We’d love to hear from you.


")
")
 In Just 6 Minutes")
")


