Sushi is a traditional rice dish in Japan, but it is also made in other regions. In other words, it is symbolic of Japan. Shushi is a famous dish worldwide consisting of seafood, vegetable, and vinegared rice.
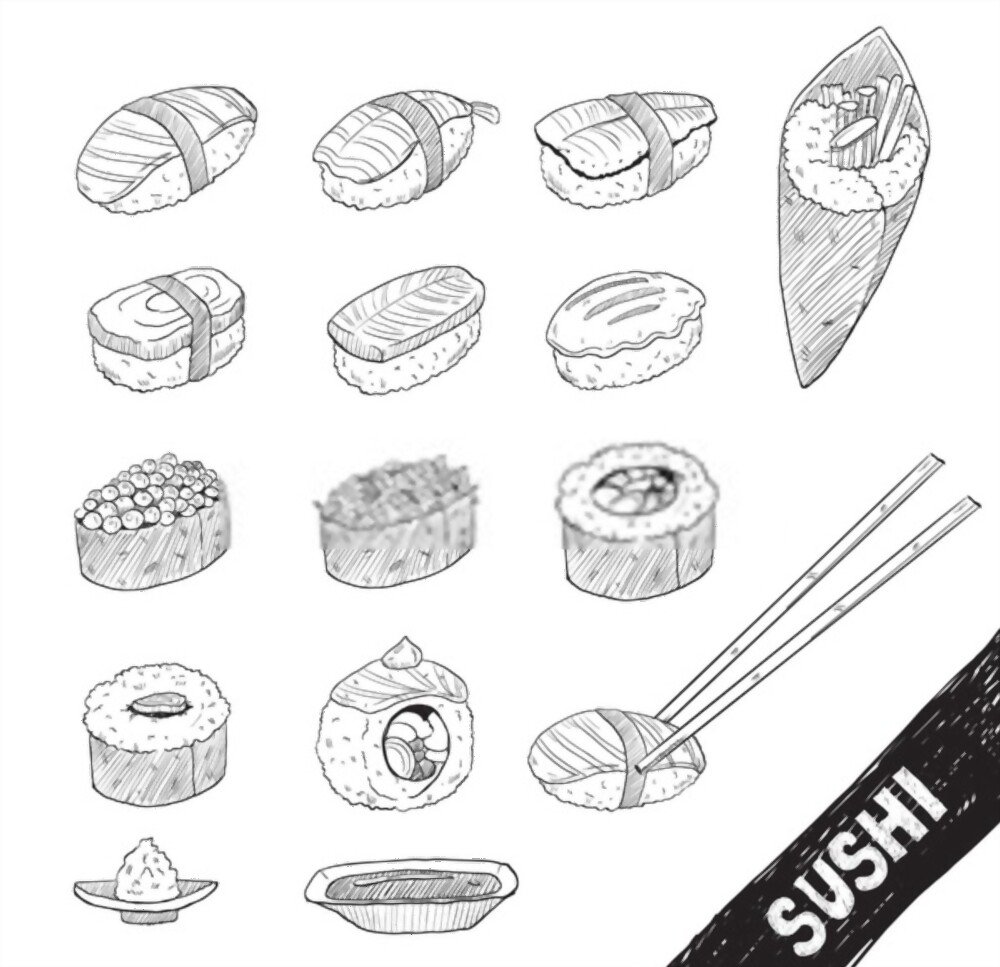
There are various types of sushi that are famous worldwide, as well as in anime and manga cartoon characters. It is necessary to have a deep overview of the types and forms of sushi before making its anime drawing. Here we will learn how to draw six different kinds of sushi step by step.
Nigiri sushi
Uramaki sushi
Maki sushi
Ebi nigiri sushi
Tamago sushi
Ikura Nigiri sushi
Many other various kinds of sushi are:
Sashimi:
Sashimi is usually served without rice. It is the best option only for those who want to eat and enjoy the only flavor of fish or shellfish and nothing else.
Oshizushi:
In Japanese, “Oshi” means “pressed,” which means; a pressed sushi dish with layers of cured fish and rice. Different ingredients and rice are pressed together in a special mold in layers.
Temaki:
Temaki is “hand roll sushi” in Japanese. It is made with large pieces of roasted seaweed. It is similar to common sushi but different in final look or presentation.
It would be best if you had HB pencils (colored) and a drawing book or some paper to draw different kinds of sushi step by step. We are here to make your anime sushi drawing easy and interesting. So, let’s get started!
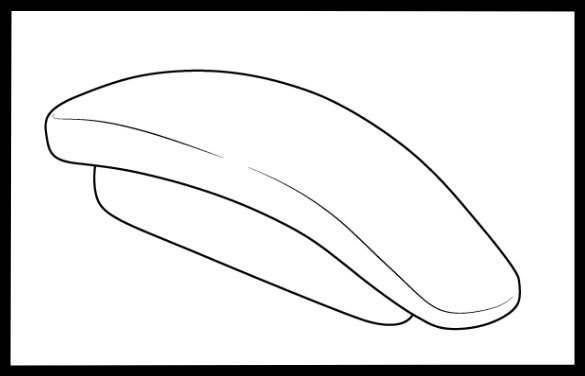
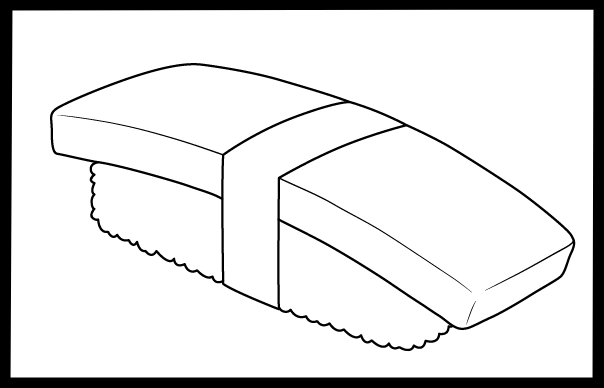
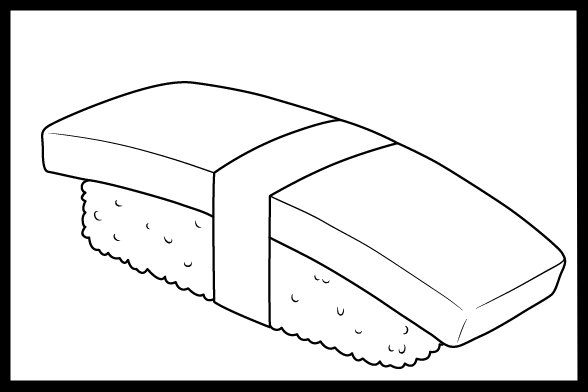
1) How to Draw Nigiri Sushi Step by Step
Nigiri is the most common sushi type in which fish is usually served on top of the rice. Fish can be raw as well as cooked. It is the best option for people who want to taste and appreciate the flavor of raw fish and other vegetable toppings.
Steps:
Here including steps
How to draw the outlines of fish and rice
Adding details to outline of rice
Draw more rice grains
Shading or coloring the nigiri sushi drawing
Step 1: How to draw the outlines of fish and rice
Let’s start our drawing by outlining the overall rice shape and a fish slice on the top. Here you don’t need to draw the grains of rice.
First of all, you have to draw two curved lines; one is bigger, and the other is shorter, just like a fish-shaped one without drawing its tail. Draw the starting part, which is also slightly fatty in the upper part of the fish slice, and the ending part is slightly slim, which is also the lower part. Connect them carefully. Keep in mind that lines or strokes should be light and gentle to erase unnecessary lines after completing the drawing easily.
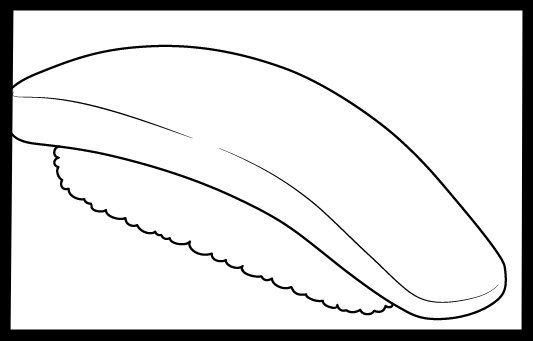
Step 2: Adding details to outline of rice
Look at the bottom part of the picture, which contains the overall shape or outline of rice and draws little bumps on the bottom outline of rice. Use an eraser to erase unnecessary lines or overall outline after making bumps of rice grains darker or clearer.
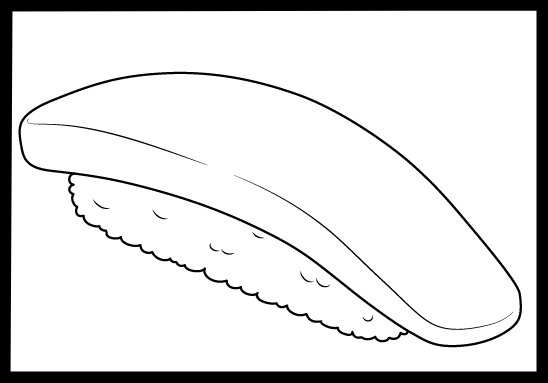
Step 3: Draw more rice grains
As shown in the picture, inside the bumps of rice grains, add some more grains to it. It will increase the detailing of sushi drawings.
Step 4: Shading or coloring Nigiri Sushi drawing
As you know, rice grains have white color, so there is no need to shade that part of sushi. If you want to look your drawing more attractive, you’ll have to shade or color fish slices. The upper area of fish should be lighter in the shade than its bottom area. You can make your sushi anime drawing more realistic by adding some details on fish slices, like adding or drawing lighter white streaks on it. You can add a three-dimensional effect to your anime drawing by shading the side part darker and on rice where the fish slice is hanging on it.
2) How to Draw Uramaki Sushi Step by Step
In Japanese, “Uramaki” means “inside out.” It uses rice and seaweeds inside out. It is similar to Maki, but the rice grains are outside the seaweed, as shown in the reference picture.
Steps:
Steps including here:
Outline the basic shape
Draw the filling and rice details
Add more rice grains
Complete your uramaki anime drawing by shading or coloring
Step 1: Outline the basic shape
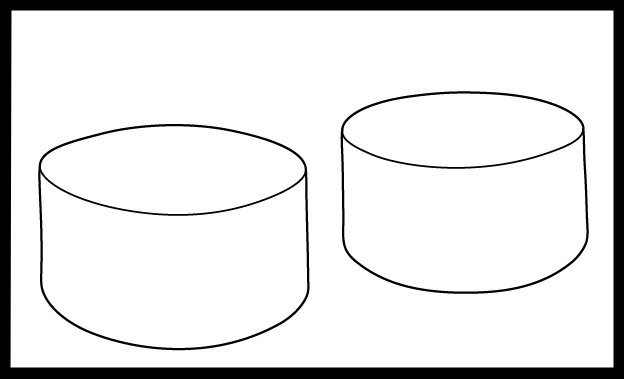
Let’s draw a round-shaped cylinder or an oval shape. You can also make it by drawing two vertical curved lines; one is the upside, and the other is at the downside of the same size. Try to make the bottom part of the cylinder slightly round and join it with the upper part of the round-shaped cylinder.
Step 2: Draw the filling and rice details
Draw the series of small bumps of irregular shape along with the outlines of the round-shaped cylinder that have been drawn in the above step. These small bumps’ series will help you build an impact on rice grains. Erase the overall outline and darken the series.
On the top of the rice, you can create a row of small curves. After completing it, you can erase the outline. Generally, “Uramaki” has many fillings in them and can easily be drawn, as shown in the example picture.
Step 3: Add more rice grains
Draw some more rice grains to make your sushi anime drawing more realistic.
Step 4: Complete your uramaki anime drawing by shading or coloring
Shade the drawing to give it finishing touch. You can color the ingredients according to your taste.
3) How to Draw Maki Sushi Step by Step
Maki sushi anime drawing is just the same as ‘Uramaki,’ but it is wrapped in seaweeds and has filling inside the rice grains. Filling may be of different kinds, as shown in the reference picture.
Steps:
Steps included:
Draw the basic shape of the sushi roll
Draw the filling
Adding the filling types
Complete your drawing by coloring and shading
Step 1: Draw the basic shape of the sushi roll
Draw two sushi rolls the same as we drew in the uramaki sushi drawing. Draw two curved lines and join them by adding two more straight lines in such a way that they make a cylindrical shape. These cylindrical shapes are called maki sushi rolls. Draw lighter outlines so that we can erase them after completing the drawing.
Step 2: Draw the filling inside the rolls
Remember that sushi rolls are being drawn by an angle just as in the reference picture, so filling inside the rolls should be drawn small, and ‘flattened’ should be matched with the angle. The size and shape of filling ingredients can be slightly different depending upon whether they should be mixed ingredients or not.
Add another filling in the other sushi roll. You can draw Maki with a single filling or just a single ingredient.
Step 4: Complete your drawing by coloring and shading
Let’s color your Maki drawing, as it is the most interesting part of the drawing.
Shade your maki sushi drawing shade the outside or seaweed of dark grey color and filling ingredients according to your taste; what you want them to be either vegetable or fruit? For example, fish color can be red or orange, as shown in the picture. The rice grains should be white, so do not color them.
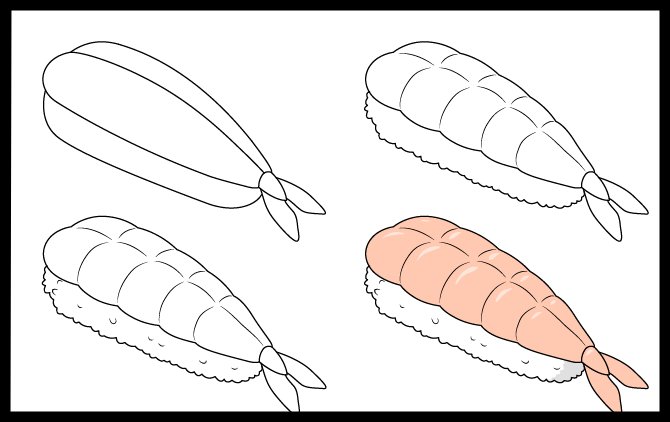
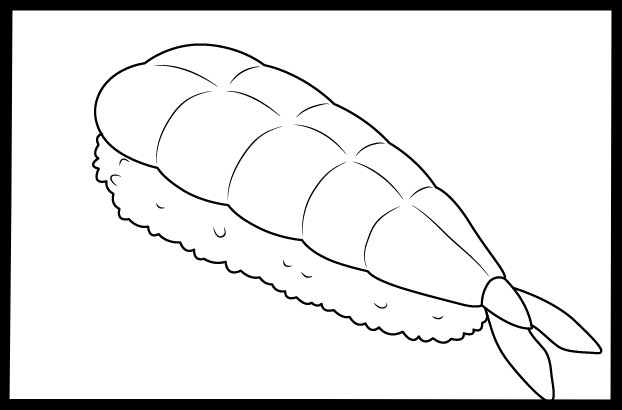
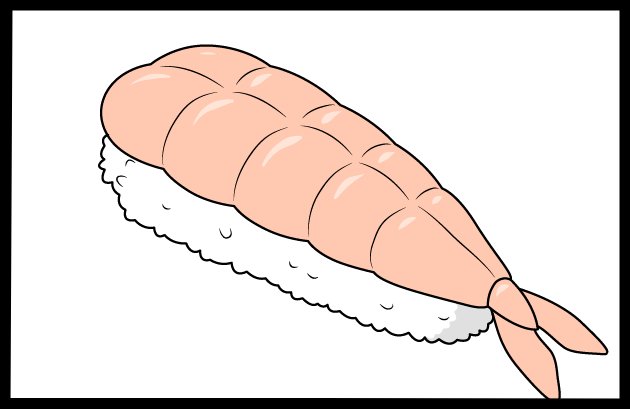
4) How to Draw Ebi Nigiri Sushi Step by Step
It contains hand-pressed rice topped with shrimp. It is a type of “Nigiri” sushi and can easily be drawn step by step. So what are you waiting for? Let’s get started with easy and interesting steps.
Steps:
Steps including:
Outline the rice and shrimp
Add the details to the shrimp and rice
Add more rice grains and streaks
Complete the drawing by shading or coloring it
Step1: Outline the rice and shrimp
First of all, make outlines of the overall shape of rice and the topping(shrimp). You can use your pencil to draw the overall shape of the shrimp. Draw three longer slopes and join them to make the shape of a shrimp, and after connecting them, draw a small tail just like shown in the picture. Make their end part round-shaped and tail a little sharpening.
Step 2: Add the details to shrimp and rice
Add the details to the rice grains first. Draw small and little sharp bumps series and erase overall outline of rice, which we have drawn in the first step. After adding details to rice grains, move towards the top part, which is a shrimp. Let’s start from the tail and make an equal section; each section will contain four-round curved lines.
Step 3: Add more rice grains and streaks
Look at the reference picture and draw more rice grains beneath the shrimp to make your drawing attractive. Erase the unnecessary part from drawing.
Step 4: Complete the drawing by shading and coloring it
Like the ‘Nigiri’ sushi, shade the topping and leave the lower part colorless as it contains rice grains. But you can shade a smaller portion of rice grains for adding a three-dimensional effect to your drawing. You can shade exactly where shrimp is bending over the rice grains. Color the meat pink or orange and draw light-colored streaks on it to give it a realistic effect.
5) How to Draw Tamago Sushi Step by Step
It is the type of sushi that contains an omelet topping tied with the strip of seaweed, and the lower area of sushi is rice grains. We can draw as easily as shown in the picture in just four steps; the first is drawing the overall shape second one is adding details to rice grains and then coloring the drawing and detailing.
Steps
Outline the rice and egg topping
Add details to rice grains
Add more rice grains
Coloring and shading drawing
Step 1: Outline the rice and egg topping
Draw outline or shape of egg piece as a topping and lower part of the sushi that is rice grain part. After drawing these parts, draw a strip of seaweed, just as shown in the reference picture. Your drawing should look like an egg piece is tied with rice grains using seaweed.
Step 2: Add details to rice grains
Draw the series of small bumps along with the overall outline of the rice but leave the area where the seaweed strip is tied with rice grains and egg.
Step 3: Add more rice grains
Draw more rice grain shapes to give your drawing a realistic and neat impact. Erase the unnecessary parts or strokes from your sketch.
Step 4: Complete your drawing by adding colors and shads
Let’s start shading the rice gain area right there where egg topping is bending over the grains. The shading will have a unique impact on your drawing. Color the dark seaweed grey and the egg topping should be light orange or yellowish.
6) How to Draw Ikura Nigiri Sushi Step by Step
‘Ikura Nigiri sushi,’ as its name shows, is also one of the types of Nigiri sushi but similar to Maki. Containing meat roe as topping should be very careful while drawing each roe.
Steps
Steps including:
Draw the basic shape of ‘Ikura Nigiri Sushi.’
Adding fish roe
Complete the line drawing
Color your drawing
Step 1: Draw the basic shape
Draw the same roll as we have drawn in ‘Maki sushi.’ You can draw it by drawing oval shapes and lines and connecting them.
Step 2: Adding fish roe
These meatballs can be very tricky to draw, but don’t panic; you can draw them one by one by drawing round balls in front and sticking behind them simultaneously. Do not be very careful in maintaining proportions and size; these can be varied.
Step 3: Complete line drawing
Just use the same above strategy to complete your line drawing and meatballs.
Step 4: Color your drawing
Shade the outer portion, seaweed, the dark grey shade, and meatballs pink or orange. To make your drawing more realistic, also shade light-colored tinny balls on each topside meatball as some light falls on them, and they are glowing.
Conclusion:
Sushi is a famous dish in Japan and all over the world. It has a large variety and various types.
In this blog, we have drawn six sushi types step by step to make you able to learn easily and interestingly.
Please stick with us for more easiest and most interesting anime drawings. Do not hesitate to put your sushi anime drawings in the comment section. Stay tuned and connect!


 Breif & Easy Guide")
 Breif & Easy Guide")
")

")
")
")