Konan is a member of the Akatsuki, an organization dedicated to collecting the nine Bijuu and creating a world ruled by Evil Organs.
Konan is introduced as an attractive woman with blue hair, amber orange eyes, and pale skin.
She wears a black kimono-style dress with red highlights. She’s fond of using roses which are her favorite flower. If you want to draw Konan, the step below is the easiest step, have fun.
How to draw Konan Step-By-Step (Akatsuki from Naruto)
Contents
Draw Konan’s Pose
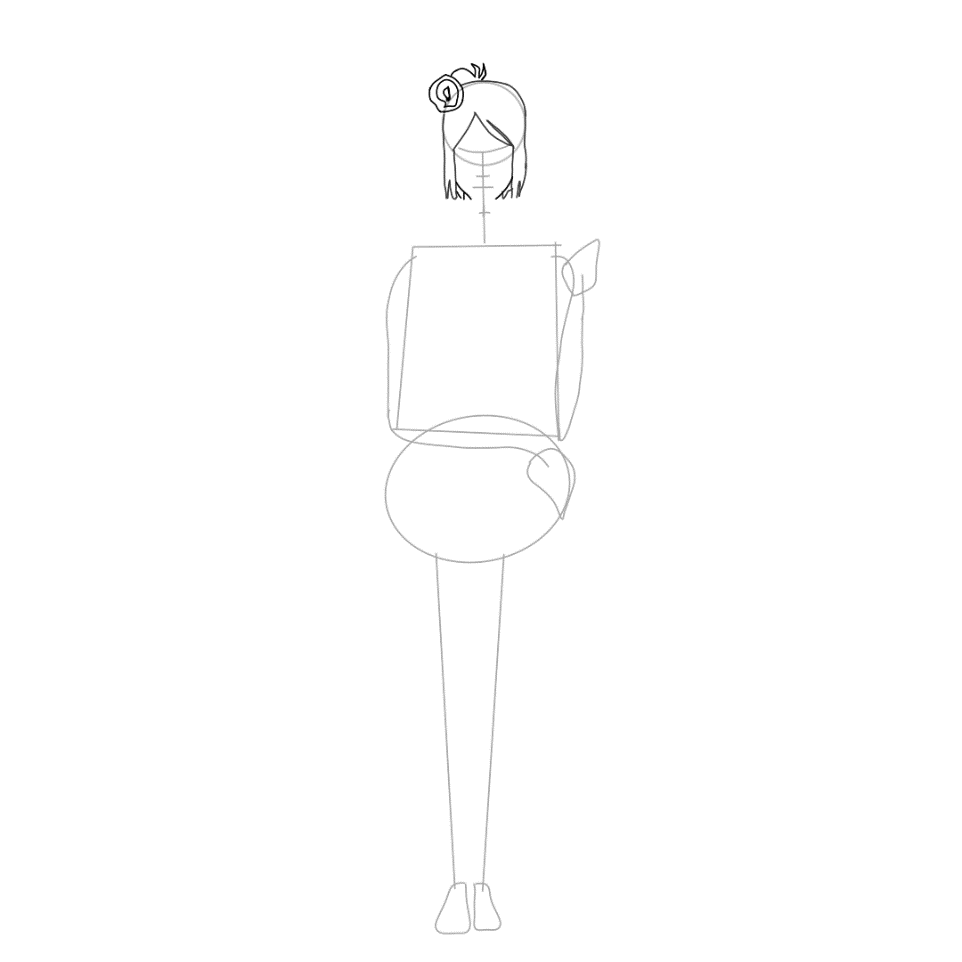
The first step is sketching out her pose and determining how other body features can be added.
Begin the pose with the head, and draw an oval shape (make sure it is not too big or too small).
Add the horizontally curved line for Konan’s eyes, the horizontal line for the nose, and the horizontal line for the basic of the mouth so that the horizontally curved line of the eyes is wider than that of the nose and the mouth.
Draw a vertical line at the center of the oval shape of Konan’s head so that it crosses all these horizontal lines you drew for the facial features; the vertical line will be used for aligning the facial features on the right and left sides.
Extend the vertical line a little to represent an outline for the neck. Draw a rectangle to outline Konan’s chest
You can now add the waist by drawing a circle that should be round in shape (resting on the lower part) and the rectangular shape of the chest; ensure this circle is bigger than the head so you can have a realistic drawing.
Now let’s add the arms and legs to the most significant parts of Konan’s pose.
We’ll be drawing Konan’s left and right arms. For the right arm, draw a vertical line from the side of the rectangular shape of the chest and bend it towards the left side of the body so that it is resting on the circle of the waist.
For Konan left arm drawing, draw the left arm so that the lower arm covers the upper arm while the left arm is pointing upward.
To draw Konan’s legs, draw vertical lines from the circle of the waist, and let the vertical line of the right leg seems slightly bent towards the left leg in which there is not much space between the legs.
Finally, for the pose, draw the basic shapes of the hands and the feet; the basic shape of the right hand should be under the left arm so that the left arm is resting on the right hand while the left hand is pointing upward in the direction of the left arm.
Konan Hair Drawing
After drawing Konan pose the first thing to draw is her blue hair; Konan’s hair covers all the sides of her head, including her ears, so keep that in mind while drawing her hair.
Make a curve above the head and extend the ends of the curve towards the sides of the head in alignment with the shape of the head.
Draw two curved lines on her forehead that these lines meet and form a sharp edge which is the side bangs at the right side of the head.
You can extend the curved lines so that it meets the end of the horizontally curved line you drew for the basic of the eyes and draw a vertical line from the end of the extended line, which looks like the continuation of the curved lines.
You can add a few lines to the tips of the end of these lines that make up the hair so that it forms edges pointing towards the shoulder.
Can I show you one of the unique features of the hair? Check the next step for the amazing package.
Now let’s draw the rose; Tada! Konan’s hair has a rose which she uses to beautify the hair; this rose is on the right side of the head (attached to the hair). Draw the flowering part of the rose, which is spirally packed together classically.
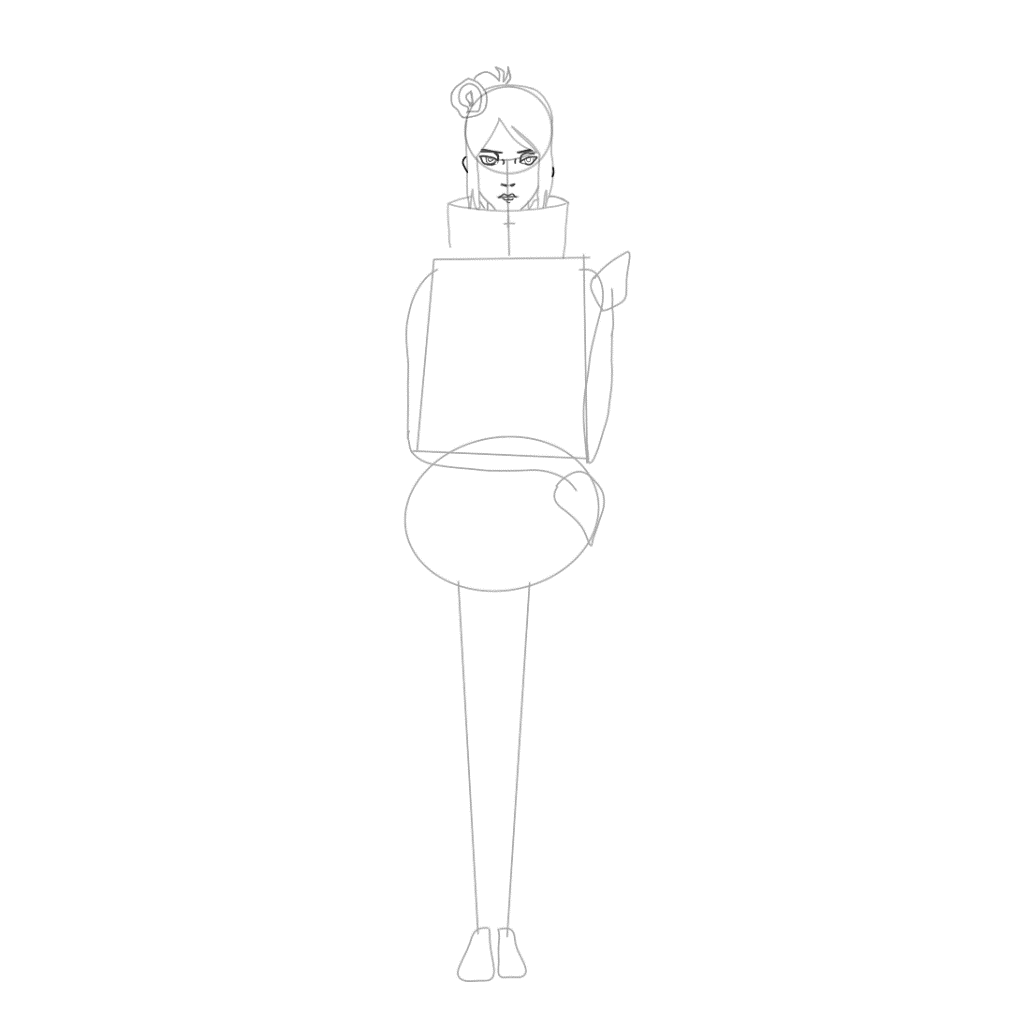
Draw the Collar of Konan’s Cloak
Konan is wearing a cloak that covers all of her body and exposes the arms, hands, and lower part of the legs.
To draw the collar of the cloak, you must first know that the upper part of the collar of the cloak covers the whole neck, and it is connected to Konan’s jaw.
Draw a curved line so that it’s curved at the ends, touching the sides of the hair, and passes through the jaw; draw vertical lines from the curved part of the line to the upper part of the rectangular shape of the chest.
Draw Konan’s Facial Features
Do I still have your attention? Fix all the facial features so you can finish your drawing on time.
For Konan’s eyebrow, draw a little horizontally curved line at the upper part of the horizontally curved line you drew for the basis of the eyes so that her eyebrows touch the hair.
For Konan’s eyes, draw a circle under the horizontal line of the eyebrow, which should be aligned with the horizontally curved line you drew for the basis of the eyes and add another small circle inside the shape of the eyes; this small circle will serve as the pupils of the eyes.
For Konan’s nose, make two little horizontal lines in the form of dots on the horizontal line you drew for the basis of the nose in alignment with the vertical line of the head.
For Konan’s mouth, draw a little concave curve above the horizontal line you drew for the basis of the mouth so that it forms the natural shape of her mouth. You can add a few lines under the mouth to make it realistic.
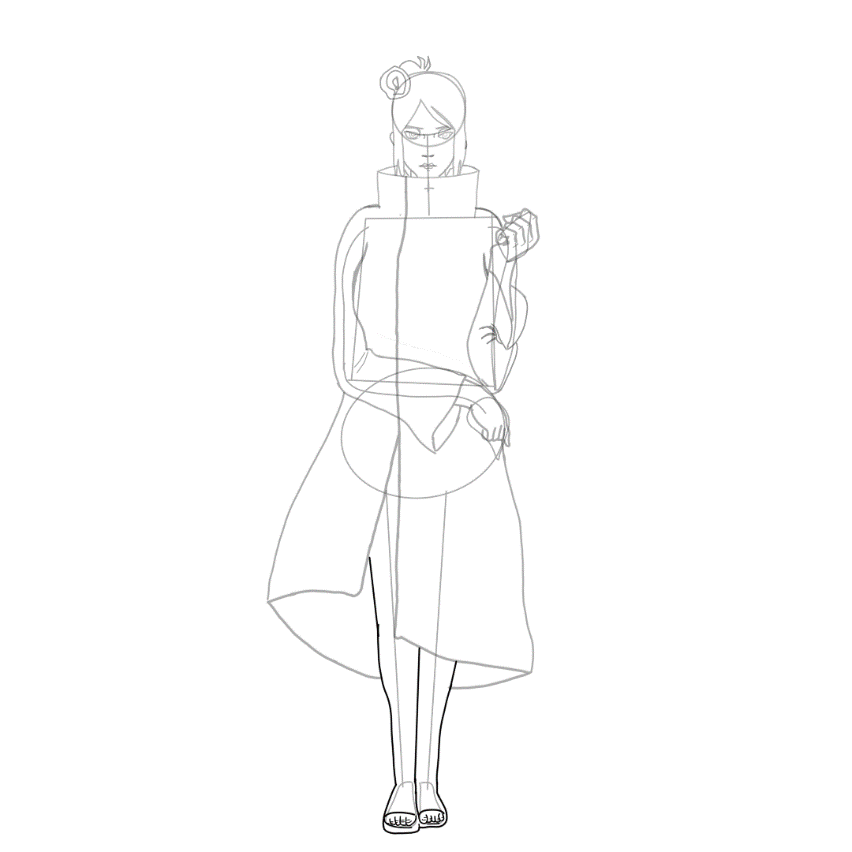
Konan Cloak Drawing
Konan’s cloak is so wide and long that it covers most of her vital body parts.
Let’s get this show on the road; start with the sleeves of the cloak; draw the sleeves having in mind that the right arm is resting on the waist while the left arm is pointing up so that the elbow joint of the left arm is resting on the right hand.
Draw a long vertically curved line from the side of the sleeves so that it curves towards the shin of the legs; this shows how long the cloak is (in order words, these curved lines represent the length of the cloak).
For the middle of the cloak, draw a long, vertically bent line from the cloak’s collar, passing through the shape of the chest and the circle of the waist, which its end touches the vertical line of the right leg.
Make a slant line from the vertically bent line towards the side of the right leg. Add more lines to these existing lines and join these lines to the long lines that show the length of the cloak.
Konan Hands Drawing
The next step is Konan hands drawing; since you already have the basis of the hands, your question should be, what do her hands look like? And what is the direction of her hands?
For the first question, Konan has attractive fingers attached to her hands.
For the second question, her right hand is directly under the elbow of her left arm while the left hand is attached with fingers that are stylishly pointing up.
Draw Konan’s Legs and Footwear
As earlier said, her cloak covers her legs, but because the lower part at the center of the cloak, is slightly open so that little part of her thigh to her ankle seems to be showing.
For the little part of the thigh, draw the line from the lower part of the cloak to the basic shape you drew for the feet.
Ensure that the legs are not too close together so that you can have a natural shape of the calf of the legs even though her right leg is resting on her left leg.
For her footwear, draw the footwear by extending the lines of the legs towards the shape you drew for the basis of the feet (don’t forget the right leg is covering the left leg), and draw the curved line at the front part of the footwear.
Complete the footwear by drawing a curve at the lower part of the shape, showing the footwear’s design.
Add the vertically curved line of the toes in front of the footwear to make your drawing more realistic.
Add Details to Konan’s Outfit
Adding details to the outfit includes drawing the fantastic design on her cloak. These designs (one at the center of the cloak and the sides of the cloak) are what make the cloak more fashionable.
Add more lines and dots to the necessary parts of the outfit and the outline inclusive. Use thick lines for the border of the outfit. Remember to clean all excess lines so your Konan drawing can be more presentable.
Add Enhancement
You can add shadow to the outfit, and don’t neglect the outlines if there is a need for the shadow to be added.
Coloring is another way of enhancing your Konan drawing.
Color makes your artwork very attractive and eye-catching; use a proper and suitable color for the outfit.
You can use black and red color for the cloak so that the design and inner part of the cloak is red and the remaining part is black. Use blue color for the hair. Her footwear is also black.
That is not all, and there is more! Add shading to the pupils of the eyes and light shading to the other parts of the facial features.
Conclusion to Konan Drawing
Congratulation! You now have good pencil art from Konan from Naruto.
If you heartily follow these few steps above, you will confidently finish on time.
This article will help you improve your drawing skill while having fun using your pencil.
You don’t need to be a professional before you can draw Konan; get all your basic drawing equipment and materials, follow these steps listed and enjoy your drawing.
Avoid all distractions while drawing Konan so you won’t miss out on any steps. Have fun while drawing your favorite anime character.
Some drawing tutorials from Naruto Shippuden you might be interested in.


")
")

")
")
")
")