This article will help you in Iruka Umino Drawing, we’ll teach you how to draw Iruka Umino step by step and it is quite easy to follow.
Are you ready for Iruka Umino drawing? Let’s go!!!
Iruka is a fictional character from the Narutoseries that was originally introduced as the assistant teacher of Konohamaru’s class in the Academy and maintenance chief.
Iruka grew up in an orphanage after his father’s death and became a student of the Third Hokage.
He is eventually assigned to teach at Konoha’s ninja academy, where he trains students under him to be the future ninja of their village.
Drawing Iruka Umino is very easy but you have to know his look and his personality.
It would be best if you also had a reference with you which you can get by using the internet or make use of our reference to ease your stress.
10 Simple Steps to Draw Iruka from Naruto
Contents
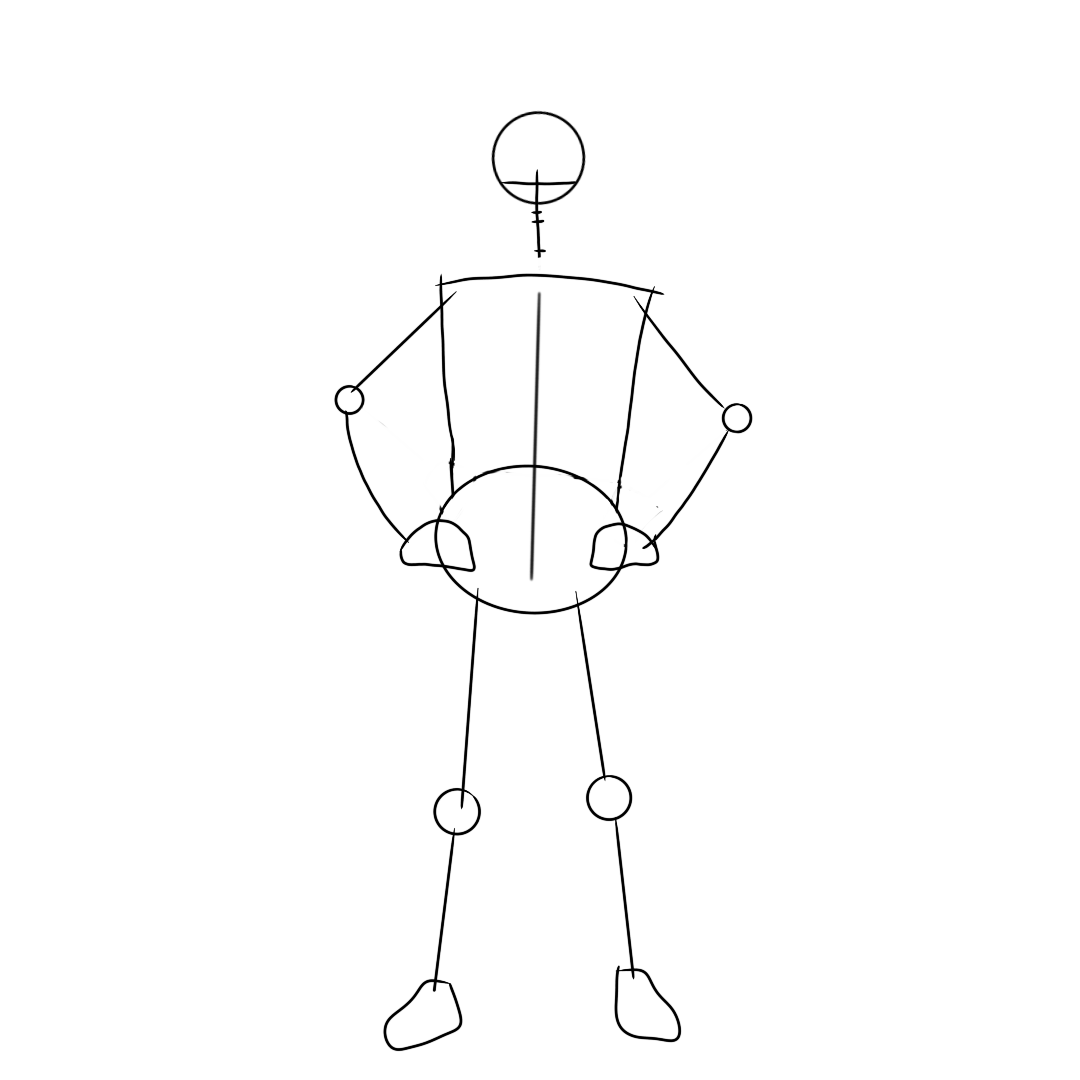
Step 1: Draw Iruka’s Pose
We will be starting our drawing by sketching out Iruka’s pose, which will help us when it’s time to draw other parts of the body.
I know you can’t wait to start making use of your pencil.
Begin the pose by starting from the head; drawing an oval, and ensuring the oval is not too big or too small.
Draw three different horizontal lines inside the oval of the head so that the first horizontal line is for the eye, the second horizontal will be used for the nose, and the last horizontal line will serve as the basic shape of the mouth.
Add a vertical line inside the circle of the head so that it crosses the horizontal lines you drew; this vertical line is what you will need to align the facial features.
For Iruka’s chest, draw a trapezoid shape under the oval of the head while leaving space between the head and the chest (the space between them is where you will draw the neck, so keep that in mind).
Add another circle under the trapezoid shape of the chest but for this approach, make sure there is no space between the chest and the circle; this circle will be for the waist.
Draw a vertical line for the neck; the line should be under the oval of the head, so it looks like the continuation of the vertical line of the head.
You can extend this vertical line down, passing through the trapezoid of the chest till it gets to the circle of the waist.
Do you know that the leg is what will determine the primary posture of your drawing? Let’s add the legs and arms to Iruka’ pose.
Start with the arms, make a slant line from the side of the chest and bend the line towards the direction of the circle of the waist so that the end of the line is resting on the waist.
For the legs, make vertical lines from the circle of the waist down, and you can now add the primary shape of the hands to the arms and of the feet to the legs.
By now, you can see that Iruka is in a standing posture or position with his hands resting on the waist, and you can freely add the rest of the body’s parts.
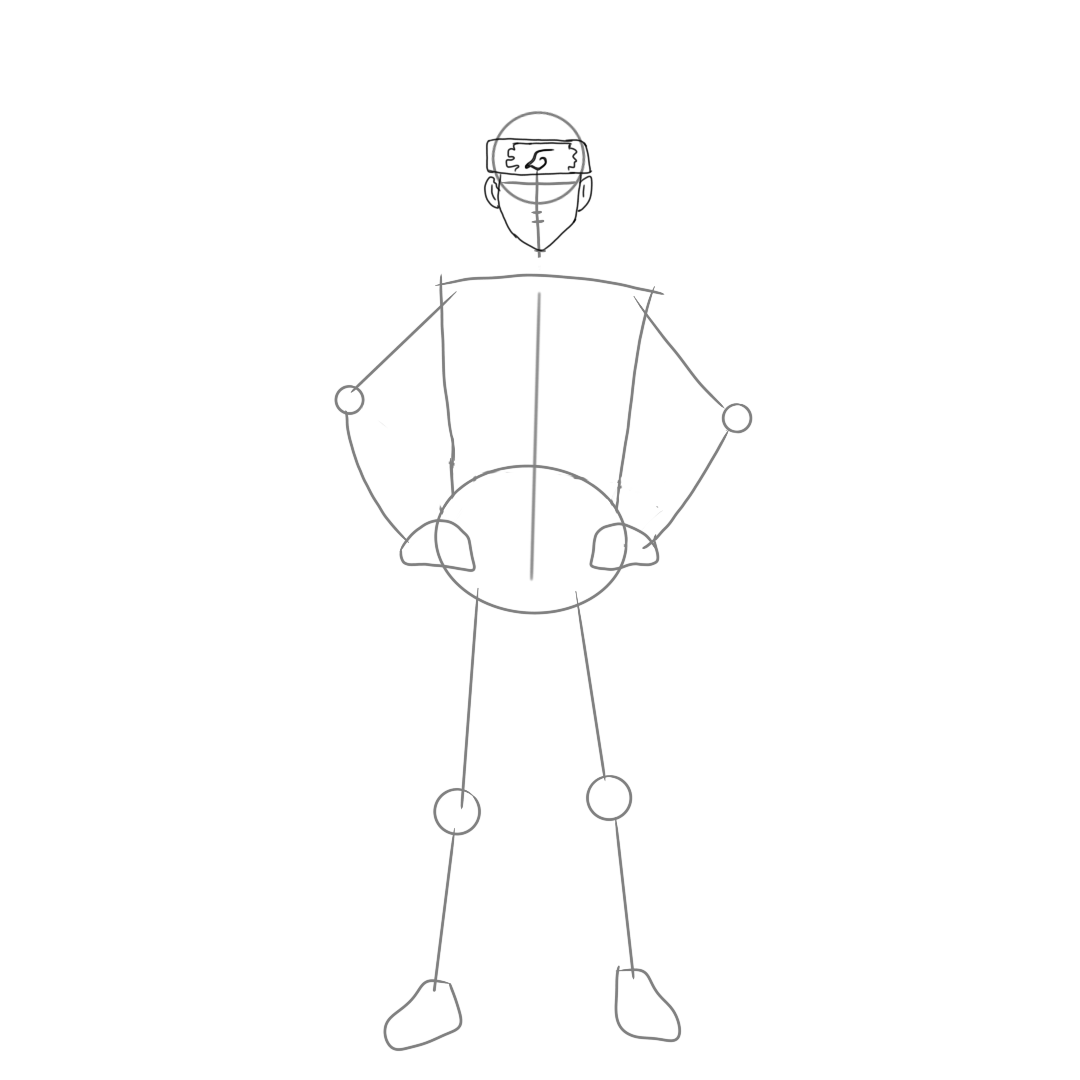
Step 2: Draw Iruka’s Jaw, Ear, and Forehead Protector
Do I still have your attention?
Let’s look into how to fix the jaw, ear, and forehead protector.
Let’s begin with the forehead protector, draw a curve above the circle of the head and add the rectangular shape under it, which is for the head protector.
We can now proceed by drawing the jaw, tracing down the sides of the oval of the head so that it forms the real shape of the jaw, ensuring the jaw shows the handsome chin Iruka possesses, and that is all for the jaw.
Since you already fixed the head protector and the jaw, let’s add the ears.
Iruka’s head position shows both the left and his right ear, which the use of curves can replicate; add curves to the sides of the head circle, which the ear is also attached to the sides of the jaw.
Step 3: Iruka Umino Neck Drawing
The neck is the bridge between the head and the body, and since you already know where to place the neck, you shouldn’t spend much time on this step.
Draw two vertical lines from the sides of the jaw to the upper part of the trapezoid shape of the chest while considering the basic shape of the neck (that is, the vertical line you drew for the basis of the neck should be at the middle of the lines).
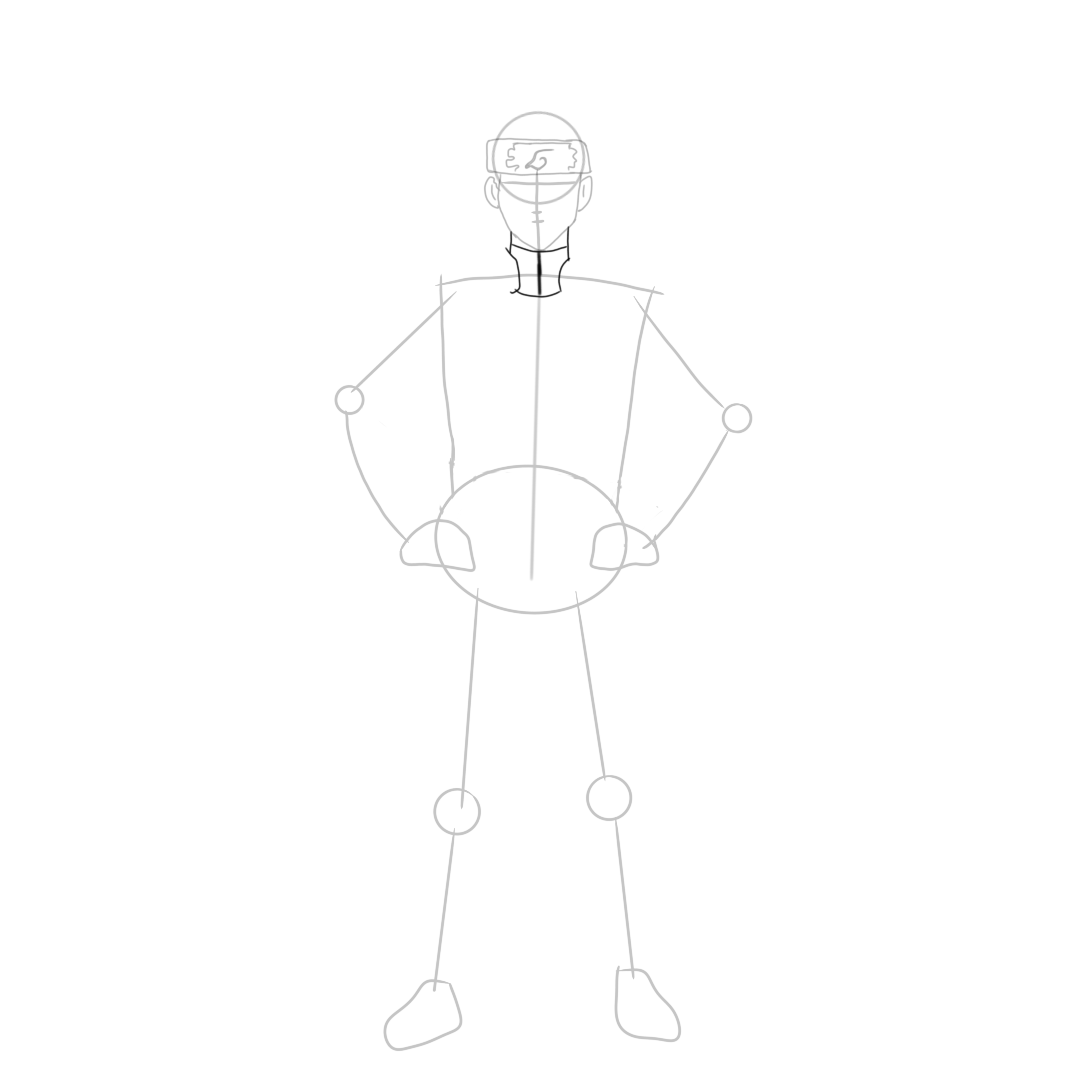
Step 4: Draw Iruka’s Mouth and Nose
Let me quickly show you how to draw the mouth and nose easily.
For the mouth, draw a horizontal line on the horizontal line you drew for the basis of the mouth.
Please ensure the horizontal line is not as wide as the one you drew initially, and add a small horizontally curved line under the mouth line, making it look more realistic.
Iruka’s nose is not wide like other anime characters; draw a very small horizontal line (in the form of a dot) in alignment with the line you drew for the basics of the nose.
At this it, you’ve fixed the mouth and nose already.
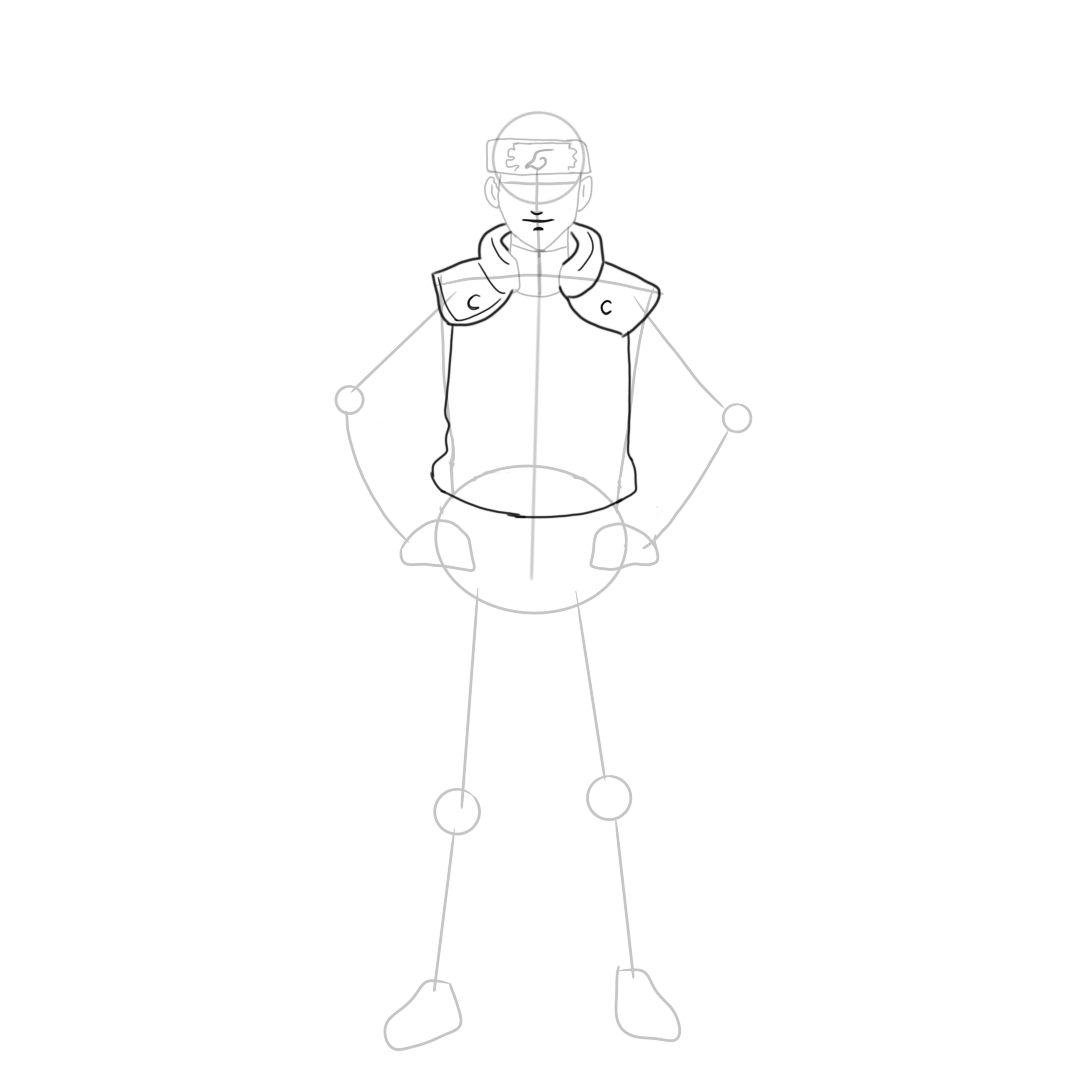
Step 5: Draw Iruka’s Flak Jacket
Let me show you the little secret of drawing the flak jacket within a few minutes.
Firstly, I will divide the flak jacket into three segments: the jacket’s collar, the jacket shoulder pad and the body of the jacket.
For the jacket’s collar, draw the collar with the use of curves and line so that it’s at the sides and neck of the body while the front part of the collar looks widely open.
The jacket shoulder’s pad is attached to the collar of the jacket, draw the shoulder’s pad in a way that it is resting on the upper part of the chest (Iruka’s shoulder), and you can double the front part of the shoulder’s pad with a curved line.
And for the last part of the flak jacket (the main body of the jacket), draw a horizontally curved line joining the ends of the jacket’s collar together, and draw vertically curved lines from the blunt edge of the shoulder’s pad down so that it crosses the sides of the trapezoid shape of the chest, join the ends of these vertically curved lines together with a horizontally curved line (in the form of a convex curve) so that it’s crossing the circle of the waist.
But wait, there is more!
Draw a vertical line from the under of the horizontally curved line that joins the collar together down to the center of the horizontally curved line under the body of the jacket; this serves as the zip of the jacket.
Some drawing tutorials from Naruto Shippuden you might be interested in.
Draw a curved line from the jacket shoulder’s pad till it gets to the elbow joint and bend the line in alignment to the direction of the arms (make sure it doesn’t get to the wrist of the hand).
Draw the other bent line from the side of the jacket (body of the jacket) and also bend it in alignment with the direction of the arm.
Add little curves at the sides of the lower part of the sleeve so that it forms the proper shape of the folded area of the sleeves.
At this stage, add the hands by manipulating the shape you drew for the basis of the hands into the natural structure of the hands so that it is resting on the circle you drew for the waist of the body.
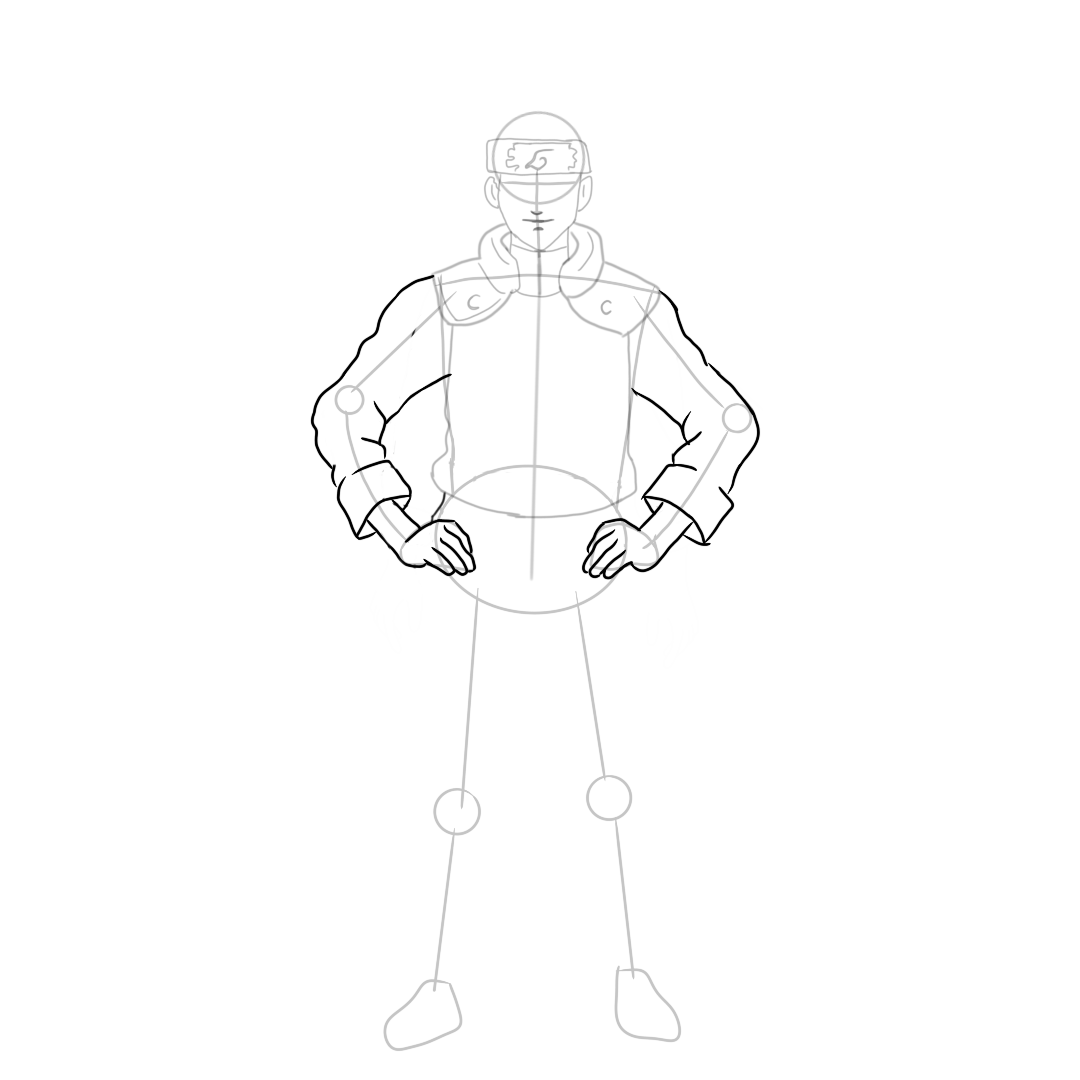
Step 7: Draw Iruka’s Pant and Pocket
The next step here is to draw the pant and add the pocket; Iruka’s pant is attached to the waist of the body and can be replicated using lines.
Draw vertically curved lines (freehand) from the sides of the top horizontally curved line while keeping in mind the direction of the legs.
Draw another vertically curved line from the circle of the waist so that the line of the right pant is roughly curved.
All these lines should not pass the legs’ lower part of the knee (calf). Join these vertically curved lines with a wavy horizontal line.
For the pocket, the pocket is attached to the right side of the pant, and it is on the thigh; make four slightly bent horizontal lines on the right pant (thigh) and ensure there is space between these horizontal lines.
To complete the pocket, draw a vertical line beside the thigh and add a little horizontal line at the end of the vertical line, which will serve as the body, draw the upper part of the pocket attached to the vertical line, and there you go, you can now confidently move to the next step.
Step 8: Iruka Umino Eyes Drawing
He has two eyes which are the right and left eyes; draw a concave and convex curve joining together to form an oval shape which is for the eyes below the head protector, and add the little lines at the side of the shape of the eyes, so it makes it more realistic.
Draw His Pupils and Eyebrow
The next step here is to finish the facial features so we can continue with other body parts.
For the pupils of the eyes, draw a convex curve inside the oval shape of the eyes. The convex curve should not be too big.
For the eyebrow, draw a horizontally curved line above the shape of the eyes. You can draw the eyebrow with thick lines.
Step 9: Iruka Umino Hair Drawing
Iruka’s hair looks short and packed in a ponytail with some showing on the left side behind his ear, draw lines forming edges pointing to the middle of his head and left side of the head.
The edges should be sharp at the tip so you can picture the hair perfectly.
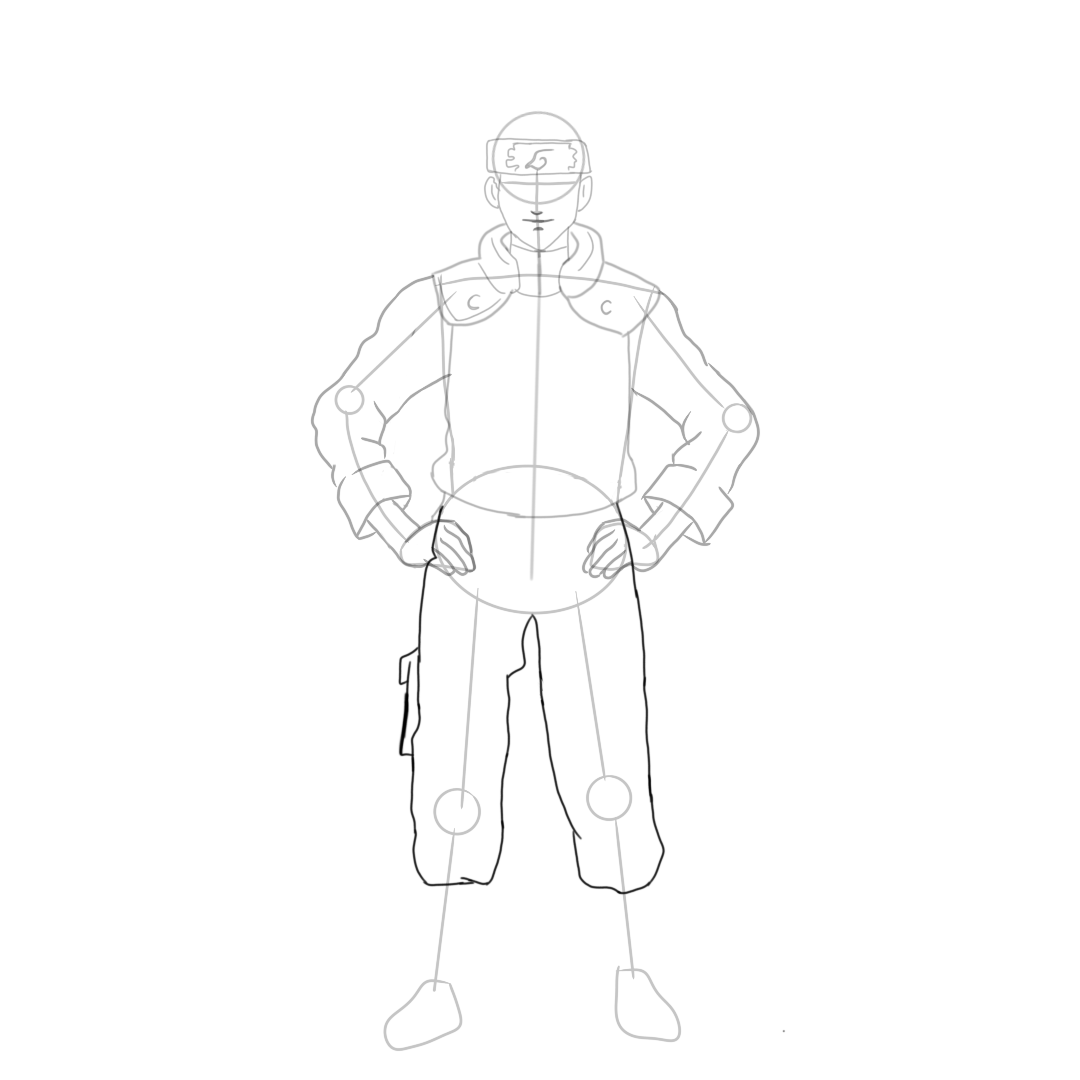
Step 10: Draw Iruka’s Legs and Footwear
Iruka has two legs, and the pant of the outfit covers two-thirds of the legs; draw little vertical lines under the wavy horizontal line of the pant in alignment with the direction of the leg so that the vertical line you drew for the basis of the legs is at the middle of the lines.
Now join these vertical lines of the legs together with a horizontal line.
We are almost there.
Let’s add the footwear, start the footwear by drawing vertically curved lines under the legs while the line is manipulated into the shape of the footwear using the basic shape you drew for the feet.
Add the curve on the footwear, which will serve as the design on the footwear, and draw the little curve at the side, which indicates the back of the footwear and ensures you draw the line for the sole.
Finally, add vertically curved lines (under the line that serves as the design of the footwear); these vertically curved lines will serve as the toes of the feet.
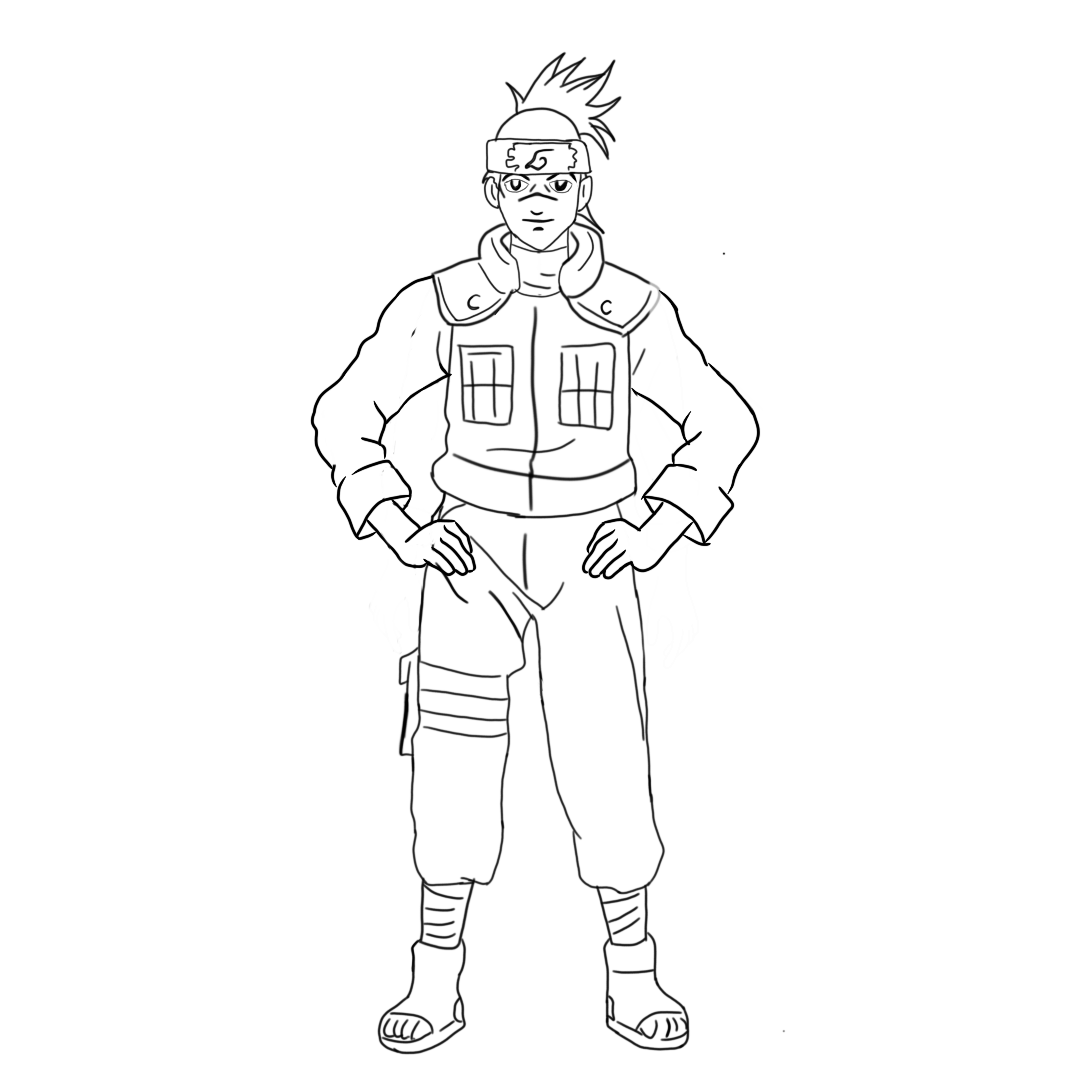
Add Details to Iruka’s Outfit
Adding details, in this case, means adding other features that will make your drawing more realistic, draw the inner shape of the head protector and add the symbol on it, also add details to his face.
Draw the horizontal line at the neck, so it serves as the upper part of the innerwear.
Draw a small circle on the shoulder pad of the flak jacket and draw the two-front pocket on the jacket. Add lines on the legs to make it look more realistic.
Add more lines and dots to the necessary part of the outlines and outfits, and never forget to erase all excess lines that might make the drawing look weird.
Add Colors to Your Iruka Umino Drawing
This is a critical stage in deciding how you want your drawing to be.
The look or appearance of your drawing is a function or level of your enhancement towards the drawing. Shade the pupils of the eyes, and use a thick line for the border of the outline and outfit.
Add shadow and highlight to the drawing where necessary, and make sure you add the most suitable color that befits Iruka’s personality; you can make the sleeves; blue, hair; brown, and the eyes’ iris should remain white, use a perfect color for the footwear.
Conclusion to Iruka Umino Drawing
Now I believe you can now easily create your own Iruka Umino Drawing in no time.
All it requires of you is to follow the 10 steps above without missing any steps. These steps will help you save time and energy; also make you productive, and prove your drawing skills.
Gather all your drawing materials and equipment and make your wish a reality.
Have fun!!
Some drawing tutorials from Naruto Shippuden you might be interested in.


 From Spirited Away | Let's draw Haku")
 From Spirited Away | Let's draw Haku")
")
")
")

