Junko Enoshima is the main antagonist in the anime series “Danganronpa.” Let’s get started with the Junko Enoshima Drawing without further ado.
This post is about her drawing style.
This is about the Junko Enoshima drawing style.
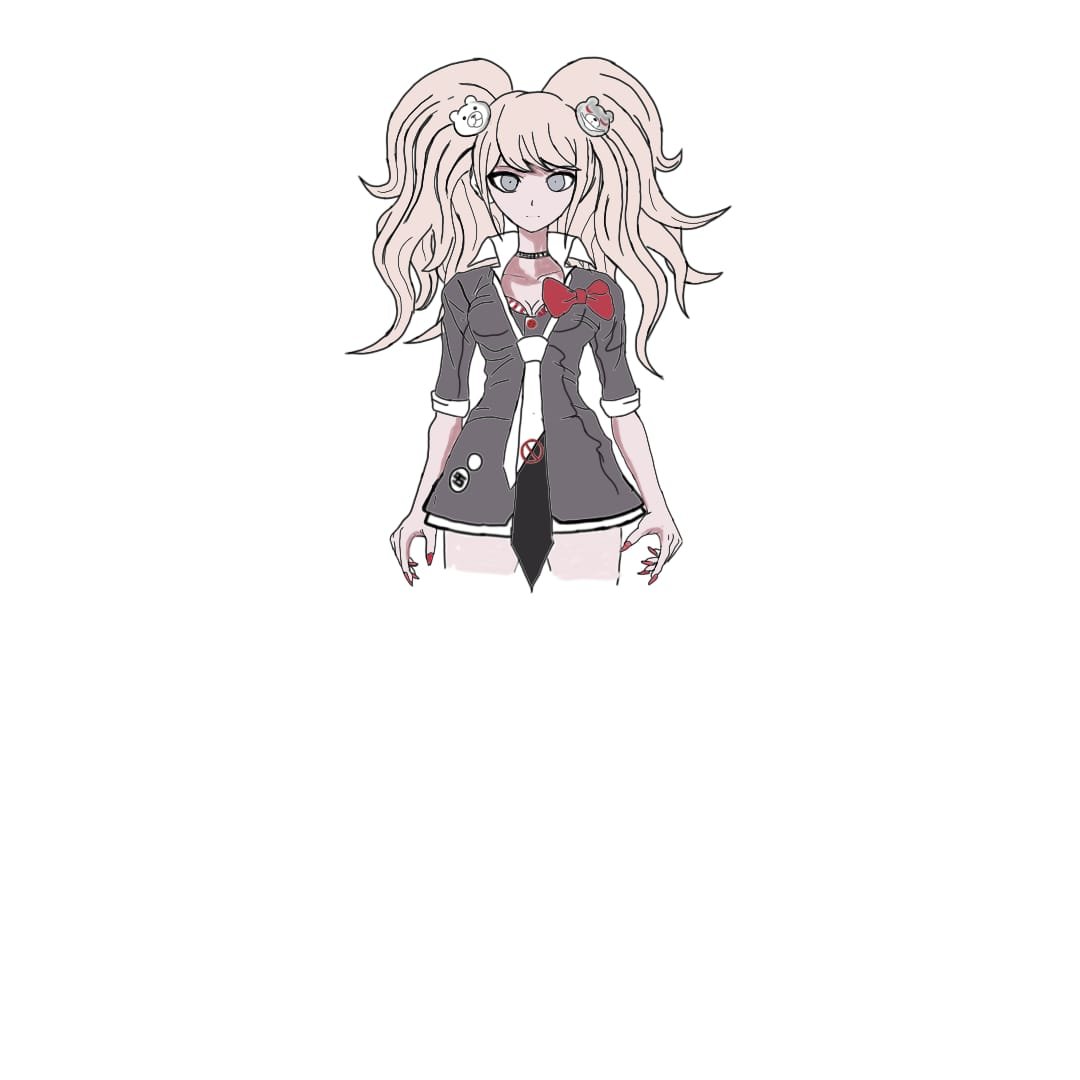
Junko Enoshima has long hair that gets to her chest and covers the sides of her shoulder with a teddy bear clip, and she’s always in an attractive dress that complements her body shape; her facial features are easy to draw with few lines.
Junko Enoshima’s outfit is attached with a bow and long tie, and she also uses a necklace, making her one of the hot female anime characters.
This article will be teaching you how to step by step draw Junko Enoshima’s upper part with her full details without missing anything out, so let’s go!
How to Draw Junko Enoshima from Dangan Ronpa
Contents
Draw Junko’s Pose
Start with a circle that should not be too round but seems one-sided; this is the head.
Draw a curved vertical line inside the circle of the head, which should not be at the center of the circle but shifted to the left side of the head for the alignment of the facial features.
Draw a horizontal curved line at the center of the head’s circle that shows the head’s direction; this is for the alignment of the eyes.
Make a slant line under the circle of the head, and this line should not be too long (but the actual length of a normal neck); this is her neck.
Draw a circle under the slant line of her neck; this circle should be bigger than the shape of the head; this is for the shape of her body.
Draw a vertically curved line inside the big circle of the body (this vertically curved line should not be at the center of the circle but on the left side of her body); this is for the alignment of her outfit. This is the posture or position of her upper body.
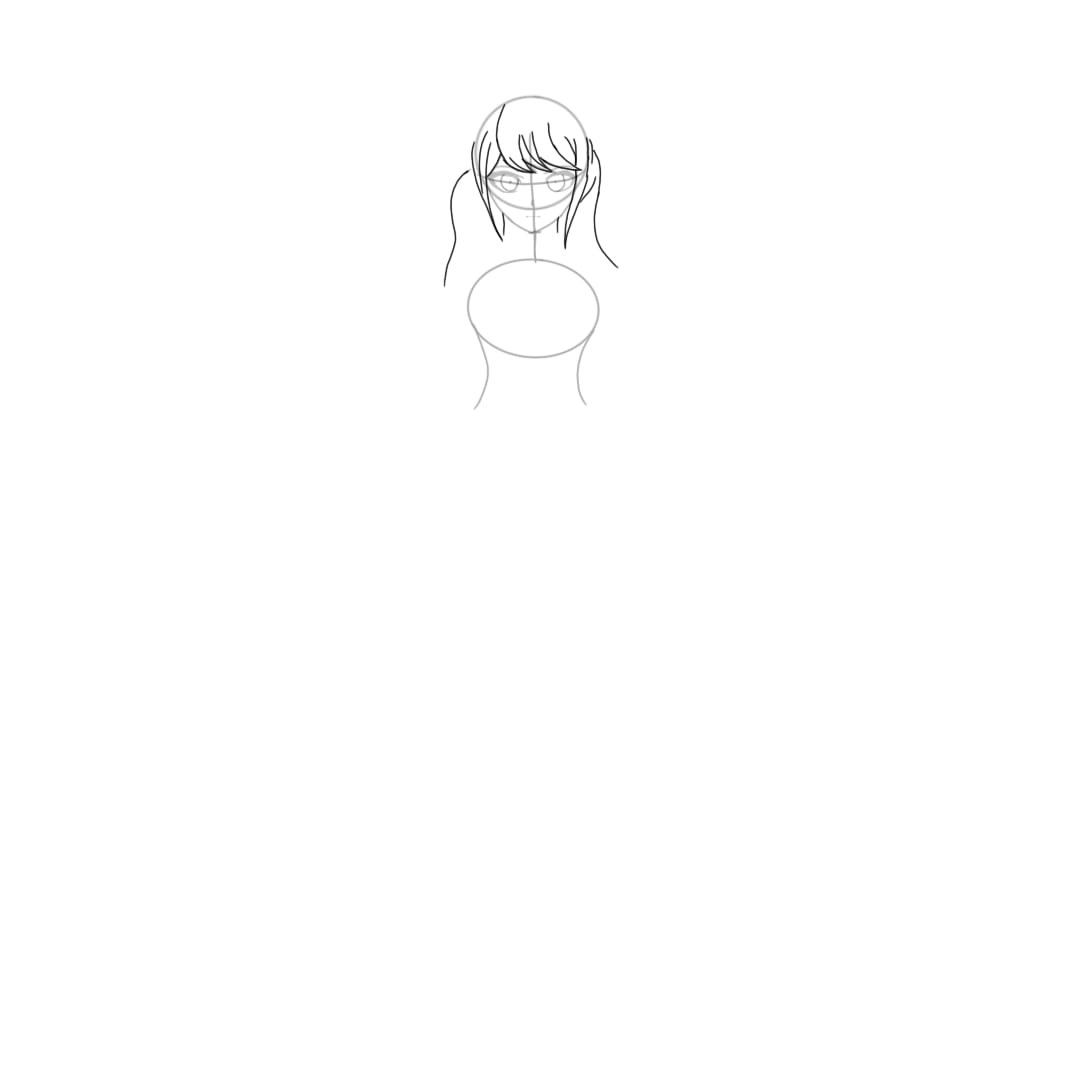
The next step in Junko Enoshima drawing is to draw her hairline and jaw.
For the hairline, make a curved diagonal line on the horizontally curved line of the eyes so that these curved diagonal lines are left-sided and follow each other.
Then draw a vertically curved line at the right side of her head; these are the few approaches to make her hairline.
For Junko’s jaw, draw a convex curve of the jaw shape under the hairline so that they are aligned with the bottom of the circle of the head; this is the jaw.
Draw Junko’s Eyeline and Eyebrows
As you already know, Junko is a beautiful girl, so you should add eyeliner to her eyebrow.
For the eyeliner, draw a horizontally curved line under the hairline which looks like a flat-concave line; this is the eye’s upper eyelid.
Draw another little curved line under the side of the upper eyelid which joins to the upper eyelid and forms an edge on the curved horizontal line of the eyes; this is the lower eyelid.
To finish the upper eyelid is very simple since you already have the upper eyelid outlined; make some strokes on the upper eyelid so that it forms the natural shape of the eyelid.
For her eyebrows, make a slightly horizontally curved line above the upper eyelid so that it crosses the hair on her forehead (use a thin line for the eyebrows); this is Junko’s eyebrow.
Now you are done with the eye lines and eyebrows, and you can move to the next step.
Draw Junko’s Eyes, Nose, and Mouth
The next step here is to draw the eyes, nose, and mouth, which are the few important features of her face.
You can start this step with the eyes; Junko has two eyes that are attached to the upper eyelid and above the lower eyelid.
Draw a convex curve in which two ends are attached to the upper eyelid and make a small circle that also touches the upper eyelid inside the convex curve; this is the shape of Junko’s eyes.
Let’s draw the nose; Junko has a cartoonish nose that can easily be replicated with just a line.
Draw a very little vertically curved line on the vertically curved line of the head under the eyes; this line can be drawn with a thin or light pencil; this is the nose.
For the mouth, the mouth is also another very simple step to take when drawing Junko Enoshima.
Draw two little horizontally curved lines under the nose so that the vertically curved line of the head seems to be in the middle of these horizontal lines and finish the mouth by making a vertically line aligning with the curved part of the vertically curved line of the heads (use a thin line or light pencil for the moth also); this is the mouth.
Begin to Draw Junko’s Bangs and the Left and Right Side of her Hair
The next step here is to begin to draw the hair.
Make a curved line (that looks like a last concave line) above the circle of the head.
Draw little curves at the end of the curved line and draw circles at the ends of the curves so that it’s aligned to the upper side of the circle of the head.
Draw another curve at the side of each circle; this is the basic shape to draw the teddy on her hair.
For the left side of the hair, draw a curved vertical line at the side of the circle of the head so that it’s aligned to the direction of the circle of the head; make a slant line joining to the curved vertically curved line, so it forms an edge facing down.
Draw another vertically curved line from the left side of the jaw so that it’s aligned with the lower part of the circle of the head, and draw a curved line joining the slant line you drew to the vertically curved line that runs from the jaw so that it also forms an edge pointing downward; this is the left side of Junko’s hair.
You can make a line joining the left side of the teddy hair clip to the left hair.
For the right side of the hair, draw a vertically curved line from the right side of the circle of the head which points down, and add a little vertical line to the curved line that forms an edge facing downward.
Draw two curved lines aligning to the right side of the jaw so that it’s joined to the little vertical line and also form another edge facing the direction of the jaw; this is the right side of Junko’s hair.
Draw Junko’s Right Ear
Junko has two ears, but since the left side of the hair already covers the left ear, we can only replicate her right ear.
Draw a curve at the right side of the hair; this curve should not be too small or big but of the normal size of her ear, and make another curve inside the first curve, but this time with a thin line.
Finish the right ear with a small curve inside the ear which serves as the inner ear.
You can also draw a curved line joining the shape of the right teddy hair clip to the right ear to enhance the shape of the hair.
With these few approaches, you are done with the ear and can successfully move to the next step.
Draw Junko’s Teddy Bear Hair Clip
Junko’s teddy bear hair clip makes the hair more detailed and attractive.
For her right teddy bear, make two separate dots inside the basic you draw for the teddy; this is the eyes of the teddy, and draw a circle under these dots; this is the shape of the teddy’s mouth.
Draw a reverse letter “Y” inside the circle and make a dot at the tail of the letter “Y” so that it forms the snout; make strokes inside the curves at the sides of the basic shape of the teddy; this is the teddy’s ears.
Draw the left teddy bear using the same steps. You are already done with Junko’s teddy bear hair clip.
Draw Junko’s Collar & Necklace
The next step is to draw her collar and necklace. Let’s begin with the collar so it will be easy to fix the necklace; draw curved lines beside the slant line you drew for the neck; this is her neck.
Draw a horizontally curved line that bends down from the upper part of the neck and end the horizontally curved line with a vertical line at the ends.
Draw a slant line at the joint of the horizontally curved line & a vertical line on the left side of the collar and just a slant line on the right side of the collar with a small diagonal line on the side; this is the collar.
For the necklace, draw convex curves joining the necklines together, leaving space between the curves so it shows the thickness of the necklace.
Draw Junko’s Shirt & Necktie
Draw curves from the end of the lines you drew for the neck so that these curves form the front part of the shirt and an edge aligning to the vertically curved line you drew inside the big circle of the body.
Draw diagonal lines coming together to form an edge (so that they form an open and close bracket) at the sides of the curves of the shirt while they touch the collar.
Draw lines together that form the letter “Y” at the curves of the shirt and add small lines that look like the letter” V” at the upper part of the letter “Y,” but this time, the letter “V” should be with a thin line; it helps to form the actual shape of her chest.
For her necktie, draw lines at the sides of the bracket shape of the shirt to the direction of the vertically curved line of the body; this is the upper part of the necktie.
Draw a small circle under the edge of the upper part of the shirt, and draw the shape (trapezoid-like) that joins this line of the upper part of the tie together so that the shape has an edge facing the right side of her body.
Draw a vertical bend line at the bottom of the shape of the trapezoid; this is the lower part of Junko’s necktie.
Draw Junko’s Bow
Junko’s bow is on the left side of her chest, and the bow completes her outfit, making it more beautiful.
Draw a small square shape on the left side of the circle of the body, and draw a curve that looks like the wing of a butterfly at the right side of the square so that it touches the line of the upper part of the necktie and looks like its resting on the tie (joining to the square).
Draw another curve that looks like a butterfly’s wing on the other side of the square, and with these few approaches, you are done with the bow on her outfit.
Complete Junko’s Hair by Drawing Her Ponytails
The next step is to complete Junko’s hair which you’ve started already.
Draw curves at the sides of the circle of the head so that these curves form another curved part facing outward.
Add curved lines to the curves so that it forms an edge facing outward.
Draw another curve from the curve of the right side of the hair so that it forms an edge at the joint, make sure the bottom of the second curve is also curved outward like the first one.
Draw the curve for the left side of the hair, too, so that it forms an edge like that of the right side of the hair.
Draw curves forming the letter “S,” double the curve that looks like the shape of a snake joining to the edge at the right side of her hair forming her ponytail.
Add curves forming edges from the sides of the hair passing beside the collar, which edges point downward.
To finish the hair, make curved lines on the hair so that it enhances the shape of Junko’s hair while minding other features of the outline and outfit.
Draw Junko’s Arms & Chest
The next step here is to draw the arms and chest; therefore, let’s start with the arms first and finish with the chest.
For the arms, Junko’s arms are not visible because her hair covers the arms, but we can still fix the right upper arm and make a line on the right upper arm.
Make a line in the middle of the curved part of the letter “S” of the hair and draw a line (with an edge facing out) from the bottom of the ponytail.
Make a hill line at the last curve of the hair in the straight hair, which was extended from the hair and passes beside the collar; this completes the right upper arm.
For the left upper arm, draw a line joining the curve of the hair to the square of the bow for the outfit and draw another cloud line from the lower part of the square for the bow so that it looks like the continuation of the first line; this is for the left upper arm.
For her chest, draw a thin line at the upper part of the square for the bow and draw a curve for the chest, so it’s on the line of the left arm.
Make a slightly curved horizontal line at the right side of the lower part of the necktie; this is for Junko’s chest.
Enhance Junko’s Outfit
You are almost done with your Junko Enoshima drawing so let me walk you through how to add enhancement to Junko’s outfit.
Firstly, add lines and dots to the needful part of her outfit and erase the excess line and dots to avoid the Junko Enoshima drawing being weird; trace the border of the outfits with a thick line, making it more enhanced.
At this point, you can successfully add color to your outfit; make sure you are using the best color that suits her outfit because she’s a beautiful girl; you can use two colors to beautify the outfit.
Don’t forget to use a thick line for the border of her necklace.
Enhance the Junko Enoshima Outline
This is the last of your drawing; adding enhancement to the outline gives you a perfect look at Junko’s drawing.
Add lines and dots to the necessary parts of the outline, and don’t neglect the fact that you have to erase all the excess lines and dots on the outline.
Use a thick line for the border of the drawing, and ensure you don’t overdo that.
You can also add colors to your Junko Enoshima drawing to make her more attractive.
Use a nice color for her hair and her teddy bear hair clip, and you can also add shading to your drawing, especially the eye lines and maybe the small circle inside the eyes, so it forms the pupils of her eyes.
Don’t forget to use a thick line for the border of the right ear.
Conclusion to Junko Enoshima Drawing
Finally, you are done with the Enoshima Junko drawing.
I am very sure you are happy with your outcome.
Drawing Enoshima Junko might look too detailed, but with these few steps above, you could finish your Junko Enoshima drawing in no time.
Consistently and constantly practicing will make you a better artist.
Get all the necessary equipment and materials ready so you won’t have to face delays while having fun with your pencil.


")
")
")
")
")
")
 in Front View and 3/4 view")